

Elevate your space by upcycling a sewing table into a chic painted end table.
I have a confession to make: I don’t like white painted furniture. Although I really like some original wood in combination with white paint (like this coffee table makeover), I much prefer bold colour(s). How to hand paint furniture designs is more my style than plain Jane white.
Even as a child, as soon as I was old enough to hold a paint brush steady, I painted contrasting black detail and hardware on my French Provincial bedroom set. No white furniture for me, thank you very much!
But before I can make a blanket statement like that, we’re painting this vintage sewing table white to see if I change my mind. So if you’d like to know how to get a professional looking white paint job on furniture, read on. Because we’re taking a deep dive into the ins and outs of painting vintage furniture white with tips and tricks along the way.
Usually with a pretty wood veneer like you see on the door, we’ll do a combination of wood and paint (see what I mean in this DIY china cabinet makeover). But not this time. Because of the scratches and condition of the veneer, we’re painting the entire table (with the exception of the inner lids). Now, in my humble opinion, white furniture can tend to be boring. So the paint colour we’re using (Oyster) has a slight greige undertone.

Do It Over Designers
Today we’re taking part in the Do It Over Designers blog Hop hosted by Ann at The Apple Street Cottage.

We’re a group of bloggers who take something old and/or unused and ‘do it over’ into something new. These items can be found in closets, barns, garages, yard sales, thrift stores, you name it!
This month we were challenged to create something using wood. Check out the other wood projects at the very bottom of this post. And be sure to drop back in throughout the week to visit them all!
If you’re a visual learner, watch our video. Or read on for the full tutorial!
How to Paint Furniture White
Painting furniture white is a great way to give it a fresh new look. There’s a few things about painting white furniture to get a perfect paint finish, which we’ll go into detail on. But here are the basic step-by steps to paint furniture white:
- Remove unwanted details (like appliqués)
- Clean the furniture
- Sand initially and between coats (and remove dust)
- Repair and wood fill
- Prime. Zinsser B.I.N primer really is an ultimate stain blocker as the lable suggests! If you continue to see bleed through after the first coat, prime a second time.
- Paint (preferably with a paint sprayer for a professional looking finish)
- Protect with clear coat (optional: this depends on the paint product you use, as you’ll see further ahead)
Note: unless you’re using low or no VOC products, be sure to work in a well-ventilated area (especially when priming with B.I.N.). Even if you’re outdoors, it’s a good idea to wear protective gear such as gloves and a respirator mask.
Before we get into the tutorial, don’t forget to get your craft mojo on at Birdz of a Feather and subscribe to our newsletter:
You can also follow us on Pinterest, Facebook, YouTube and Instagram.
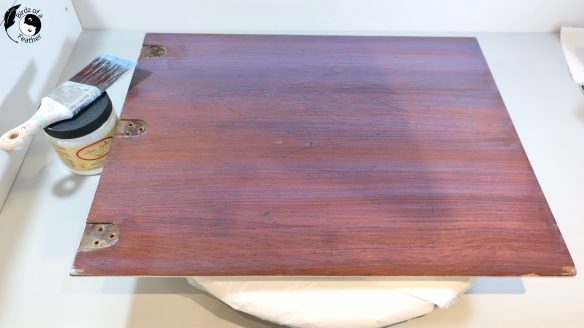
Supplies for Painted End Table
[If you’re looking for some of the things we used, we’ve got you covered (disclosure): Clicking on the affiliate links below means we may receive a commission. We earn from qualifying purchases which we proudly donate to Alzheimer’s research. But don’t worry, you don’t pay a cent more! Thanks for helping to support our fundraiser!]
- Contour sanding grips
- Bosch Variable Speed Sander
- Two part wood filler
- Famowood wood filler
- Silk All in One Mineral Paint (Oyster)
Some people like to skip some of these steps. It may save time up front. But if you want a perfectly painted end table that stands the test of time, prep is everything. And nothing’s more important than cleaning, sanding and repair work.
1. Remove Unwanted Details
Now is the time to remove details you don’t want (or cut away and reshape your furniture, if desired) before making over into a painted end table.
One of the furniture appliqués on this piece is broken, so we’re removing both. There are ways to re-cast or replace details like this but we decide not to. If that’s something you’d like to try, check out this DIY on how to make furniture appliqués using Iron Orchid molds by my friend Denise at Salvaged Inspirations.
Note: removing these left glue residue and a depression that we didn’t notice until the piece was fully painted. It’s helpful to shine a light around the piece after priming better see these flaws before you get to the paint. You can always fill and spot prime again after priming. But doing that after painting is a pain!

2. Clean
If your furniture happens to smell, read our article on how to get smell out of old furniture.
Remove any dirt, dust, or grime from the furniture using a damp cloth. To deep clean, we’re using Varsol to lift a hundred years of build up. Varsol is a solvent that degreases and dissolves which sounds great. But is also dangerous to breath in so only use it outdoors (and wear a mask).
Simple Green diluted in water is another way to go. Just make sure the cloth is barely damp when you clean. We find that water can lift the veneer. Hide glue, often used to veneer these old pieces, is water soluble, which is why we prefer Varsol in this instance.

Allow it to dry completely before painting. We leave it overnight.
3. Sand
Sand the piece using fine-grit sandpaper to create a smooth surface for the paint to adhere to. Sand in the direction of the wood grain. Some we do by hand.
But it’s much faster to use an electric sander on the flat areas like the inside of the lid!

We love our Bosch variable speed sander for this. Just be careful with an electric sander. Because veneer is often used to save money on vintage furniture, and is very thin, it’s so easy to blow through it with a sander. Ask me how I know.

If you’re painting, it’s not a big deal. But for a natural wood finish, sand-through is going to be noticeable (and derail your plans to keep the wood). So, if you accidentally sand through the veneer to the cheaper wood underneath, check out our end table makeovers for one possible solution.

Contour Sanding Grips
Since sanding furniture with a lot of detail can be especially challenging, make your upcycling life easier with these contour sanding grips.

Contour sanding grips come in all shapes and sizes and make sanding hard to reach details a breeze.

They are perfect for getting into the tight areas that a regular sanding pad can’t reach.

Hubs and I always work on different detail areas to speed this detail work along. Just blast some tunes, enjoy being outdoors and sanding will be done in no time! I love working my my ‘partner in grime’!

You can wipe away the dust with a tack cloth (use one that is silicone free or you can have problems with paint not adhering!). But we prefer to blow the dust off with the air compressor first as a nozzle attachment can be directed into the crevices to get sanding dust out of detail work. Then we remove the remaining sanding residue with a barely damp cloth.

4. Repair and Fill
On new furniture you may not have to repair or fill damage. But on these vintage sewing tables, they are ALWAYS well used. And with that, comes scratches, dents and condition issues. Lids especially see a lot of use and the veneer is often chipped on the edges or even bubbled.
If you read our post ‘how to fix veneer that is lifting‘ it has a lot of great tips for more severe issues. Overall, this table isn’t too bad in the grand scheme of things.

Our go to wood filler is a two part epoxy. There are many two part fillers on the market, such as Bondo but we swear by Minwax Wood Filler.

You can’t sand out deep scratches because veneer is so thin. So Minwax wood filler is great to fill missing veneer and deeper scratches too. It’s more durable than other fillers.

Although, other fillers do have a place too. For general touchups, we love this water based Famowood. It doesn’t have a pungent smell, like two-parts epoxies, so I personally love working with it.

5. Prime
Priming wood furniture is especially important when painting furniture white because it hides a multitude of sins. I used to try to get away without priming furniture. But bleed through is the bane of my existence. There’s nothing worse than painting furniture a light colour only to see colour you don’t want (like red or yellow) seeping through your perfectly painted surface. Even worse is when you think you get away with not priming until you top coat. Then the tannins seep right through your paint! So we take the time – and go to the expense – of using a stain blocking primer on all old pieces. My attitude now is just prime!!!!
In addition to preventing stains from bleeding through, applying a coat of primer to the furniture also helps the paint adhere better. Allow the primer to dry completely before painting.
When the primer is dry, Hubs also likes to give a light sand and remove the sanding dust. That will knock down any high areas and give you a perfectly smooth paint finish over top.
Our go-to primer on a piece like this is Zinsser BIN. BIN is a shellac based primer that not only seals stains, but odour too. It will be dry to the touch in 20 minutes and cures fully in 1 to 3 days.
Cover any areas you don’t want to paint with a moisture-resistant paper.

Spraying the Primer
Our preferred way to paint white furniture (or any furniture for that matter) is to use a paint sprayer. See how to paint using a spray gun.
If you watch the video, you’ll see Hubs priming the table in real time so you’ll get a sense of just how quick it is to spray.
6. Stain / Paint
Staining
On the inside of the lid, we decide to freshen up the stain instead of painting. If this ever goes back into serviceable use as a sewing table, it’s better to have a stain on the surface that will get a lot of abuse with fabric and pins running across it. Since paint is more noticeable when it wears, stain is a better choice.

Did you know that you can customize your stain? We didn’t like the containers of stain colour we had so we adapted our own colour. And it’s so easy: see how to change stain color.
We’re choosing to use an oil gel stain. Gel stain has better hiding properties over a traditional stain that soaks into the wood. That way, we can build up the layers to give us a heavier coverage if we want.
This is the inside of the lid before.
And after. Gel stain doesn’t completely hide, but it does a great job of masking the scratches, doesn’t it?

We never strive for perfection with our wood finishes. As a matter of fact, we prefer to show previous signs of life and character because that’s exactly what makes a piece so special. Just imagine the sewing projects that were created by the sewing machine that used to sit in this table!?
Painting the Painted End Table
Apply a thin coat of white paint. For a professional finish, we use a painter sprayer as we did with the primer (but you could also brush it on). Let the first coat dry completely before applying a second coat if necessary. Depending on the colour and texture of the furniture, you may need to apply additional coats until you achieve the desired finish.
Silk Mineral Paint is too thick to put through a paint sprayer so add an ounce of water to every 8 ounces of paint (or two ounces for the full jar if spraying large pieces).

Hubs is a professional paint sprayer so he is teaching me. It’s great fun to learn. But ironically, as soon as I start spraying, the wasps appear out of nowhere. Although I’m not allergic to a little hard work, I am allergic to wasp stings. So I usually hand the sprayer back over to him and distance myself behind the camera. Thank goodness for the zoom lens 😉.

As with the primer, start with the sewing table upside down first. Then flip upright and spray the rest (watch how to on the video).

Since Silk has a built in primer; the extra primer is ideal when painting white furniture because it means you’ll likely need less coats to cover over darker colours. We only have to spray one coat of Silk Mineral Paint on this piece to get full coverage.
7. Protecting the Painted End Table
Generally speaking, once the final coat of paint is dry, you can protect the finish by applying a clear sealer or wax. This will help prevent the paint from chipping or peeling and make the furniture easier to clean.
There are many protective finishes to consider. For instance, on stain and milk paint, we think hemp oil is wonderful, as you’ll see on this painted rocking chair.
However, Silk All in One Mineral Paint also has a built top coat. So that extra step of sealing isn’t necessary for our painted end table (but only if you hand brush the paint). Since we diluted the paint for the spray gun, it doesn’t hurt to add an additional clear coat of protection to seal it.
On the other hand, gel stain must always be top coated. So we’re brushing on several coats of clear satin, which is self levelling (see how to brush it with a mini angle brush in the video). For that reason, I often don’t bother spraying it.
White Painted End Table Reveal
How do I feel about painting furniture white now? I’m not a convert – yet. But I have to admit that the white painted table does look fresh and pretty. And I do love that Oyster has that greige undertone! It works with our maple floors.
How to you feel about white paint on furniture? Are you a fan?

Fall Into Fabulous
One of the things I love most about blogging is connecting with other makers. And this Fall we’ve created something truly inspiring together: 16 digital goodies from top creators — planners, recipes, colouring books & more — including our Beginner Crochet e-Book!
Grab it now — the bundle is only available for a limited time at this price: use the coupon code FALLFUN to get it for $9.99!
As always, every dollar of our commission goes straight to Alzheimer’s research, so treat yourself knowing that you’re making a real difference! Let’s make this Fall fabulous and full of hope. 💜

Pin Painted End Table
Pinning is always welcome and appreciated!

Other Sewing Table Makeovers
We have a LOT of sewing table ideas on the blog, like this desk (Hudson’s Bay Point Blanket Inspired Upcycle), drink station, and coffee table (refinish a coffee table) to name just a few (browse the first link for all of them).
Do It Over Designers
Our talented blogger friends have some amazing and inspiring DIYs for you! Don’t forget to visit these posts for more upcycled do-it-over transformations!
What a beautiful makeover, Sara. The clean deco lines really show up nicely in that paint color and I love that were able to salvage such a special piece!
These vintage pieces have a lot of battle scars but are so worth the effort to fix!
I always say, “Prep is the key” and you did a great job spelling that out, Sara. The table is beautiful and now I have to ask…Is the white table growing on you??
It actually IS growing on me. Every time I throw a glance that way, it strikes me how pretty it is now. Who would’ve thunk?
It looks so beautiful now!
Thanks so much!
I do love the end result, Sara! The table is now quite lovely. The finish piece does look better white! I’ve never had any white furniture but I do have white cabinets. I love the look but the paint has not held up well around the knobs where they are constantly being grabbed to open. And they do show more drips and spills that happens in kitchens more so than if they were wood finished.
We have that same problem with our kitchen cabinets and also on he actual hardware where we have black over brass. The black is coming off; maybe it’s time to strip it and change to brass hardware lol.
I think it’s pretty, fresh and bright. Thanks for all the advice on prepping to get the best results too.
So glad you think so Julie!
I agree that white isn’t that fun, but this looks classic and clean. A big improvement. Loved all your tips too.
Thanks so much Rachel! With all the colours of the rainbow at my disposal, white has never been a first choice lol! Glad you found the tips handy 🙂
Your table looks gorgeous! I love bold colors myself but sometimes white is just the right way to go. I find with some pieces it really allows the details to shine.
Thanks so much Tuula and you’re right; I’m realizing that it really does allow the details to stand out.
I just knew you would have a great piece of furniture to makeover. You did a great job. I have never heard of the contour sanding grips but I will definitely be buying some. I waste so much sandpaper just rolling it up to get I to the small spaces.
Thanks Anita! Those contour grips are amazing. I see people spending $1000 (Canadian) for a Surprep to do the same thing. I guess if you have a business and time is money, it’s worth it. But we don’t mind hand sanding and prefer the control of manual sanding anyway.
Sara, you put a lot of work in remaking this piece and it is beautiful. I hope you now like white a little bit more after this.
It’s hard to change preconceived notions, but I do like it more now!
Wow, it’s truly a brand new table now. It turned out great! Thanks for all those ins and outs and tips throughout your whole process. Contour grips are new to me and they look real handy to have. I’ll have to consider the investment in those because I’m cheap ~ lol.
Thanks Allyson! Those contour grips really aren’t too expensive, especially when you consider they will save you a lot of time and improve the outcome of your project 🙂
Thanks for all the great tips! I’m getting ready to paint several pieces of furniture white! I love how yours turned out!
oh, that’s exciting! I know they’ll be amazing and can’t wait to see how they turn out Donna!