

These end table makeovers prove that you CAN fix unfortunate mistakes with transfers! But not all mistakes (see if you can spot the mistake at the end).
As you may know by now, we’re clearing out my mom’s old house, which my sister is currently living in, to get it ready to sell. You already saw the record player stand DIY we salvaged from the house. We absolutely don’t have room for any more furniture, but it’s hard to part with stuff you grew up with. Do you know that sentimental feeling too or are you less so when it comes to decluttering?

Anyway, I thought it would be a nice diversion to try these end table makeovers before finding a new home for them. Kinda crazy because we’ve been far too busy getting not only one, but two houses on the market this year after both our moms passed away around the same time. With many a delay due to Covid, and the houses being the priority, it’s really no wonder that there’s been little time left over for projects like this. Just like during lockdown, I’m wishing this year would end quickly and we can get back to more fun things again.
Watch the Video
Do It Over Designers
Today we’re taking part in the Do It Over Designers blog Hop hosted by Ann at The Apple Street Cottage.

We’re a group of bloggers who take something old and/or unused and ‘do it over’ into something new. These items can be found in closets, barns, garages, yard sales, thrift stores, you name it! Check out the other projects at the very bottom of this post. And be sure to drop back in throughout the week to visit them all!
How to Refinish an End Table
1. Clean and Sand
Clean the piece first; I like to use something like Simple Green or vinegar and water. Dry thoroughly.
For this piece, I wanted a big change so I decide to sand the top back to lighter wood. I thought the top was solid wood. However, it’s actually only solid around the edges. The centre is veneer. That turns out to be a problem, as you’ll see later.

So while Hubs went on a day trip to purchase more sewing machines to fuel his hobby, I started with coarse sand paper and sanded.

And sanded.

And sanded. This is where I was at after almost 2 long hours!

In retrospect, if I do this again, I’ll first remove the clear coat with a safe stripper. That’s because the finish clogs the sandpaper. And those chunks of finish will scratch your wood unless you remove them or constantly swap out for fresh sandpaper! 
Then, after getting down to bare wood, progress to finer grits.

It took over 4 hours to sand both tops.

Scuff Sand
Luckily Hubs got home and took over. He finished the body of the end tables. All they need is a scuff sand.

Then we’re going to prime the bases, so remove the sanding dust with a barely damp cloth (or silicone free tack cloth) before painting.

2. Prep for Primer and Paint
Wrap the drawer with paint resistant paper to protect from overspray.

Since sanding for forever, we’re spraying the primer to speed things along and get back on track. Refer to our post on how to paint using a spray gun.

In ten minutes, our end table makeovers went from this…

… to bright white primer.

Ready for paint – once it dries!

3. Paint
We’re using Silk Mineral Paint in a colour called Cactus. To spray it, you need to thin it out a bit with water.

Use no more than 1 ounce of water per 16 oz container of paint. 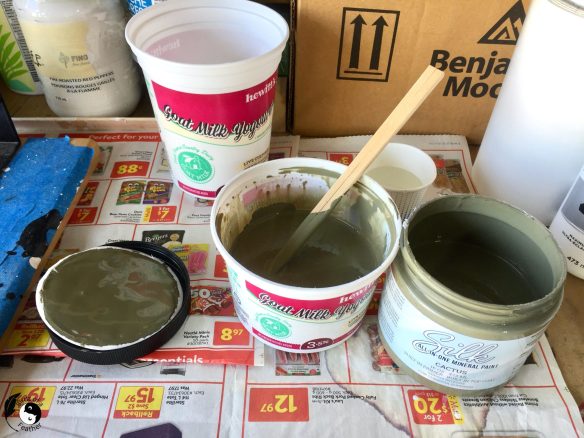
We like to start with the piece upside down to get the underside first.

Then finish with it right side up.

Again, the paint goes just as fast as the primer!

When it’s time to finish the drawers, it goes onto its own paint jig (which we show in the spray gun post linked above).

A quick and beautiful finish! There’s nothing smoother than spraying on a finish. 
Let Silk dry overnight before doing a second coat if necessary.

Don’t forget to spray a paint sample if it’s something you want to use again (which we do)!

4. Clean the Paint Sprayer
Tool maintenance is important and if you want spray painting to remain fast and efficient, you have to clean the paint gun well! Watch the video to see Hubs’ tips. 
5. add transfer
After sealing the top, you could of course stop here and be done. However, we blew through the veneer when sanding the top! It’s not as apparent in the raw state.

But as soon as you apply lacquer thinner to mimic a clear coat, you can see just how bad it looks (please wear a mask when you do this). Manufacturers usually use cheap wood under the veneer and this one throws green cast. In sad news, it’s not the look I’m going for.
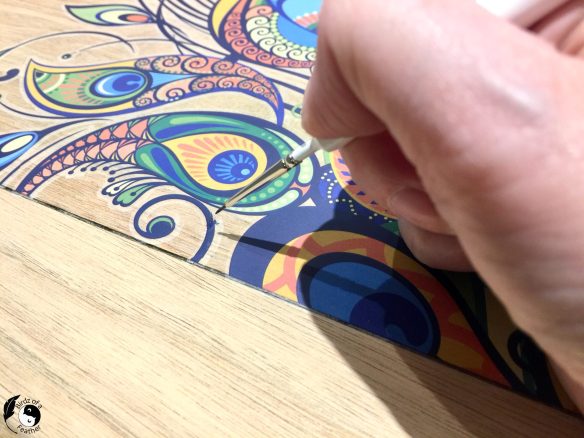
 But we didn’t put in all that hard work for nothing. So it’s time for transfers to save the day! This Retro Peacock transfer will cover those spots!

First of all, let me preface this step by saying that you should mark any sand through with painters tape. Then test the design to make sure it covers what you need it to. If it doesn’t work out, move onto a different transfer.
The transfer comes with a stick to help burnish it on.

But if you love transfers, like we do, and plan to do more projects, invest in a transfer tool like this. 
The larger width of each end, will cut your rubbing time in half.

Troubleshooting Transfers
Sometimes, despite your best efforts, the transfer will tear leaving a noticeable gap in the design.
If that happens, use a small touchup brush and paint that’s a close colour match to fill in.
 Lucky for me, Nautical is an exact match to the transfer.
There, all fixed and hardly noticeable.  6. Clear Coat
While Silk Mineral Paint does not need a topcoat (it already has one built in), you will need to seal in the transfers to protect them.
We find Dixie Belle’s clear satin too thick for spraying, so have to water it down. It goes on milky and dries clear.

The problem with adding water is that it can raise the grain so this is one part of the project you might want to brush instead of spray.
End Table Makeovers
These end table makeovers are quite different from where they began.

The transfers do a great job of covering the area we sanded through. But did you spot the mistake?

The Retro Peacock transfer is in the same position on both pieces. Ideally, I wanted to mirror the images so the transfer is in opposite corners! Oh well, live and learn. Hopefully my learning experience will inspire you to check your placement before it’s too late.
In the end, it’s not such a big deal. They still look great as is. And if they don’t sell as a pair, I can alway sell one as a single and try to make room for one around here :). More furniture! That’s just what we need in our tiny space (she said sarcastically).

If you’re in the Toronto area and need some end tables, be in touch!
Memory Lane
But it can be hard to part with stuff you grew up with that brings fond memories. My mom would store her crochet hooks and works-in-progress in this end table beside where she sat. And now, I’m continuing the crochet tradition passed on by my Mom, Grandmother and all the women who came before. If you love to crochet, we just created our first e-Book with these four Christmas phone covers to make.

And the best part? All proceeds from our Crochet for a Cure eBook are being donated to our Alzheimer’s fundraiser! Click the button below to purchase for yourself or as a gift for the crochet lover on your list!


Amazon Kindle
Our book is also available on Amazon Kindle and will soon be available in a print on demand format if you’d like to give a physical copy as a gift! So do you have any favourites? Which one would you crochet?
Fall Into Fabulous
One of the things I love most about blogging is connecting with other makers , and this Fall we’ve created something truly inspiring together.
Grab 16 digital goodies from top creators — planners, recipes, colouring books & more — including our Beginner Crochet e-Book!
Every dollar of our commission goes straight to Alzheimer’s research — a cause close to our hearts. Your purchase through this link means you’re not just treating yourself; you’re making a real difference.
Grab it now — the bundle is only available for a limited time! Let’s make this Fall fabulous and full of hope. 💜

Pin End Table Makeovers
Pinning is always welcome and appreciated! Click here for more Furniture Project Ideas.

Do It Over Designers
Our talented blogger friends have some amazing and inspiring DIYs for you! Don’t forget to visit these posts for more upcycled do-it-over transformations!
Beautiful! The colors are outstanding and the wood on the top is so clean and fresh looking. Happy hopping!
Thanks so much Kim; happy hopping to you too 🙂
What a transformation! Between the color and the transfers those tables are like Cinderella now ready for the ball. Beautiful job!
Ha, that’s a good analogy Ann! For a minute I was almost stuck with a pumpkin lol.
What an amazing transformation, Sara! I don’t think the placement of the transfers makes a difference. It’s a labor of love! You and hubs did a fabulous job! Well done!
Thanks Gail! I don’t really think it does either in the end 🙂
Those turned out beautiful! As I just told Rachel with her cabinet makeover, I’m so impressed with your dedication! It was worth it in the end!
Aw thanks Tania! I agree that a labour of love is always worth the effort!
Wowza, I absolutely LOVE these tables. I don’t care if you made mistakes or not, the finished tables are stunning! I’ve never really thought about transfers for furniture but I do think a lot of our furniture is a bit boring so I might need to do something about that! Such lovely inspiration, thanks.
I have to admit that I’ve never been a huge fan of transfers but I do love when they’re used in moderation. They can really add some pizzaz to boring pieces 🙂
Awesome makeover, hard to believe they are the same tables. I love the transfers that you chose.
Thanks so much Anita; missed you today!
Sara, I love these! What an upgrade! I didn’t know about that transfer tool, but that sounds like a great idea. It took me 6 hours to apply a huge transfer once.
Yes, the big ones are so time consuming! I’m patient, but not that patient lol! Anything to speed things up.
Wow, what a difference, Sara! I love the paint colour and that gorgeous transfer. P.S. Mama needs that sweet transfer tool
You would love that tool Marie; I’m so glad I bought it!
So glad you decided to give the tables a new life, even if you aren’t going to keep them. Good luck as you continue to clean out.
Thanks so much Donna; I’m hoping to make room for one but we’ll see.
Beautiful makeover!
Thank you so much Virginia!
I love how these end tables turned out Sara! Peacocks are one of my favorite.
Thanks Meagan! I love Peacocks too; they are so colourful!
Waw! What an impressive and beautiful transformation!
Thank you!
Love it! I’m featuring you this week when the next To Grandma’s house we go Wednesday link party starts – thanks for sharing with us!
So awesome; thanks Tarah!
What incredible transformations! These turned out so beautiful. Featuring when my link party opens.
Thank you so much for your comment and for featuring us at your link party ❤️!
I’m blown away, Sara. They turned out gorgeous. That transfer is stunning!!! Your end tables look like works of art now.
Thank you! I really wish we had room for these in our tiny abode!