

Today’s post is a quick tip about how to change stain color. But maybe not in the way you might be thinking.
Gel stains are an amazing product! There are so many advantages: they don’t drip, you don’t have to sand or strip the previous finish, and you can control the depth of colour by the number of coats you apply. So what’s not to love? Well, what if you buy a few containers then realize you don’t like the colour for the project you have in mind after you test it?
This post isn’t about mixing stains together to produce a hybrid colour. There are plenty of videos on YouTube showing how to do that (and it’s fun just to experiment if you have a bunch of stains from the same brand). Nope. Instead, we’ll show you how we transformed a gel stain colour we didn’t like into one that we love using a universal colourant!
Supplies for How to Change Stain Color
[If you’re looking for some of the things we used, we’ve got you covered (disclosure): Clicking on the affiliate links below means we may receive a commission. We earn from qualifying purchases which we proudly donate to Alzheimer’s research. But don’t worry, you don’t pay a cent more! Thanks for helping to support our fundraiser!]
- Mixol Universal Tint – Schwarz Black
- Applicator pads
- Paint/stain can opener
- Gel Stain
- Satin clear coat
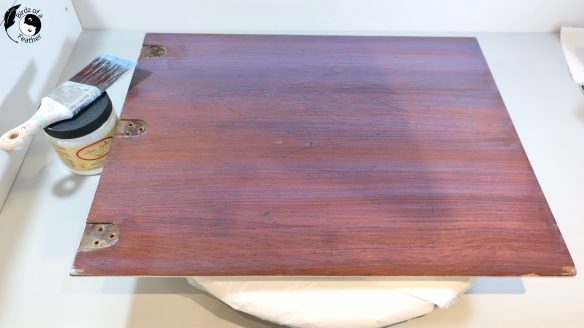
While working on converting a sewing table to a painted end table, we decided to stain the inside of the tops that lift open. Just in case someone still wants to hide a sewing machine in it, a stained surface will be more practical to sewing on.

On closer inspection you can see the scratches on the veneer of this wooden top. That’s a job for gel stain. Gel stain can sit on the surface of previous finishes to hide imperfections. So you don’t even have to necessarily sand. However, you do have to clean the surface well first.

With so many scratches, it doesn’t hurt to give the wood a light sanding with fine sandpaper. Don’t go overboard though; veneer is pretty thin and you don’t want to sand through it!
You can read more about how to apply get stain to finished wood and how to stain and seal wood from two of our blogger friends. You’ll see how gel stain works straight out of the tin on both finished and raw wood surfaces; french doors and a railing!
How to Change Stain Color
Watch this video, or continue reading below, for how to transform the colour of furniture stain out of the container.
Unlike using a stain on raw wood (which soaks in) gel stain is easy to test on a pre-existing surface to see if you like it first. Test on a small, preferably inconspicuous, area. If you don’t like it, you can remove it with a paint thinner such as mineral spirits.
We have two gel stains – Golden Ash and American Honey – neither one of which we like for this particular sewing table. Mixing them together doesn’t result in a colour we want to use either.
American Honey is the stain shown below on the right side of the paint stick. That’s the one we’re using to show you how to change stain colour.

Can You Customize Wood Stain?
Wood stain can be customized with the addition of universal colour. We’ll deepen the tone of the American Honey gel stain with black colourant.
The colourant we’re using is made by Mixol and is called Schwarz Black. Mixol makes a line of concentrated universal tinting pastes that are highly concentrated (it even comes in metallics). You can add them to almost any type of paint and/or coating materials; you can even mix them together to create an infinite variety of custom colours.

How to Customize Stain Colours
After opening the tin, thoroughly mix the gel stain. Then scoop some into another container, or a lid as we’re using here.

Add a few drops of colourant at a time and stir well to mix. After all, you can add, but you can’t take away!

We stop at 10 drops. By the way, if you ever want to reproduce this stain colour again, be sure to measure everything precisely and write down the formula.

Below, on the left, you can see how much the American Honey stain has changed with the addition of the universal tint. Since gel stain is somewhat translucent, it will still show through some of the stain original colour on the wood, unless you build up multiple layers of stain. You can control how the coverage you want with more coats.

How to Apply Gel Stain
Any gel stain that is an oil-based product is best to use it outdoors.
To apply gel stain, we think these applicator pads are amazing at getting a smooth lint-free finish. On small projects like this we cut them in half and serge the cut edge to economize. They work beautifully to apply and also wipe back excess stain if you flip it around to the back.

Spread the gel stain onto the wood by wiping in the direction of the grain. Look at the difference between the scratched area and just one application of stain!

You can build up more layers if you wish but we’re stopping at one. Here’s a reminder of the before.

And here it is after one coat. The universal tint adds a richness that the gel stain alone on this particular old stain wouldn’t achieve. It turned out exactly as we hoped!

Important Info About Clean Up
Pay close attention to the warning on the label of stain. This stuff is oil based and therefore combustable. So when you dispose of the applicator pad or cotton rag, don’t ball it up with the gloves and throw it in the garbage. That’s an invitation to start a fire.
The best way to dispose of stain laden rags is in a tin can filled with water with a lid that closes. With no air, it can’t combust. Alternatively, lay them out flat to dry on an incombustible surface such as a metal tray – away from the sun.

Seal the Gel Stain
Gel stain MUST be sealed with a topcoat to protect it. We leave it to dry for a full 72 hours before applying a satin clear coat. The clear coat actually looks like it has a purple hue here when it goes on, but is a water based product that dries perfectly clear.
Before & After How to Change Stain Color
Here’s how the table looks after a light sanding.

And now? Gel stain is a great choice if you don’t have missing veneer and you want to re-stain a piece of furniture. But if you do have extensive veneer damage and want to keep the wood look, check out our post on how to make wood filler look like wood grain.

So there you have it; an easy way of how to change stain color! Here’s how the inside lids of the sewing table look after re-assembling. You’ll see the final reveal of this sewing table turned painted end table in our next post.

Fall Into Fabulous
One of the things I love most about blogging is connecting with other makers. And this Fall we’ve created something truly inspiring together: 16 digital goodies from top creators — planners, recipes, colouring books & more — including our Beginner Crochet e-Book!
Grab it now — the bundle is only available for a limited time at this price: use the coupon code FALLFUN to get it for $9.99!
As always, every dollar of our commission goes straight to Alzheimer’s research, so treat yourself knowing that you’re making a real difference! Let’s make this Fall fabulous and full of hope. 💜

Pin How to Change Stain Color

FAQ’s about Gel Stain
Can I stain over stain without sanding?
Yes, you can stain over pre-existing stain and finish with a gel stain. Add as many coats as you wish to the desired depth of colour. Then seal with a clear coat.
How do you lighten a stain that is too dark?
If just applied, you can remove gel stain that hasn’t cured with a paint thinner such as mineral spirits. If it’s an old piece, you could try sanding the stain back to bare wood. Then try a transparent colour wash, like this Minwax white wash to lighten up the wood.
Can you Customize Wood Stain?
You can customize stain by mixing like-brand colours together. You can also add a universal tint to completely change the tone of the stain as we have done in this tutorial.
Can you color over a stain?
Gel stain is perfect for colouring over pre-existing stain because it sits on top of the surface. Just be sure to seal it with clear coat once you’re happy with the new colour.
Sara, I love this post. I have a lot of wood pieces in my home, so we stain much more often than paint and getting the right color out of the can doesn’t always work. I had no idea there were colorants…also…bad DIYer, I never measure and then I can never reproduce my colors. Great tip. Thanks for sharing. I’m off to share this one!
So happy to hear this was helpful Kim and thank you for sharing our tip 🙂