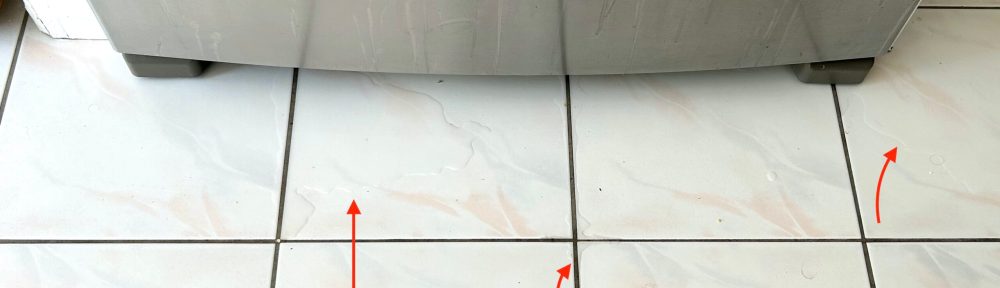

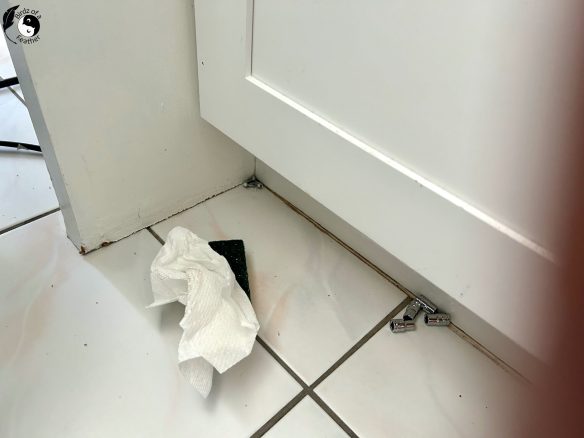
Water leak from fridge?! Just when we thought we were going to have a well deserved break on Sunday, we returned home from the park to discover a water leak all over our kitchen floor!
Before this ever happens to you, be sure to pin this post to refer back to because we’re going to show how to fix leaking water from the fridge and stop it for good!
We were lucky for several reasons! First, Hubs actually noticed the water on the tile (we could easily have discovered it only after slipping). Secondly, it was the weekend and we were both home.

Water leak from fridge
Funnily enough, we also had our washing machine leak the day before and had to buy a new one. But that’s a story for another post.
What’s Causing the Fridge to Leak?
The fridge was new in 2015 when we undertook this kitchen renovation to sell a home. In comparison to our washing machine that amazingly lasted 34 years, 9 years doesn’t seem that old. These days, a fridge should last between 10 – 20 years. But they sure don’t build them to last, like they used to. Have you noticed this too?
Time to do some detective work! First, I should clarify that we don’t have water hook up on our fridge, so that eliminates an actual water leak from a water line.
Because my sister has a big family and has experience with all sorts of appliance failures, my first instinct was to text her. She was almost out the door to take my nephew to the airpot. Another stroke of luck that I caught her in time.
My sister’s suggestion was to check for dust hubby’s. Of course she meant dust bunnies; darn auto correct! But because Hubs is the one who’s going to fix this, the irony isn’t lost on me!
You might think that a flood indicates a major fridge failure. But, as in our case, it can be as simple as dust clogging the pipe where water is supposed to drain and evaporate in the pan.
Throw in the Towel
When I say throw in the towel, I don’t mean give up! First step is to throw a towel over the leak to dry the floor so no one slips on water they can’t see.

How to Clean Refrigerator Drain Pipe
We were hoping to have a video for you too. But when it rains it pours; it seems like everything is breaking down at once (we’re having computer problems too). So for now, we’ll take you through the step by step tutorial below and hopefully post a video later.
Tell Tale Sign of a Clogged Drain Pipe
Check below the basket in your freezer section. If you find a sheet of ice lining the plastic shelf, the culprit could be dust. In our haste to get everything out of the freezer, we spilled a package of cocoa. With our Hot Cocoa Bar Sign put away for Spring, we’ll just have to stock up on cocoa for our hot chocolate station again in the Fall!
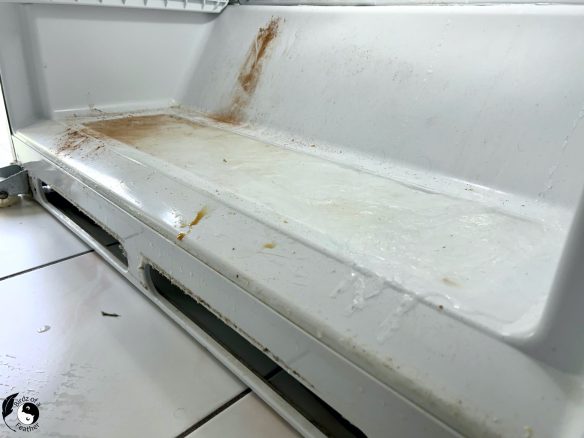
Sheet of ice on bottom of freezer drawer
unscrew Back Panel of Fridge
There’s no way around it. If you find something on the net that says you can do this without removing the back panel, take a pass. It might work temporarily but you really should deep clean, as we describe here, if you want to fix this so it never happens again.
- Remove the front grille at the bottom of the fridge. You can keep the fridge running for now.
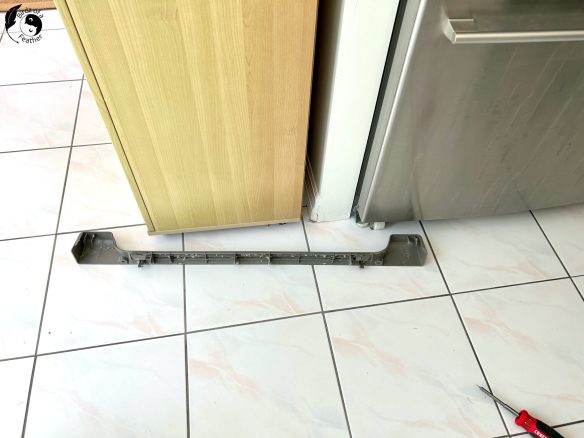
The plastic is covered in dust, but take a look under the fridge! After seeing this we realize we should be removing the grille and vacuuming this area as part of our regular maintenance.
 We’ll vacuum this area at least once or twice a month from now on to maintain it.
2. Remove food from the freezer.
We put all our frozen food into coolers. If you have an extra fridge, transfer over all the food from the fridge too. Otherwise, keep the doors closed to maintain temperature as long as you can.
3. Pull out the fridge and unplug it.

4. Now, with the fridge unplugged, it’s safe to remove the back plate.
You’ll likely need a socket wrench to remove the screws. 
Put the screws somewhere safe. We shove them right into the corner of the pantry so they don’t roll away and go astray. By the way, this pantry is part of the kitchen storage improvements we made to the kitchen.
Remove Back Panel
5. Move plug on back panel upwards to clear it from the panel.
This plug slides up to get it out of the way but we don’t detach it.

6. Gently move the back panel as far forward as you can, since the wires are all attached.
Our drip tray is bone dry, so that’s another indication that there’s a clog in the drain pipe.

6. Shine a flash light inside and look for the drain pipe. Since we’re not detaching any of the wires, it’s going to be a little difficult to see with the panel in the way but you will find it.

7. The drain pipe on our fridge is on the right side. Once you locate it, carefully pull it out. Older model fridges may have a just silicone gasket at the top that you can remove, while a straight pipe remains in place. However, our drain pipe removes fully and looks very much like a plumbing pipe with a trap at the bottom.

Water Leak from Fridge – Culprit
9. Use Flat tweezers to pull out any material at the bottom where the drain pipe was connected at the back of the fridge. This chunk of dust alone could be responsible for the clog causing the water leak, but there’s more to do.

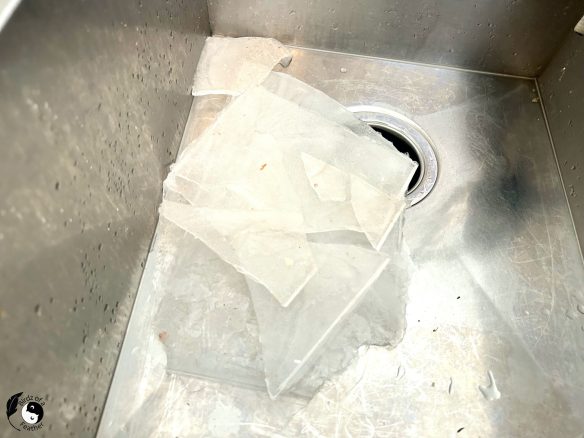
8. Now, rinse the drain pipe thoroughly. You can see some of the crud that was washed into in the sink. As an added precaution, Hubs also blew air through with his air compressor, but you shouldn’t have to do that if you rinse it well.

Vacuum Dust
The dust clean up still doesn’t end with the front of the fridge and the drain pipe connection. The fan, coils and other inner workings are covered in it too.
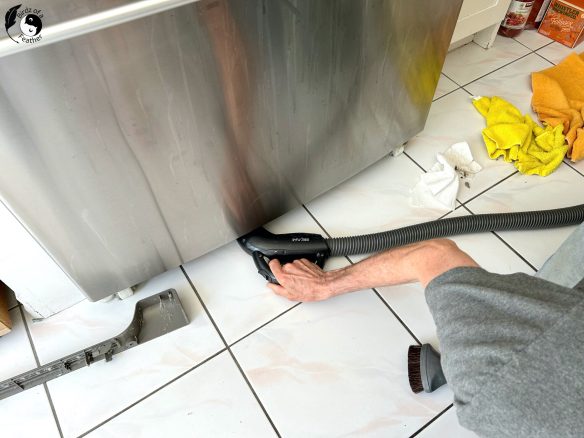
9. Use keyboard attachment accessories to vacuum all the hard to reach areas inside the back of the fridge.

In particular, this small brush head and the hose are key.

Get the flashlight ready again; you’ll need it to see where you have to vacuum.

Vacuum the dust in the grilles at the upper back.
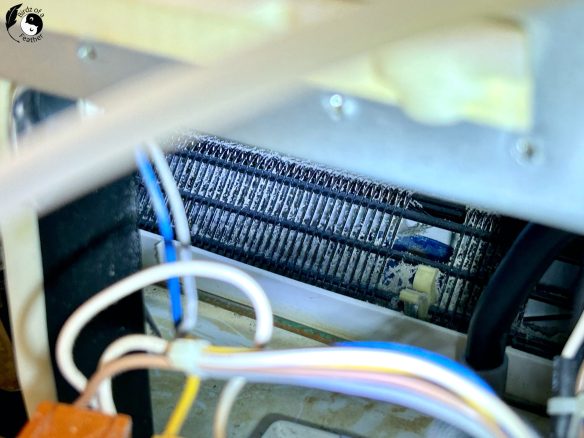
Then vacuum both the front and back of the fan blades and the metal surround. As you can see, it’s pretty heavily covered.

Lastly, move the vacuum hose along the bottom where ever you see dust.

Deal with the Ice
Now it’s time to remove all the ice we showed you in the freezer drawer at the beginning.
10. Run a knife under warm water. Carefully work the knife under the ice to lift it. If you find this difficult, you can try warming it with a hair dryer.

You should be able to remove the ice in chunks.

This is only some of what we removed.

Take it all to the sink and let it melt.
11. There’s still more ice at the back of the freezer section in these grills to melt.

If you’re lucky enough to have another fridge and were able to remove ALL the food, you can let this ice melt on it’s own. But we’re in a race to keep the food in the fridge from spoiling. So we break out the hair dryer.

It’s handy to have another set of hands to hold the flashlight. Be sure you keep the hair dryer moving! You don’t want to melt the plastic, just the ice.

Final Cleanup
12. Before putting the front grill back on, remove as much dust as you can with the vacuum and then wash it.

Since cooking grease will make its way onto the plastic and cake it up, this also calls for a scrub at the sink. You can use warm soapy water, but we prefer Method All Purpose Cleaner to break it down. Believe it or not, Method is also our secret for how to remove a sticky label from glass! It has so many uses in the kitchen.

Use a toothbrush to scrub between the grates. Rinse and let it dry.

While everything is still out of the freezer, take this opportunity to wash the shelves and baskets with warm soapy water, rinse and dry with a towel.
Reassemble Back of Fridge
13. Lift the back panel back into place.
Position the plug back into the slot.

And push it all the way down.

14. Replace screws.

The water line screws back into place too (since we don’t use it).

If you had to untape the lines to access the back panel, tape them back in place.

Return the food to the freezer/fridge and plug back in.

While you’re at it, clean the fridge doors and then you can display an air plant magnet!

Aftermath of Water Leak from Fridge
The next day, everything was running perfectly and, more importantly, no water leaks from under the fridge in sight!
You know, not cleaning the dust from your fridge can not only cause a water leak, but it can also make you sick. Water seems to be the bane of our existence as this water leak repair and mold prevention after a water leak will attest. We even lost our beautiful engineered hardwood floor basement installation which led to this loose lay vinyl plank flooring installation, so we’re no strangers to the damage that water can do!
If you take anything away from this post, go check your fridge for dust bunnies and get rid of them! A little maintenance up front can save you a whole lot of time and frustration in the long run.
Other Fridge Maintenance Tips
As a precaution, we also keep an eye on the temperature gauge in our fridge to ensure that we’re maintaining a proper temperature. If you find the temperature is too low, you could have a compressor problem that may need replacement.
Fall Into Fabulous
One of the things I love most about blogging is connecting with other makers. And this Fall we’ve created something truly inspiring together: 16 digital goodies from top creators — planners, recipes, colouring books & more — including our Beginner Crochet e-Book!
Grab it now — the bundle is only available for a limited time at this price: use the coupon code FALLFUN to get it for $9.99!
As always, every dollar of our commission goes straight to Alzheimer’s research, so treat yourself knowing that you’re making a real difference! Let’s make this Fall fabulous and full of hope. 💜

Pin Water Leak from Fridge
Pinning is always welcome and appreciated!

Water Leak from Fridge FAQs
How do you unblock a defrost drain in a refrigerator?
- Remove front grille and vacuum under front of fridge
- Remove food from freezer (and fridge if possible)
- Unplug fridge
- Remove screws from back panel. Move plug out of the way to tilt back panel away.
- Remove drain pipe and wash out any blockages
- Remove any dirt and clumps of dust where the drain pipe connects
- Vacuum fan, grilles at back and surrounding area at the back of the fridge where panel has been removed.
- Using a dull knife, work it under the edge and remove ice from bottom of freezer drawer
- Melt ice in grilles at back of freezer drawer; a hair dryer can be used or if food is totally removed, you can let this defrost.
- Reassemble and put food back.
How to clean refrigerator drain pipe?
Rinse the drain pipe in the sink with water until it runs clear and all debris is removed. You can also use compressed air after cleaning in the sink. Vacuum and remove all dust in and around where the pipe connects to the fridge before replacing it.
What causes a blocked defrost drain?
Surprisingly, all it takes is a little dust over time to fully block the defrost drain and cause water to leak from underneath the fridge.
How do I stop my fridge from leaking water?
Remove and vacuum the front grille as well as under the front of the fridge on a regular basis.
What does it mean when your fridge is leaking water from the bottom?
It can mean that the defrost drain is clogged, so you need to methodically remove dust and ice. See our step by step guide on how to do this.
How to unblock a drainage hole in a fridge?
Along with rinsing the defrost drain, you need to remove any blockages formed by dust clogging the hole. See our step by step guide on how to do this.
Where does water come from in a fridge?
If you notice water leaking out from beneath your fridge, it could just be a simple fix that any homeowner can take on. All it takes is a little dust clogging the defrost drain. Once you have a clog, you can experience condensation backing up and freezing along the bottom of your freezer drawer and then actual water leakage. See our step by step guide on how to fix this.
Ugh! That’s no fun, yet here you are telling us how to fix it! 🙂
You’re right, it wasn’t exactly fun. A little like child birth – painful in the moment but wonderful in the aftermath. We went from coming home from a morning walk in the park to start breakfast to wondering why it was almost dinner and we still hadn’t eaten lol. And when we were done, poor Hubs had to run out and cut the lawn too.
Everything is so expensive these days that we couldn’t help documenting it to show that you really can do it yourself! If something can be fixed without a service call, it’s so worth the effort.
Agreed. Mike is really handy like the two of you, so he’s often able to make repairs.
Good thing you were both home and have great investigative and DIY skills to find and fix! Glad it was a simple repair rather than a replacement. 🙂
I’m glad too! It’s certainly been the week for appliance breakdowns!
LOL, I laughed out loud when you said dust hubby and then went into a mini state of shock when I saw the grille. I didn’t know that needed a clean and now I’m to scared to open ours. Our fridge is probably 10 years old and we have lots of fur babies that love lying by the fridge in case a treat drops out unexpectedly.
ooh, your fridge is getting to the age where things go wrong, just like ours so I hope this helps! I can’t blame your fur babies for positioning themselves where the treats might fall; they’re so smart lol!
This was such a helpful and relatable post! The way you explained the issue step by step makes it so easy to understand, especially for homeowners who might panic when they see water all over the floor. I really liked how you highlighted that something as simple as a clogged drain pipe can cause a big mess—definitely not something everyone would think of right away.
The practical tips, especially checking for ice buildup and cleaning the drain properly, are super valuable. It’s also great that you shared your real-life experience—it makes the guide feel genuine and trustworthy.
Thanks for putting this together! This kind of clear and honest advice can save people time, money, and a lot of stress
So glad it resonated with you! We really hope our experience is helpful to others that might encounter the same situation.