

When you want to add storage onto a pegboard, this pallet shelves DIY lets you display things you can’t normally hang.
By now, if you’ve been a reader for more than a hot minute, you know how we hate to waste. So when we had these left over scraps of peg board and pallet wood sitting around, we thought it would be ideal to show you how to paint the pegboard in a riot of colour and add pallet shelves onto it! Cool, right?

DIY shelves made from pallets
There’s nothing better than free building materials in the form of pallets. So around here, we love to think up pallet ideas, like this wooden wall art diy, pallet diy, muskoka chair challenge, and even this paint stick pallet.
There’s nothing better than a burst of colour to get you through the doldrums of January (if you live in the western hemisphere like we do). We started this project on blue Monday; how apropos? As a matter of fact, my birthday is at the end of this month – typically the coldest day of the year – and this will definitely bolster my mood as I turn the big 6-0! Where does the time fly?
IBC – Pallet Parade Challenge
It’s time for another International Bloggers Club (IBC) challenge and this month our theme is Pallet Parade (pallets or scrap wood).
The IBC is a group from all over the world who challenge each other every month to make something using a common theme. You’ll find our friends’ pallet ideas at the very bottom of the post. So don’t forget to check them out before you go. And if you don’t have time to browse today, pop back in later in the week to pick up where you left off.
Before we get into the tutorial, don’t forget to get your craft mojo on at Birdz of a Feather and subscribe to our newsletter:
You can also follow us on Pinterest, Facebook, YouTube and Instagram.
Watch on YouTube & Subscribe!
Pallet Shelves DIY Supplies
[If you’re looking for some of the things we used, we’ve got you covered (disclosure): Clicking on the affiliate links below means we may receive a commission. But don’t worry, you don’t pay a cent more and it helps us make more unique crafts to share with you! Thanks for helping to support our blog!]
- 1/4″ white Pegitz Pegboard Locks (or the size that corresponds to your pegboard holes)
- Pegboard (ours is a scrap around 12″ x 24″)
- Vintage ruler yard sticks (2)
- Pallet, broken down and cut to length
- Stencil (made from an acetate sheet)
- Clear coat (satin is our preference)
- Wood cleat or metal french cleat to hang
- Sandpaper (we use this cheaper sandpaper for small touchups)
- Stencil brushes
- Dixie Belle Chalk Paint. We used 15 different colours (peony, the gulf, rusty nail, mermaid tail, pure ocean, daisy, dusty blue, flamingo, tea rose, dixie belle blue, florida orange, colonel mustard, honky tonk red, navy, green)
- Mitre saw
- Painters tape
- Pencil
- Square
- Spring clamps
- Elmer’s Carpenter Glue
- 6″ shelf brackets
Because the pegboard is an offcut, and we want it to look good of course, We take the time to make a to scale template of our design so we can place it exactly! We keep a whole role of brown paper in my studio and use it for everything! It’s so handy.
By the way, this design was inspired by this print on Society 6 by designer Ania Wieclaw at Show Me Mars. So let’s get painting!

Make Stencil
Find yourself a pattern you like; Pinterest is a great resource for ideas.
When our printer ink ran out, I used my iPad to trace my stencil design onto paper (see how to trace on an iPad). As a complete aside, if your printer ever stops working completely, check out this post on how to clean printer heads.
I then positioned the pattern under a piece of acetate on top of a cutting mat. Cut the acetate with an X-acto knife. Hand cutting the stencil was actually faster than trying to figure out how to use my Cricut for the first time :).

After cutting the stencil(s) out of acetate, lightly trace the pattern onto the pegboard with a pencil.
Paint Pegboard
I pulled most of my Dixie Belle chalk paints out of the cupboard. This project is ideal for using up any leftover paint because you need so little.
I didn’t prime or paint the pegboard, (it was already white) but do so if your pegboard is brown so the rest of the colours pop on the background.

Dixie Belle Chalk Paint
Each jar goes onto the 15 shapes in the pattern.

Once happy with the placement of the colours, take some tape and double number as you see below.

Cut the tape, placing one number of the corresponding space on the pegboard and the other on the jar.

Clear everything off and we’re ready to stencil!

Stencil Pattern onto Peg Board
Tape your stencil to the pegboard with a few pieces of green painters tape to secure it to the pegboard.
Dip your stencil brush into the paint and offload it onto some paper towel so it’s dry. Start in the centre of the stencil and pouch straight up and down to deposit the paint. Then come in from the edges, again with a straight up and down motion. Working with a dry brush and and up and down motion of the brush will ensure you don’t get any paint bleed under the stencil.
Be sure to leave a gap between your shapes as you stencil so you don’t accidentally smudge anything.

Chalk paint dries so fast that you can fill in the rest of the spaces in no time!
I wanted to include orange so mixed the red and yellow you see in the right corner above. Orange is so under-utilized and I love it! Anyone with me on that?

You’ll notice that the colours aren’t even ‘solid’. That’s because I only stencilled one coat of paint onto each. If you prefer, you can stencil another light coat or two, but I like the look of some of the white showing through for this colourful project.

Cut Frame
Now, onto the frame! we’re using vintage rulers from our collection to frame around the pegboard.

On our chop saw it’s difficult to see the mark. So use a square to extend the cut line. We’re cutting ours 24″ long and then measure the gap in between for the horizontal piece.

Due to the pegboard scrap not being cut evenly, we cheated the placement of the rulers on the sides to cover the half-holes. So the ruler is only actually only covering half the board on the two long edges.
Glue and clamp the rulers and leave them to dry. I’m using Elmer’s ProBond Max. Spring clamps are great for holding the rulers as they dry.

Once dry, clear coat the entire project. Then add a wood cleat on the back of the pegboard and one on the wall to hang it.
What is a Wood Cleat?
A wood cleat is simply a piece of wood cut on an 45 degree angle so it becomes two pieces of wood that lock together seamlessly. It’s handy to have a table saw for this. If you don’t have a table saw, you can also use a metal french cleat and mount it onto a piece of wood to provide clearance behind the pegboard for the pegs.

Two wood cleat pieces that fit together
When you mount one half to the wall, and the other to your pegboard, the angles fit together and hold your project on the wall. The advantage is that you can screw the cleat right into the wall studs, giving you the most secure weight load! Here’s a video on how to make a wood cleat.

Wood cleat side view
Pallet Shelves DIY
Can you make shelves out of old pallets?
Pallet wood is a great free resource to upcyle into many projects, including pallet shelves. But make sure the pallet wood you use is chemical and bug free. The simplest way to make shelves is to cut them to length and hang them on pegboard.
How Do You Make a Shelf out of Pallet Wood?
- Break down the pallet
- Cut pieces to length you want shelf
- Install onto pegboard with brackets, square bend hooks (if the wood is 3/4″ thick) or keyhole hangers
1. Break Down the Pallet
First, break down the pallet. If you don’t want to damage the wood, see the easiest way to break it down here.

Sand it down smooth to avoid splinters.

2. Cut Pieces to Length
Our pieces are the width of the pegboard, but you can cut them any size you desire.
Using a square to mark, cut to desired length. Luckily we cut these pallet pieces last summer. It’s way too cold now for extensive cutting!

My original plan was to add a paint stick onto the front to cap each shelf. You’ll see we skipped that for this project, but feel free to cut and add a paint stick if you have items you don’t want to roll off your pallet shelf.

We also originally planned for two or three shelves, but out pegboard was small so we’ll save the other for another project.

How To Secure to Pegboard
3. Install onto Pegboard
There are many ways you can attach your pallet shelves DIY onto the pegboard. We chose to use pegboard shelf brackets that you insert like any other peg hook.
However, I realized we only had one set of these 6″ peg board shelf brackets. So it’s one shelf for now! Just slot the shelf brackets onto the pegboard where you want your shelf to sit and place your shelf on top. If you’re worried about the pallet shelf falling off, add some cable staples on the underside to fasten the prongs to the wood. These are 6″ deep to accommodate the depth of the pallet wood.

Because you want the shelf to be secure, we suggest that you lock these shelf brackets in place with Pegitz Pegboard Locks. They’ll keep the brackets from falling out accidentally (we used them on both our how to hang sliding pegboard and pegboard craft organizer projects). 
There are a variety of other ways to hang this pallet shelves DIY. If you have 3/4″ wood, try using L hooks, like this video demonstrates.
For lightweight items, you can also try these keyhole hangers. Just screw them onto the back of the pallet shelf. Then attach them to the pegboard with a round head screw and nut that you attach from the back.

The Family Handyman has other amazing ideas on how to hang pallet shelves, such as with wall anchors and L-hooks. Here’s how our brackets look:

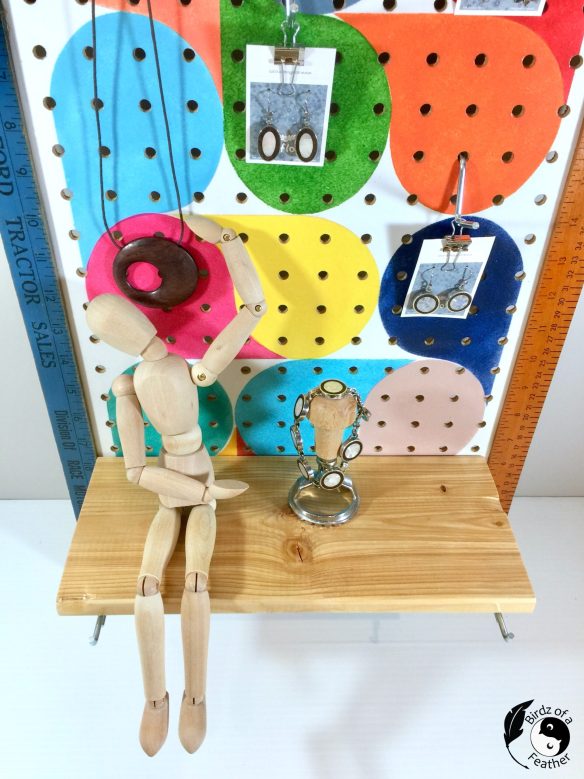
Hang Pallet Shelves DIY
Once the shelves are in place, you can attach a cleat onto the back of the pegboard and a corresponding one onto the wall and hang it up!
This pegboard design would be great in an office or craft room; you could organize almost anything on it. However, this one is going in the bedroom to display some of my favourite necklaces, earrings and bracelets. But we won’t be hanging this to display jewelry until we make some updates to our bedroom. Once we get past finding my sister a new house and helping her move in the Spring, I’d love to turn our attention to updates in our own house :).
Don’t you just love how the vintage rulers look as a frame around our colourful ‘thought bubbles’?

Pallet wood shelves can look stunning with a coat of varnish! It really brings out the grain.
You’ll find more pegboard ideas and jewelry display ideas here.
Fall Into Fabulous
One of the things I love most about blogging is connecting with other makers , and this Fall we’ve created something truly inspiring together.
Grab 16 digital goodies from top creators — planners, recipes, colouring books & more — including our Beginner Crochet e-Book!
Every dollar of our commission goes straight to Alzheimer’s research — a cause close to our hearts. Your purchase through this link means you’re not just treating yourself; you’re making a real difference.
Grab it now — the bundle is only available for a limited time! Let’s make this Fall fabulous and full of hope. 💜

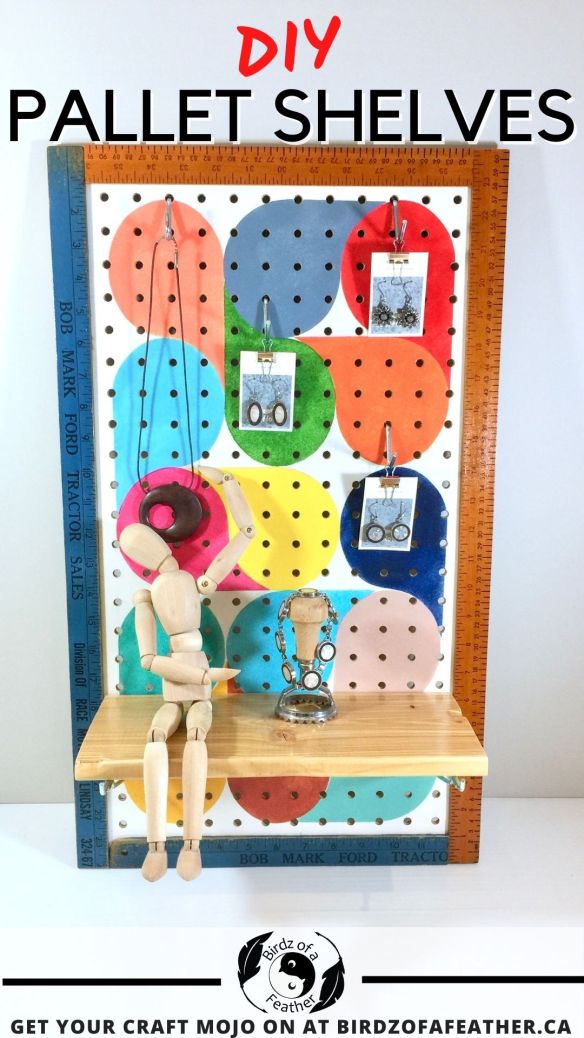
Pin Pallet Shelves DIY
Pinning is always welcome and appreciated!
Pallet Parade Challenge – IBC
Don’t forget to visit these awesome ‘Pallet Parade‘ projects from our creative friends below for more unique ideas!
- Songbird – Easy DIY Compost Bin
- Unique Creations from Anita – Pallet Wood Heart
- Birdz of a Feather – Pallet Shelves DIY (that’s us)!
- Saved from Salvage – Pallet Photo Holder DIY
- A Crafty Mix – Reverse Canvas Magical Fairy Forest
- The 5th Sparrow No More – Upcycle Old Hymnals on this Creative Pallet Project
- Tea & Forget Me Nots – How to make an easy rustic pallet DIY shelf

Pallet ideas
This is such a cool storage piece – great job on this!
Thanks Kristin! Great to have you as part of the IBC 🙂
This is so much fun! I love the bright colours you chose. And Happy Birthday!
Thanks so much Rachel and welcome to the IBC :). I still have 3 days left in my 50s lol
This project is awesome, I was curious how you painted the bubbles so perfectly when I first saw the image, great idea. And those vintage rulers do need a mention, they are great. I have plans to do my workshop up with peg boards but never seem to find the time.
Thank you! I honestly wish I had more wall space; I’d blow this up huge and do the entire wall like this lol!
I just love this project and how it turned out, those colors are beautiful!
Thanks so much Kristin! I’m a colour junky!
Sara – I love your colorful creativity. Such a fun project. You made that pallet wood shine! So happy to be part of the IBC.
Thanks Regina; and we’re so happy you joined us!
I do so enjoy how you always experiment with wild and wonderful colors, Sara. It seems like everyone is playing safe and using whites and creams which so boring and with all our fur babies it will never stay that way. Thanks for making the whole cleat thing simple too. I’ve tried to find the metal ones but haven’t had much luck. Cutting a piece of wood makes it much easier. I’m assuming the angle doesn’t have top be exactly 45 degrees?
When I was a fashion designer, I was just as experimental. There’s just no fun in neutrals for me! You’re correct – the angle doesn’t have to be 45 degrees but that angle will likely give you the best security.
What a great idea! I love all the colors you used! Thanks for sharing this informative post with us!
So happy to hear you like it Kimberly! Thanks for dropping by to let me know 🙂
Great project, Sara. I love the bright colors and, of course, pallet wood!
Thanks Ann! Those colour sure do cheer up our dull weather lol! We’re expecting a huge storm today.
Beautiful and practical – that’s a great combo.
Thanks so much Julie; I think so too 🙂
FABULOUS upcycle, Sara!
I’d love for you to join us over at the Creative Crafts Linky Party every Wednesday through Sunday
https://creativelybeth.com/creative-crafts-linky-party/
Followed and Pinned!
Creatively, Beth
Thanks so much Beth! Will do 🙂
I love it! What a wonderful way to jazz up a pegboard!
Thanks Kippi!
What a great idea for pegboard offcuts (I have some collecting dust in the workshop). Love the pops of color!
Thanks so much Marie! It’s surprising how useful it is, so I’m glad I did this project!
Wow Sara this is so cute and creative! I love all the colors! It looks fantastic!
Jenna
Thanks so much Jenna!
wonderful project! thanks so much for sharing on craft schooling sunday!
Thanks for featuring it Sara!!