

Before you run out to needlessly to buy another printer, try our fix on how to clean printer heads first! Less landfill = a happier planet and, like our motto says, good planets are hard to find!
The handiest tool in our craft arsenal is actually our home printer; it is indispensable. But over the last few days it has been printing badly at first and then printing completely blank pages. Not a good thing when you need print outs for your next upcyled craft project!
With so many people working from home now, it’s more important than ever to have a printer in good working order.

If you’re getting bad prints, or blank pages, try the easy things first. Run a nozzle check, then try running cleaning the print heads from your printer’s control panel or computer.

Before we get into the tutorial, don’t forget to get your craft mojo on at Birdz of a Feather and subscribe to our newsletter:
You can also follow us on Pinterest, Facebook, YouTube and Instagram.
How to Clean Printer Heads Epson
Watch this video to see how we clean and fix our Epson printer. The same principles will apply to other printers too.
Troubleshoot First
We ran all the typical troubleshooting (refer to your own manual to see if you can get it working again). However, none of that worked for us. We haven’t been using our printer for crafting very much lately, due to other priorities, so it’s probable that pigment has dried up clogging some or all of the printer heads.
Note that if the cartridge has the print heads built in to it, then instead of doing what we’re about to show you, you’ll want to pour the cleaning solution into a shallow dish and soak it directly for about an hour. Swab the printheads with a cotton swab and repeat the process if necessary until they are clean.
How to Clean Printer Heads – Epson
By the way, we have an Epson WF-3540, but the same principles will work for other makes and models. Since our printer heads are in the printer, and not on the cartridge, you’ll need the following items:
- Cleaning solution – we’re using straight Windex but you could cut it with distilled water or try isopropyl alcohol mixed 50/50 with distilled water too. There are other suggestions below under the ‘what can I use to clean’ section.
- Clear vinyl tubing – should be a snug fit to fit over the printer heads. The tubing we’re using has an inner diameter of 1/8″ and outer diameter of 1/4″ but yours may be different.
- Syringe – we’re using a craft syringe
- Paper towel
- Plastic (optional) – we lay this over the work surface (a wood desk) to catch any drip.
- Plastic wrap – to store the cartridges as you clean the heads
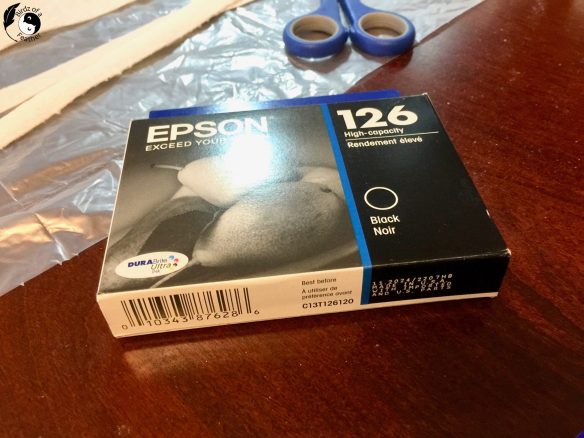
- New cartridge (s) (only if you have run out of a certain colour). We’re using an Epson 126 cartridge compatible with our printer
What can I use to clean printer heads?
Windex to Clean Printer Heads
You can buy a specialty printhead cleaner kit with a cleaning solution, but it’s not really necessary. For water based inks, a soap and water solution will suffice (half a cup of distilled water with a drop of dishwashing liquid and an ounce of isopropyl alcohol). The DIY printhead cleaning solution we use is straight windex for our Epson printer. However, I’ve seen others using combinations of windex and isopropyl alcohol, ammonia and distilled water (one part ammonia to 10 parts water), 50/50 alcohol and water, denatured ethanol and water or even vinegar and water. If you use a solution that includes water, don’t use tap water or any water with added minerals. Be sure to use distilled water. This article goes into more detail about print head solutions and how to make them at home so choose the one that’s best for your own situation.
The solution will be pushed through the printer head nozzles to flush out ink particles that are likely clogging them and interfering with the printer.

DIY printer cleaning solution
IMPORTANT: Disconnect the power supply!
You must move the carriage in such a way that it slides along the rails. To do that you have two choices:
- Start a print job, then unplug your printer from the back. The printhead will stop somewhere in the middle allowing you to move it. Our printer was not detecting our black ink so we didn’t have this option.
- On your printer control panel, pick the option to change your print heads and that will also move it out.

Now, before proceeded with flushing liquid through the printer heads, unplug the cord to the printer to be safe!
How do I Clean the Printhead?
Set Up
Cut a piece of vinyl tubing (ours is 7″ long).

Connect one end to the syringe.

Cut a double layer of paper towel the same width as below the print head assembly. You can cut separate pieces but I find it easier just to fold it. Wriggle the paper towel underneath the printhead assembly, in between the rails, and then pull it along on the other side of the assembly.

Lay out a piece of plastic wrap. Open the top of the printer carriage (if it isn’t already open) and remove the cartridges.

Put them nozzle down onto the plastic wrap in the order you remove them. Then wrap them up tightly. This will prevent the ink from drying out as you process with the work.

Warm the windex in a glass dish in the microwave at low power for 10 seconds or so. You do not want it hot!
Connect the syringe to one end of the tubing.

Homemade printhead cleaning solution
Blotting Paper
Insert the paper towel underneath the print heads, in between the rails. The paper towel acts as a blotter. So ensure it comes out on the other side, as shown below, to catch the ink.

Place the end of the tube in the windex and pull up on the syringe util you have about 2 ccs of windex in the syringe.
Insert the end of the tubing over the first printhead.

Be gentle with this next step. Slowing push and pull on the syringe so the fluid is flushed in and out of the print head. You should see some ink colouring the liquid.

Do this for about a minute and until all the liquid has been pushed out.

Move onto the second print head. But first, slide the paper towel to the right to expose a fresh area. You’ll likely find after the first two printheads that the paper towel needs replacing.

Repeat this process for remaining printheads.
Once complete replace all the ink. On the printer we tap on maintenance, clean the print head and then run a nozzle check. If it doesn’t work the first time try again – or wait until the next day and try again.

Replacing the Cartridge
The printer was indicating our black ink was out, although the levels were looking ok in a previous check. It could be that the computer sensors are not detecting it, so be sure to try wiping the cartridge contacts (any shiny metal) first with isopropyl alcohol.
In our case, we replaced the black ink with a new cartridge. Check the expiry date first before installation.
Print Perfect
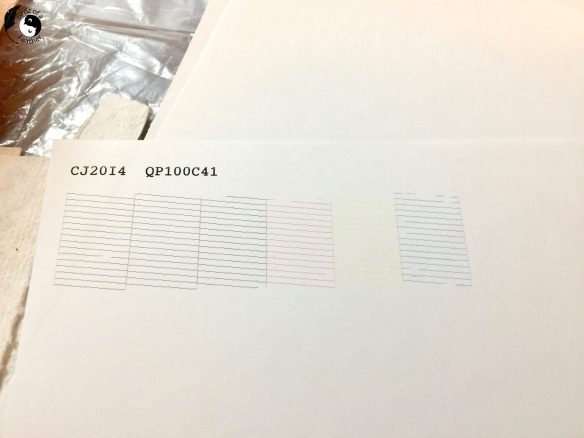
It took us two tries before we got a great test page with all the colours.
Now we can print again and I can get back to our geometric wall art!
Follow the recommendations for your printer for how often you should be printing and running maintenance so the print heads don’t clog with dried ink again. But if they do, you’ll know what to do.

Fall Into Fabulous
One of the things I love most about blogging is connecting with other makers, and this Fall we’ve created something truly inspiring together.
Grab 16 digital goodies from top creators — planners, recipes, colouring books & more — including our Beginner Crochet e-Book!
Every dollar of our commission goes straight to Alzheimer’s research — a cause close to our hearts. Your purchase through this link means you’re not just treating yourself; you’re making a real difference.
Grab it now — the bundle is only available for a limited time! Let’s make this Fall fabulous and full of hope. 💜

Pin How to Clean Printer Heads
I hope you enjoyed our post on how to clean printer heads; so many people may not even realize there’s an easy fix for a printer that no longer works well! Pinning is always welcome and appreciated.

Cleaning a Printer FAQs
How do I make my own printhead solution?
A homemade printhead cleaning solution is just as effective as a commercial solution. Depending on the type of ink your printer uses, you can use a detergent based solution or one containing ammonia or isopropyl alcohol. Water based inks don’t need as strong a solution as real ink which will need the latter. For our Epson printer, we’re using straight Windex from the bottle, gently heated in the microwave.
How can you tell is a printhead is clogged?
When the printer is not printing clearly, there are obvious missing dots, broken or wavy lines or you are ultimately getting blank pages, it’s a good indication your printhead is clogged and affecting the printer’s function. It’s time to unclog the printheads!
Very helpful I wouldn’t have even thought of this.
We hate to see anything going to landfill – especially plastic which doesn’t break down. Hope this helps people realize there might be an easy fix 🙂
I had no idea! Thank you for this. My printer went on the blink over the weekend. I am going to try it now.
How ironic! I hope it helps. If we save just one printer from landfill, we’ve done our job lol.
I hate sending things to landfill too! Thanks for this tutorial, I probably never would have thought of trying something like this. I know what to do in future!
Awesome! Hope you never need it, but if you do……
This is a very helpful tip. I have had this happen to me a few times so annoying and the automatic process isn’t very successful.
Give it a try next time you run into the issue. Hopefully it helps!
I did not know you could do this. It’s so good to learn something new! Thanks for the info! Will pin for future reference! Donna
We didn’t know either until we tried it and it worked! It was worth taking the chance since it wasn’t working anyway. One less thing in the landfill 🙂
This was just one week to late. I had the sane issue. I googled the fault and was given a guide to get into the manufacture reset system. But it did not work so I ended up buying a new printer. Great tutorial.
oh no – so sorry to hear that Anita! But now at least you’ll know what you do if it happens at some point with the new one 🙂
We have purchased a cleaning kit in the past. It worked for a bit. Seems like printers are manufactured for planned obsolescence these days.
It’s not just printers; sadly everything seems to be like that!
Wow! I had no idea . . . I am super impressed with your knowledge about cleaning the printer heads. Thank you for sharing – definitely pinned for future reference.
Awesome, thanks Anna!
This is so helpful! I never knew you could do this. Thank you for sharing! Pinned!
Thanks for sharing this information! I had no idea that the printer heads could be cleaned! I will have to try this when our printer stops working!
It really is handy; I had to write it up so we remember for next time too lol!
I had no idea that a printer head needs cleaning. I will be adding it to my spring cleaning list. Thank you for sharing how to do it.
Kippi
You don’t necessarily have to clean them unless the printer is giving you trouble so you might be able to hold off if that’s the case 🙂
oh oh! I never knew they needed to be cleaned. Thank you for sharing!
Only if all else fails; we did it as a last resort 🙂
For some reason, printers are my nemesis, thanks for sharing this!
I’m the same with anything electronic. Mysteriously the same piece of equipment can work fine for my husband but then stops working only when I use it! The coffee maker is a perfect example.
I have the exact same printer (Epson WF-3540), and I was having problems with the cyan and yellow cartridges. I followed your instructions to the letter, with the only exception being I used a recipe of 8 parts Windex and 2 parts isopropyl alcohol. I cleaned all 4 printheads twice, installed the ink cartridges, ran a nozzle check and then did a printhead cleaning cycle, then ran another nozzle check and another printhead cleaning cycle, and my printer is now working as good as new. Thank you so much for your very detailed, in-depth article, and also for providing links to the tubing and syringes you used. I ordered those items from Amazon and they worked great.
So happy to hear that our tutorial helped Lynda! These things still have life left in them and we’re all for keeping things out of landfill!
Does this also apply if the printer is not detecting the ink cartridge itself?
In that case, I would carefully remove the ink cartridge(s) and wipe away any dirt that might be on the contacts of both the cartridge(s) and printer with a lint free cloth. Replace and see if that helps.
Use damp cloth and wipe the chip on the head. This will do the work. One can also use ip solution to clean it. Still if there is no ink flow then best to replace the print head.