

Today we’ve got another unique upcycling idea for you: an old book turned it into an upcycled book ‘shelf’! Not to be confused with the book shelf you all know to store your books in! But a hardcover book made into a shelf! If that’s as clear as mud, you’ll see what we mean as the tutorial unfolds.
The Shelf
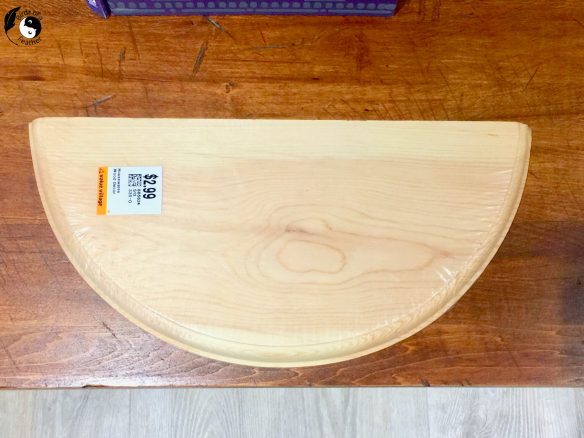
In the meantime, it all starts with this 23 year old IKEA corner shelf find. Made in 1999, it conjures up Prince’s iconic song. And people having meltdowns about what would happen in Y2K once the clock struck midnight and computers couldn’t recognize the year 2000! 1999 is the same year that PayPal launched and was voted one of the 10 worst business ideas.
Many catastrophic breakdowns were avoided in 1999. But things always have a way of working out for the best; just like this project! Now we’re resurrecting these shelves from the same era and saving them from landfill! Another catastrophe avoided!

If you can’t find 1/4 round shelves, then maybe a half-round shelf like this cut in half. Or finally, draw an arc on scrap wood using the method we used for our wooden wall art diy and cut your own!
International Bloggers Club
It’s time for the first International Bloggers Club (IBC) of the new year. The IBC is a group from all over the world who challenge each other every month to make something using a common theme. Our previous challenge was ‘Felted Fixations‘ and we created a mondrian inspired heart felt applique that would be a great gift idea for Valentines day!
When the International Bloggers Club challenged us to Bodacious Books, we had our work cut out for us to come up with something totally fresh and new. You’ll find our friends’ Bodacious Book projects at the bottom of the post. So don’t forget to check them out before you go. And if you don’t have time to browse today, pop back in later in the week to pick up where you left off.
Upcycled Book Video
Watch the video to see and learn exactly how it’s done. It’s not as easy as it looks! Behind the scenes Hubs and I are troubleshooting along the way so you don’t have to. I’m sure you have a book or two you may no longer want. Or pick one up at the thrift store to try this fun upcycled book project!
Upcycled Book Supplies
* [If you’re looking for some of the things we used, we’ve got you covered (disclosure): As an Amazon Associate, we earn from qualifying purchases. Clicking on the links in this post means we may receive a commission. But don’t worry, you don’t pay a cent more. Thanks for helping to support our blog!]
For this project, you will need:
- Hardcover book
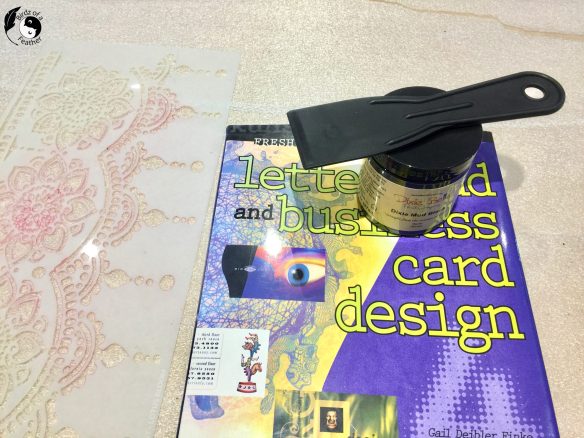
- Lotus Bloom stencil
- Texture paste. To make your own, you’ll need baking soda, Elmer’s School Glue and acrylic paint of your choice.
- Plastic putty knife/ scraper
- Paint of your choice (we used red)
- Metal book end
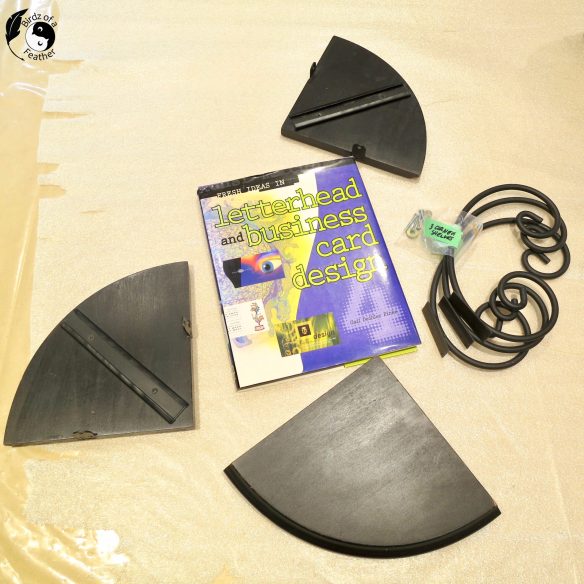
- Plastic woodworking ratchet clamps (ours are MasterCraft)
- Paint sticks
- Pencil
- #6 flat heat screws
- Cordless drill
- Punch (as wide as the screw heads)
 These corners shelves are a 3-shelf unit, but we’re only using one for this project. If you can’t find a similar IKEA shelf at the thrift store, cut your own out of scrap wood. These are just over 8″ along each edge. If you cut your own, you can cut them exactly to fit the width of your hard cover book (ours is almost 9″ wide).
The book really should be hard cover vs. soft cover because you need the strength for support.
Stencil Shelf
We’re using a red mineral paint but use whatever paint you have on hand. Don’t waste your money on expensive texture paint if you already have these things on hand: you can make your own texture paste by mixing 3 tablespoons of baking soda, 1 tablespoon of Elmer’s School Glue, and 1 tablespoon of acrylic paint (or chalk paint if that’s what you have on hand).
Clean the shelf and give it a scuff sand. Wipe away all dust. I clamp one end of the stencil and tape down the other end.
 Over the black, the Fiery Sky is pretty subtle, so I stencil on 2 coats. Normally you have to let Silk dry 2 hours between coats. But because I offload most of the paint onto paper towels so the brush is dry, I only wait an hour.
 I don’t usually clean my stencils between uses. But because I’m using mud in the next step, I did clean with a baby wipe.
Stencil Upcycled Book
The lotus bloom stencil on the shelf is beautiful and I’m dying to try raised stencilling too. So I remove the dust jacket and stencil right onto the hard cover with black Dixie Belle Mud. It produces an awesome raised effect!
I’ll likely do another raised stencil project soon because Dixie Belle is also launching some brand new stencils that I can’t wait to show you too!
Before you lift the stencil, let Mud dry for 5 minutes. If you lift any sooner, it could spread and you want it to keep its shape.

A Note About Dixie Belle Mud
When you’re done with the Mud, be sure to pop it into the fridge to store it for next time. Also, don’t wash any of the mud down the sink. Instead, clean your mud knife and stencil with a baby wipe or wet paper tower and dispose of it in the garbage.
Scottish Influence
Open the book to a page you want to display. I didn’t split the book exactly in half because I love the bagpiper. You’ll notice further ahead that my black and red colour scheme on the shelf ties in with the kilt colours!
True story about why I chose this page (I know I digress). When I was a little kid, my grandmother gifted my sister and I Schmid Bros porcelain music wind ups. My sister’s was a pretty maiden in a blue flowing dress and I got a Scottish lass in a kilt. Being young and naive, I burst into tears because my sister got the ‘pretty’ one with the melody to match (mine plays the folk song Blue Bells of Scotland). My younger self didn’t understand how special mine was at the time.
In retrospect, that gift had a lot of influence on me stylistically, because plaid has always been my thing. If you’ve watched our recent YouTube videos, (like the one at the start of this post) you’ll notice I practically live in Hub’s plaid shirt.
Ironically, the start of each book section has a similar lime green colour as the socks and pom pom on my Scottish lass (green is my favourite colour)!

One good thing about aging? Maturity clarifies perspective. I’m so honoured that my grandmother chose the Scottish music doll for me! The page I chose to display in this project is a reminder to appreciate what I have, and of how much my grandmother loved me! Oh, how I miss her!
Isn’t this Scottish lass beautiful?!

Mark Book Pages
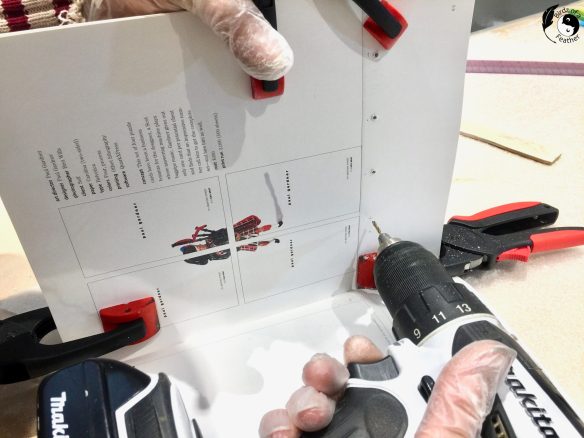
Back to the upcycled book! With pencil, draw a line that’s parallel to the bottom of the book where you want to place the shelf. The thickness of the shelf is 5/8″. So when you make your markings below that line, be sure it’s half the measurement of the thickness of the shelf. Place marks at even intervals as shown below. Our book is almost 9″ wide, so we’ll put 5 screws on each side.

Predrill Book Pages
Sure you could drill right through the cover to support the shelf, but with what we have in mind, that would be ugly. Who wants to see screws sticking out of a cover? Not me! Accordingly, there are four key steps to successfully mounting a corner shelf in a book:
- Use a bookend to prop one side of the book pages up so they stand 90 degrees. This is important because if you don’t drill the pages as they will sit when the shelf is in place, you’ll get wrinkles.
- To help stiffen and support the pages as you drill, clamp a paint stick at either end. One of the paint sticks should sit behind the drill markings you just made in the book. You must support the back page with wood or the paper will splay as the drill exits the paper and the shelf won’t sit tight to the book pages. You want smooth exit holes!
- Countersink the screw heads (more about how to do that in the next section).
- Predrill holes the same or slightly larger than the screw shank. We originally used a smaller bit (seen below), but a larger one will allow you to tighten the screws against the shelf giving you a seamless look against the book pages.
Screw Shelf into Upcycled Book
Since the shelf is black, I add painters tape to the two edges so I can see the pencil lines. Mark the shelf in the same intervals as you do the book pages. Predrill straight into the marks as shown.
 Now, line the shelf up with the lines made earlier in the book (stencil side up).
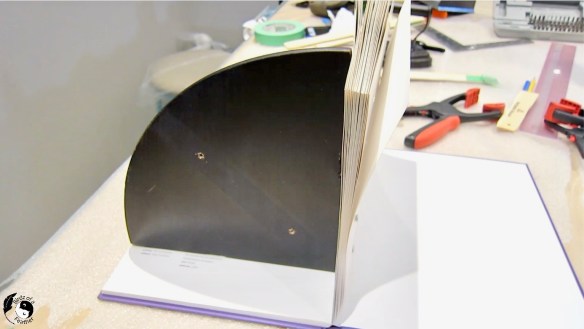
Countersink Screw Heads
Before adding screws, use a punch to remove paper from the first few pages; this allows you to ‘countersink’ the head of the screw so that it’s flush with the paper and the book covers will close flat. If you prefer, you can bring back the bookend, instead of the shelf, for this step.
 Vacuum up any paper debris as you go. I use an attachment that’s typically used to clean a keyboard so I don’t accidentally suck the paper from the book into the hose! You’ll see that in the video.
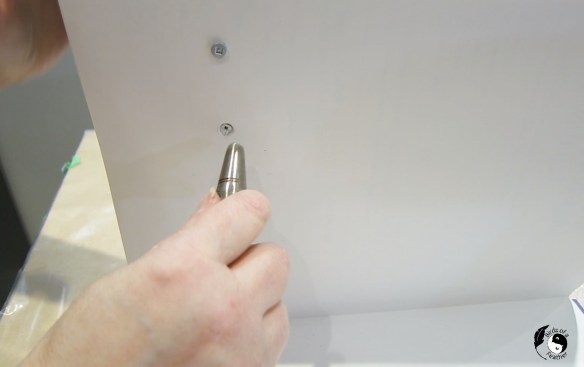
Insert Screws into Upcycled Book
Add screws onto one side.

Flip the book around and screw into the other side. The beauty of this process is that no screws show on the outside of the pretty cover with the raised stencilling!
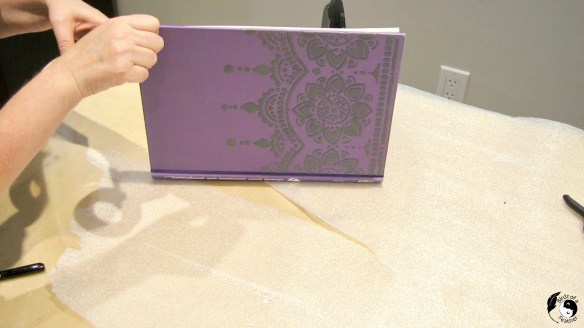
Once all the screws are in, you can now stand the book up to display it! But first, if you prefer, you can add some double faced tape around the edges of the cover so you can hide the screws. However, if you follow the 3 keys steps above, I don’t find this necessary. The book should stand just fine as it is once the shelf is attached.

Upcycled Book ‘Shelf’ Reveal
Here it is on display! Scotland is somewhere on that globe!

Because the book is open, you don’t necessarily see the raised stencil cover unless it’s on display somewhere that’s not against a wall. But I know it’s there and had so much fun trying mud for stencilling for the first time!

I’m definitely going to play around more with this idea. Besides, I have two more shelves left!
Fall Into Fabulous
One of the things I love most about blogging is connecting with other makers, and this Fall we’ve created something truly inspiring together.
Grab 16 digital goodies from top creators — planners, recipes, colouring books & more — including our Beginner Crochet e-Book!
Every dollar of our commission goes straight to Alzheimer’s research — a cause close to our hearts. Your purchase through this link means you’re not just treating yourself; you’re making a real difference.
Grab it now — the bundle is only available for a limited time! Let’s make this Fall fabulous and full of hope. 💜

Pin Upcycled Book
Pinning is always welcome and appreciated.

IBC Bodacious Books
Don’t forget to visit these awesome ‘Bodacious Book‘ projects from our creative friends below. You’re in for some incredibly creative upcycled book ideas!
- Interior Frugalista
- A Crafty Mix
- Birdz of a Feather (that’s us)
- Unique Creations by Anita

This must be one of the craziest, coolest book ideas EVER!!!! I would never have thought of using a book to make a book shelf, but it’s so awesome and definitely a conversation starter.
When people call my ideas crazy, I take that as the best compliment ever lol! Thanks Michelle!
What a clever and creative idea for a “book” shelf, Sara! Your tutorials (written and video) are always so thorough. I have an old corner shelving unit waiting in the queue for a makeover but after seeing this great idea, it may be going in a different direction than planned.
Thanks Marie! I’ve had these shelves forever and am so happy to finally find a creative use for them. The International Bloggers Club always brings out the best ideas in me :)!
I love plaid too. You are so creative to think of all these fun details. I have some old books that just might become a cute shelf too.
Happy New Year,
Kippi
That’s awesome Kippi; looking forward to seeing your version 🙂
so cute – gives me an idea for maybe using albums for my husband’s record room.
Thanks Rosemary! Using record albums is a great idea – especially with the great artwork on the covers!
Now that is unique bookshelf, Sara! I love the way you used the mud, too. Very cool!
Such a creative idea Sara! I would never have even considered turning a book into a shelf. Pinned.
This is just brilliant and so out side the box. I was very curious how you did it when I first saw the photo. You did a great job, well done.
Thank you Anita; it took a lot of trial and error but between the two of us we figured it out :).
Sara, love this idea so much! Very creative. Thank you for showing us how you did it.
Thank you Brooke! I just started crocheting again very recently so I surprised myself at how well these turned out!
Wow… now that’s just so clever Sara! I’ll be keeping my eye on a cool book to try this one!
Thanks Donna! There are all sort of cool books at the thrift store; I’m sure you’ll find something 🙂