

Did you know you can use Canva for surface design and design your own fabric? With Canva, you don’t even have to know how to draw!
Surface Design Patterns
A few weeks ago we showed you how to design your own fabric and promised to show you an easier way where you don’t even have to know how to draw! Today is the day to show you that. But more importantly? We’re showing you what we did with the first fabric pattern we designed, and it looks A.MAZ.ING!
Here’s the result of hours of work of drawing frogs in our last post to create ‘A Day in the Life of Frogs’. Using Canva will cut down that time drastically and ease you into learning the basics of surface design!

Just like our last post, you can print your fabric at a Print on Demand service like Spoonflower to use in creative ways. But even cooler than that? You can put your surface designs on wall art, home decor and more to sell on an online marketplace like Society6.
If you’re not interested in learning a bit more about surface design, skip down to “How to Reupholster a Sewing Stool” where we’re using this custom fabric to update a vintage stool.
What is Canva?
If you haven’t heard of Canva, it’s an online graphic design tool that is free to use for graphic design, social media, photo editing, YouTube thumbnails, resumes, presentations etc. Whether you are in the creative sector or not, there are tools to help you do just about anything where you want to add a little pizazz!
Do It Over Designers
Today we’re taking part in the Do It Over Designers blog Hop hosted by Ann at The Apple Street Cottage.
Coincidentally, this month’s challenge is fabric. How timely!

We’re a group of bloggers who take something old and/or unused and ‘do it over’ into something new. These items can be found in closets, barns, garages, yard sales, thrift stores, you name it! Check out the other projects at the very bottom of this post. And be sure to drop back in throughout the week to visit them all!
Don’t forget to get your craft mojo on at Birdz of a Feather and subscribe to our newsletter:
You can also follow us on Pinterest, Facebook, YouTube and Instagram.
Surface Design Classes
Take the Free Pattern surface Design Course
Before jumping in, you’ll want to take Bonnie Christine’s Start Simple in Pattern design free mini course. In just 5 lessons, Bonnie unlocks all the secrets to creating a repeating pattern in Adobe Illustrator to design your own fabric.
While Bonnie shows you how to hand draw some patterns, I was pressed for time and took a shortcut using Canva. Here’s the sewing notions theme fabric I was able to create using Canva – all without drawing a thing!

Sewing notions surface design pattern with scissors, zippers, pin cushion, spool of thread, tape measure, needle threader, bobbin and safety pins
Later in this post, we’ll be upholstering a cute sewing stool with this fabric which I had printed at Spoonflower.
I’m using Illustrator to create our fabric design (as Bonnie demonstrates), but you can also design your fabric repeat right in Canva. This video shows you how to create a simple fabric repeat in Canva.
Surface Design Without Drawing
In our last post, I showed you how to vectorize your drawings on Vectordad.com. When you gather graphics in Canva, it saves you so much time; you can just move on to vectorizing and colouring the artwork right in Illustrator!

Before we get into the fun stuff, let’s talk a bit about content licensing!
Content Licensing on Canva
Obviously when you’re not drawing your own original content that you have rights to use however you see fit, you need to be cognizant of what you can and can’t do using Canva to create and sell your designs.
Canva has a ton of free graphics like the ones you see below. But what if you want to use Pro elements in your fabric design but don’t want to pay for a subscription to Canva?

Well, you can purchase elements to obtain a licence to use for one off designs. For as little as $1 (or $1.39 Canadian), you’ll be covered to design digital and physical products that you want to sell! However, you might be better off to upgrade to a paid account to get unlimited access to all the pro designs. If you intend to continue designing, it will save you money in the long run.

If you’re wondering what is and isn’t allowed regarding content license and commercial usage, take a few minutes to watch this video from Canva. Note that your design has to be original; meaning you have to manipulate it in some way, shape or form if you ever want to sell your designs. For instance, after putting a little effort into creating your fabric, you can sell your design to other fabric enthusiasts on Spoonflower.
Directly from Canva’s website:
Canva’s Content License Agreement does allow you to use both Canva Free and Pro Content to design and sell a range of products (see section 5 of the Content License Agreement) such as:
-
- templates
- posters, mugs, t-shirts, stickers, and other printed products
- e-books and magazines
Canva’s Content License Agreement does not allow you to use Free or Pro Content to design and sell your own stock content (e.g. clipart files). If you want to sell stock content, you need to create your own designs from scratch.
Using Canva for Surface Design
You don’t have to do a sewing notions fabric theme like I did. With 100 million stock images, videos and graphic elements in Canva, there is no shortage of inspiration!
I put each graphic onto individual pages and exported them as PNGs. Once in illustrator, place the elements you want to use on your artboard. Then comes the decision on which ones to use to build your theme!

Create Your Colour Palette
You can use any source to create the colours you want to use in your fabric design. Have a favourite knit sweater? Take a picture with your phone and use the eyedropper tool to colour pick and fill your squares. Colour inspiration is everywhere. Here’s the source of our palette for our sewing notions fabric – using pictures of our garden!

After vectorizing, you can use the shape builder tool to colour in the ones you choose. If you like adult colouring books, you’ll love this part; it’s so fun!
How to Vectorize in Ilustrator
Vectorized graphics are ideal for designing your own fabric or surface pattern because you can scale them up or down to any size you wish without loosing quality. By contrast, a .jpg format would just pixelate and look blurry if you try to scale it.
Use a function called image trace to vectorize each graphic. Be sure to click ‘ignore white’ so your elements are on a transparent background after vectorizing.

Once traced, expand the element. I like to group it again so I can move it around without leaving things behind.

Shape Builder Tool
First, select the element you want to colourize. To use the shape builder tool, the shortcut key is Shift + M. Simply hover over each area and when you see the pattern, just click to fill in the colour.

Combine Surface Design Elements
Of course you can colour and leave your elements as individual designs. But why not combine them into vignettes? The three elements on the right were combined to create a grouping of the pin cushion, thread and tape measure. You don’t even have to colour them all. Since the tape measure was traced using ‘ignore white’, it will show through the background colour of your fabric (as you’ll see in the picture of the finished fabric further ahead)!

Customize Some Elements
Since this fabric is going into my craft room, I thought I would add our logo into the fabric on the sewing machine. It’s a fun way to work your branding into the pattern!

With all your elements coloured and customized as you like, follow Bonnie’s steps to set up your repeating pattern. I wanted 4 different colours of buttons, so the repeat accommodates a wider artboard/background. Your repeat can be as wide as you like!

You can see how this blue version of our Sewing Notions fabric design looks on over 20+ products at Spoonflower too.
Re-Colour Your Surface Design!
I chose to print the blue fabric above for our sewing stool project at the end of this post. But what if you want to play with colour? You can use the recolour artwork tool in Illustrator to randomly scroll through different colour combinations until you find one you like. I used the same sewing notions palette I set up initially.

Use Your Surface Design to Upholster
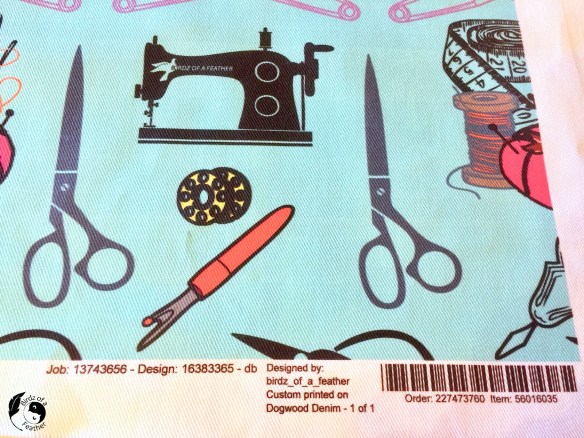
There’s really nothing more exciting than seeing how your surface design looks on actual fabric! This Sewing Notions Fabric is printed on 100% cotton in a fabric called Dogwood Denim. It’s a heavy twill and I think it will be great for upholstering!
Spoonflower folds the fabric when they ship it so you’ll have creases.

Final printed fabric of the sewing notions surface design pattern from Spoonflower
Be sure to iron out all the wrinkles before you start upholstering.
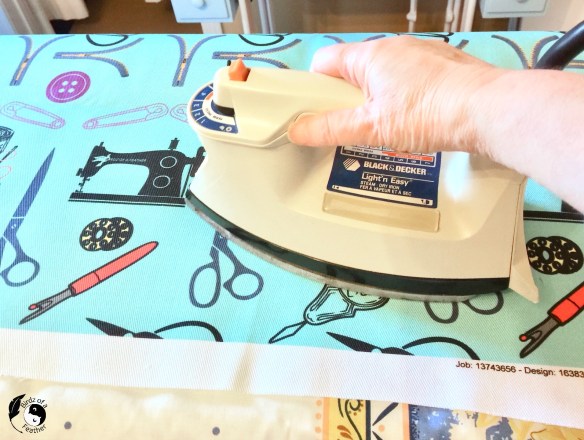
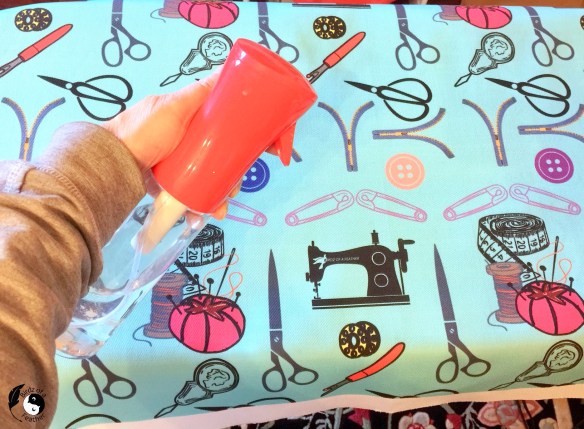
A fine mister bottle with distilled water works wonders when you set your iron to the cotton setting. I find this works so much better than the steam setting on my iron.
Prepare the Equipment
Posts on Birdz of a Feather may contain affiliate links. As an Amazon Associate and Spoonflower Designer, we earn from qualifying purchases which we proudly donate to Alzheimer’s research annually. See our full disclosure.
For this reupholstery project, you will need:
- Uvex safety goggles
- Fabric (Our Sewing Notions fabric is available for purchase in our Spoonflower shop with all proceeds donated to fund Alzheimer’s research)
- High density foam (only if you need to replace it)
- Batting
- Upholstery staple puller
- Arrow PT 50 pneumatic stapler
- California Air Tools Compressor or Porter Cable Air Compressor
- Fabric scissors (I use these industrial ones) or these Fiskars Spring Loaded Scissors
- Dust cover fabric or cardboard
How to Reupholster a Sewing Stool
Here’s the original sewing stool. It’s ok, but the fabric is boring.
I love that it has a back; we don’t see a lot of those. This is our go to chair whenever I cut Hubs hair (which I learned how to do during the Pandemic).

The fabric is actually in great shape, so I’m going to reupholster right over it.

But first, I’ll add a thin layer of batting to pad and hide the tucks in the original fabric at the corners, as you see below.

Disassemble the stool
The back is held on by 4 screws.
Tip 1: When you remove the screws, make note of which end of the back is ‘up’ so you don’t accidentally put the fabric on upside down.

Tip 2: I like to put the screws into a magnetic tray so they can’t accidentally get lost.

Add Batting
You only need a thin layer so I separate the plies.

To attach the batting, we’re using 1/4″ staples in a pneumatic stapler to tack it in place.

Cut the batting 3″-4″ bigger all around.

Be mindful not to cover the screw holes with either the batting or the fabric so make adjustments accordingly.
When attaching fabric, I typically first place a staple in the middle of each side. But since I don’t have to centre a pattern here, I start with the corners.
Pleat up the edges to ease in the fullness and put in 4 staples in each corner. Ensure the underside (the top) is perfectly smooth as you do this.

After the corners are complete, staple around the perimeter and cut away the excess.

Now, let’s move onto the fabric!

Staple on the Fabric
Switch to 3/8″ staples for the fabric.
Tip: To centre the fabric, I like to put a piece of painters tape and mark the middle so I know where to land when stapling the fabric.

Getting a smooth edge around rounded corners can be tricky with thicker fabric like this twill. I tried two methods.
Method 1 was to pleat and pull the fabric so the wrinkles only show underneath and not on top. That tends to leave a lot of bulk.

Method 2 is to cut away the fabric so the corners are mitred as shown, which reduces all the bulk.

Then tuck and pull what’s left in the middle. You’ll end up with two little tucks that won’t really show on the right side of the fabric; they’ll be hidden by the edge of the sewing stool.

Both of these methods looked smooth on the right side of the fabric, but I prefer method 2. I’ll have a DIY upholstery video up on our Youtube Channel shortly that shows how to cut the fabric to do the corners for method 2.

Here’s our reupholstered sewing stool decked out in our Sewing Notions fabric (which you can now buy with all proceeds going to Alzheimer’s research).

Now, isn’t this much nicer than the original beige? It’s so fun to see a fabric I created upholstered onto an actual item!

The fabric looks pretty good against the wood stain. However, I might paint the stool white when the weather improves and I can spray paint outside (see how to paint using a spray gun).
We have several tutorials on how to upholster chairs on Birdz of a Feather. Check out this Office Chair DIY to see how a pleated corner (method 1) is more effective with thinner fabric or how to upholster a dining room chair if you need to add new foam.
Fall Into Fabulous
One of the things I love most about blogging is connecting with other makers. And this Fall we’ve created something truly inspiring together: 16 digital goodies from top creators — planners, recipes, colouring books & more — including our Beginner Crochet e-Book!
Grab it now — the bundle is only available for a limited time at this price: use the coupon code FALLFUN to get it for $9.99!
As always, every dollar of our commission goes straight to Alzheimer’s research, so treat yourself knowing that you’re making a real difference! Let’s make this Fall fabulous and full of hope. 💜

Pin Using Canva for Surface Design
Pinning is always welcome and appreciated!


Do It Over Designers
Our talented blogger friends have some amazing and inspiring DIYs for you! Don’t forget to visit these posts for more upcycled do-it-over transformations!
That fabric is so sweet! The color and pattern is perfect for spring, so bright and cheerful! Interesting process, too. Thanks for sharing!
Thanks so much Kim! We finished this the day we got the biggest dump of snow of the year, so we’re looking forward to Spring lol!
I love the fabric you created, Sara and it really pops on your re-upholstered stool. Great job!
Thanks Ann; so exciting to see it come to life on our little stool!
I found this idea fascinating as I taught surface design and wrote a booklet on this subject for HS and College teachers (I learned some in Japan on a Fulbright). But I struggled with so many distracting ads/pop-ups on your blog post and the amount of time it took to load those ads. I will try to go back and read it again
That’s so interesting that you taught surface design Patti! Sorry about the distracting ads; they are a necessary evil to raise money for our Alzheimer’s fundraiser. Might as well donate it to a good cause 🙂
You’re so clever, Sara. I’ve been dying to try something similar ever since I saw your adorable little frogs. Knowing you can jump start the process in canva makes it so much easier.
Thanks Michelle! I hope you try it; I think you’d have so much fun!
You shared such a wealth of knowledge on designing fabric, Sara! Thank you! I was introduced to Canva when I first started on Bowdabra’s design team, but I quickly brushed it off for some reason I don’t remember now. I’ll have to re-visit that site. I love the design of the fabric you created and your sewing stool looks adorable!
Thank you Gail! You’ll love Canva; it’s so useful; even the free version is great!
Wow, that’s so cool. I knew you could have fabric printed that you design yourself but never knew how. Love the sewing chair 🙂
Thanks so much Tania!
Your chair turned out amazing! So much better than the beige. I love the blue and the images on your fabric. So fun and cheerful! I use Canva all the time and love it, but never thought of designing my own fabric.
Thanks Tuila; I couldn’t agree more. Colour is so much better than beige; especially in a craft studio where it should be fun. I used Canva because I was pressed for time when I took Bonnie’s free course. I’m so glad it actually worked out because it’s such a timesaver!
I love this pattern and the color, too. Nicely done!
Thanks so much Alys! Reminds me of my days as a fashion designer when I used to sew all the time!
I miss sewing like that, but I can’t seem to get interested again. Of course, sewing fabulous costumes on an industrial machine was really something. I still enjoy a good mend. How about you?
I do love to mend and alter too! Did a dress for my niece last year; she looked lovely in it! Hubs has so many vintage machines he has fixed, but I haven’t sewn much on any of them; I’ve lost interest too. I love my industrial machines but those vintage machines give them a run for their money! One day, I have to do a real sewing project and try them out.
The earlier machines were solid affairs and likely just as critical as the other home appliances at the time. Women made clothing for themselves and their families, as well as linens, curtains, etc.
It was a huge expense to be able to afford one back in the day, but they sure do stand the test of time. There’s hardly a machine my husband can’t get up and running again!
This is such an interesting process, and modern technology seems to make it SO much more do-able. I absolutely love your finished chair, that really is my cup of tea! It would look great in my craft room! 😀
Thanks Julie! We use that little chair all the time; it’s easy to move around!
The fabric you designed looks fabulous on your chair! You must be beaming with pride.
I do love how it turned out! Thanks Allyson!
I love the way this turned out Sara, and thanks for all of the ideas and tips on creating my own fabric. I have always wanted to do that, but thought it was out of reach! What wonderful knowledge to have. I love your design.
You should try it Cara! It really is a lot of fun!