

Did you know that you can make your own DIY Solar Eclipse Glasses if you can find the special solar film and have a laser cutter? With the solar eclipse just around the corner, I couldn’t wait to try these out on our new xTool P2 Co2 laser!
A total solar eclipse occurs when the Moon aligns with the Earth and Sun, casting a shadow on parts of Earth. While the moon is roughly 400 times smaller than the sun, on April 8th, the moon will be 400 times closer to the Earth, making a total solar eclipse possible!
Watch the Video Tutorial
xTool P2 Co2 Laser
We previously gave you a sneak peak of our new xTool laser when we did our Husky Workbench Assembly.

A special thank you to xTool who sent us this P2 laser machine to review. The opinions we share are honest and based on our own experiences. Our posts may contain affiliate links, but we only recommend things we’ve actually used and love. While we do earn from qualifying purchases, at no extra cost to you, we proudly donate all earnings from this blog to Alzheimer’s research annually. See our full disclosure.
We have an xTool P2 Co2 Laser Beginners Guide in the works. We’ll tell you all about the P2 laser in detail. But we put that on hold to do this fun time sensitive project with the eclipse less than a week away! After all, the next solar eclipse event won’t happen again until 2099! This is our last chance to view it in our lifetime.
Subscribe to our newsletter if you’re interested in learning more about laser craft in future posts:
You can also follow us on Pinterest, Facebook, YouTube and Instagram.
Safety First
You can’t just look at a solar eclipse without the proper specialized eye protection. Without the proper precautions, it can be very dangerous. Only use high-quality, ISO-certified black polymer solar filter film if you’re interested in trying this project out. FYI, you can’t see through authentic solar film; it’s a total blackout experience until you look at the sun.
DIY Solar Eclipse Glasses
First, I designed the file in Illustrator, then saved it as an SVG and imported it into xTool Creative Space (XCS). To line the frames up and make the most of your material, the P2 makes it ultra easy to zoom in with a closeup camera (one of two cameras).

The card stock we’re using for the frames is simple white bristol board from the dollar store. This one has a shiny and matte side. For the lens, Hubs obtained a scrap piece of certified solar eclipse film from a friend.
Since there are no settings for bristol board in the XCS software, this is going to require some experimentation to determine the power and speed for cutting through the card stock. We always recommend doing a test with your chosen material before your actual project.
In addition, to determine the thickness of the card stock to manually input it before cutting, we’re using EZ CAL digital callipers to measure. This material turned out to be 0.014″.

After some trial and error with test rectangles, we finally had success cutting through. The sweet spot settings for us for the power and speed was 40/80. Of course, you can get to the same result with different combinations of power and speed. But the important thing is not to go too high with the power as you don’t want the paper to scorch.  You can see by the squares on the right hand side that it took us 5 tries. You can also do a grid test for any new material you use. But we wanted to start with very low settings and work up slowly because I was nervous the paper stock would ignite.
We could have used the lower setting to score patterns onto the frames, which would’ve been cool! But in the interest of time, I had another idea to decorate these.
The 4 frames you see below will make two pair of glasses; we’ll be doubling up the layers to make them sturdy – and to sandwich the solar film in between.

Along with the frames, we laser-cut a paper star as a template for the ‘lens’. I wouldn’t attempt to laser cut the actual solar film; it will likely just melt.

Use the template to trace around the star. Then cut out the solar film with scissors.

DIY Solar Eclipse Glasses Assembly
To decorate these frames and give them pizzaz, we found this adhesive vinyl at the dollar store too! At only .50 cents a roll, it was an amazing buy!
There are vinyls that are laser friendly that you can likely pre-stick to the card stock and cut in one go.

But since this is dollar store stuff, I’m cutting it the old fashioned way – with scissors. Just stick it down and cut around the perimeter. I use an x-Acto knife to cut away the interior of the stars. Alternatvely, you can wait until you have both layers glued to cut around the perimeter of the vinyl. The extra thickness will guide the x-Acto knife in place of scissors.

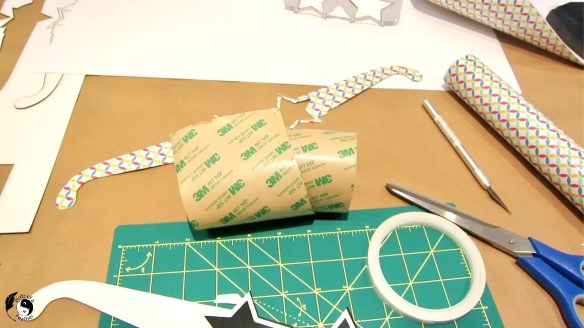
I tried one version of the frames with double sided tape, but it took forever to cover the entire frame and trim it.

And it was way too narrow so I had to roll out multiple pieces and trim them.

If you want an ultra fast way to stick two pieces together, use 3M 467 MP. You can adhere it before cutting, making assembly a breeze. I only have a small piece I’m saving for another project or I definitely would’ve used it!
The better method turns out to be glue. One of our favourite craft glues is Aleene’s Tacky Glue. Just spread it on in an even layer. 
Then lay the second piece on top.

I put some weights on them for about 20 minutes to ensure they would stay together. By the way, if you ever find vintage irons, they’re perfect for craft weights. We’ve used them in everything from how to fix veneer that is lifting to holding down a ruler to mark tape lines in this Hudson’s Bay Point Blanket Inspired Upcycle.
Use a scoring tool and metal ruler to emboss and then fold at the temples. You’ll want to score on the wrong side (the side without the decorative vinyl).

Use the iron weights again to permanently crease them.

I did a second pair of DIY solar eclipse glasses with the gingham vinyl too:

They both turned out fabulous!

If you can’t find the special film in time for the solar eclipse, these glasses would be fun to make for a party – kids and adults alike.

I couldn’t wait to see how they fit. Hubs is my ‘star’ model!

Pretty funky and far out – just like the solar eclipse will be!

Learn More About the Solar Eclipse
Want to learn more about the science behind the solar eclipse? Check out these resources from the Ontario Science Centre.
Get the Free Laser SVG
We’ll have more fun xTool P2 laser projects coming up in the months ahead. Don’t have a laser? You can buy one here. If you’re a subscriber and you’d like the solar eclipse glasses SVG file to cut with your own laser, all you have to do go grab it at our Birdz on the Fly Freebie Library.
The library is password protected so you’ll have to subscribe to to gain access to our newest DIYs, crafts, recipes and free patterns and printables.
Fall Into Fabulous
One of the things I love most about blogging is connecting with other makers. And this Fall we’ve created something truly inspiring together: 16 digital goodies from top creators — planners, recipes, colouring books & more — including our Beginner Crochet e-Book!
Grab it now — the bundle is only available for a limited time at this price: use the coupon code FALLFUN to get it for $9.99!
As always, every dollar of our commission goes straight to Alzheimer’s research, so treat yourself knowing that you’re making a real difference! Let’s make this Fall fabulous and full of hope. 💜

Pin DIY Solar Eclipse Glasses

Oh those glasses are so coooooooool. Love the star frames and patterns on the outside. I’ve been reading so much about the xTool lately but for now it’s little out of my budget.
Thanks so much Michelle! We weren’t going to post until we had a few projects under our belt but we couldn’t resist making these for the special occasion! The P2 is currently the most versatile in the line for larger projects – and especially for running a business. But there are many other affordable choices you could consider for crafting and they often run sales. We’ll have a Beginner’s Guide coming out soon where you can read all about the them and compare the differences.
What a clever idea Sara, I bet they will work perfectly. The xtool is a brilliant laser.
They sure do; looking forward to using them in a few days! The xTool is brilliant and we’ve only just begun :).
How fun are they?? Not only will your eyes be protected, but you’ll be stylin’. Neat tool, too. You guys are so crafty, I just know you’ll get tons of use out of it.
Thanks Kim! We’ll Definitely get a lot of use out of the P2! The only challenge will be deciding what to make next. We have so many ideas!
These are really cute! I had no idea you could make them!
Thanks Susan! We didn’t either until we tried lol! Happy solar eclipse day if you’ll be seeing it in your part of the world!