

We learned how to install LED lighting after undertaking a kitchen renovation to sell a home. Once we updated our kitchen, we changed our mind about selling. And after realizing just how easy LED lighting strips are to install, not to mention energy efficient, we couldn’t wait to do the same in our basement laundry room! Energy efficient features (and a finished basement) always add value to a home – whether to enjoy or sell.
Adding DIY under cabinet lighting is a great solution if you need more task lighting in naturally dark spaces – or on prep surfaces in the evening once the sun goes down!
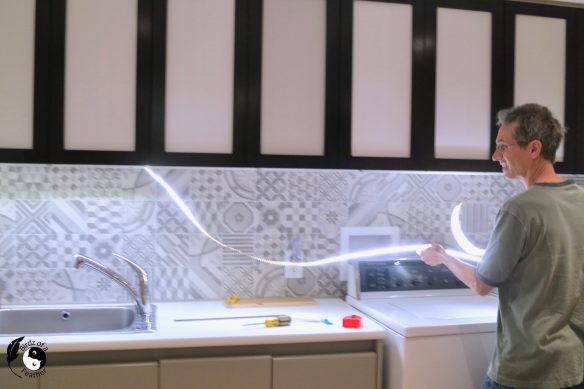
Installing LED tape lighting is an easy project (it has a self adhesive sticky back). But it doesn’t always go to plan (as you’ll read later).
When planning the lighting needs for your situation, keep in mind that you can purchase LED lighting with varying numbers of LEDs per foot (ours is available in 9, 18 or 36 LEDs per foot). If you want the option of dimming your lighting, purchase one that is specifically made to be dimmable with an AC dimmer.
Before we get into the tutorial, don’t forget to get your DIY mojo on at Birdz of a Feather and subscribe to our newsletter:
You can also follow us on Pinterest, Facebook, YouTube and Instagram.
Materials for LED Lighting Project
Our LED lighting is separate elements. To make it easy on yourself, you can also buy a kit with everything you’ll need.

- Armacost LED strip lighting (soft white)
- Wireless touchpad LED dimmer control
- Armacost 12V LED power supply (this one is 45 watt; (ours is 30 wattt which isn’t sold anymore)
- LED strip 2 pin connector (if needed to combine lengths)
- Scissors
- Tape measure
- Screw driver
- Aluminum channel and mounting clips
- Drill (if using aluminum channel)
How to Install LED Lighting
Wiring
You may set this up differently, but in our laundry room we located the low voltage transformer on the other side of the wall, in the furnace area. The transformer reduces the 120 volts of the electrical line into just 12V to run the LED lights.
To wire for the LEDs, Hubs just plugs in the transformer then runs the wire from the LED strip right through a small hole in the wall. Notice that he also wired in an LED dimmer, which is totally optional.

Since the hole is right underneath the cabinets, it’s barely noticeable.

Where to Place LED Under Cabinet Lights
Positioning of LED lights is important. Closer to middle front edge of the cabinet will allow the counter below to be well lit.
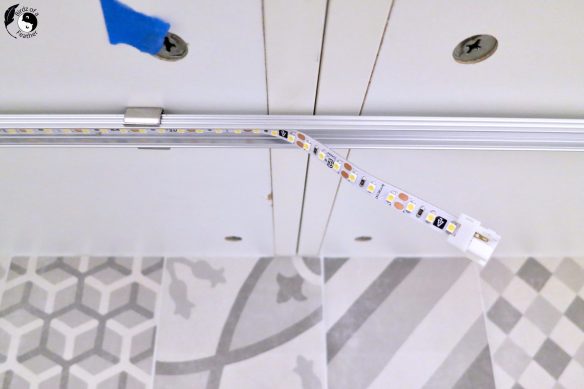
Because the LED strip lighting has a peel ‘n stick adhesive backing, you could stick it directly onto the undersurface of the cabinets. However our IKEA cabinets are perfectly flush on the bottom (no recess) and we didn’t want to be staring at bright LEDs directly. So we mounted the LED lights into an aluminum channel with a diffuser. Another advantage of this set-up is that it protects and keeps your LEDs dust free.
First, attach the mounting clips into the underside of the cabinets with screws. Then the aluminum channel snaps into the clips.

Easy peasy and ready for LED lighting!

Install LED Strips
Now it’s just a matter of peeling the backing.

And sticking the LED strip right into the centre of the channel. 
BUT…. before you do that, it’s a good idea to connect your strips and test them out first.
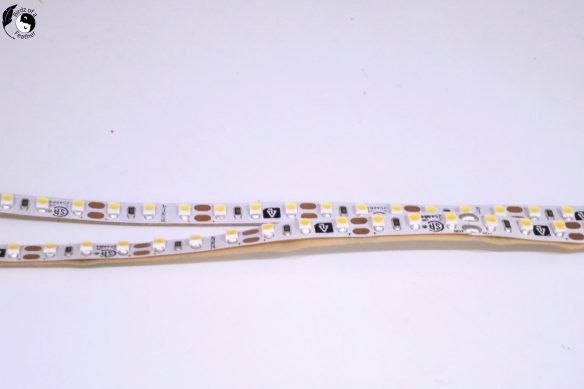
Why, you ask? Well, if you buy your LED strips from an open stock retailer, like us, it’s easy for the customer service rep to grab two different colour temperatures. Here, we have a cool white LED strip combined with a warm white. Not the look we’re going for.

It’s not a good idea to stare directly at LEDs, so we turned the lights off to make sure. Yup, that’s a distinctive yellow glow!

Luckily Hubs stuck down the cool white LED strip first! But he had to schlep back to the store to exchange the other strip. TIP: before leaving with your purchase, check that you get what you come for!
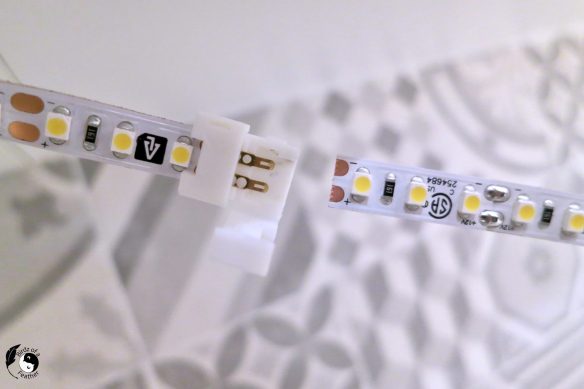
LED Strip Connector
Now that we’re back on track, it’s time to connect them! Multiple strips can be combined with one of two methods. You could solder pieces together with a wire lead, or even splice them. But you can also us a plastic connector to join two strips. We chose the plastic connector.
Notice the – and + signs on the LED strip below? When you connect two pieces, you have to ensure that you are joining like to like to maintain the same polarity. So you may have to turn your LED strip around.

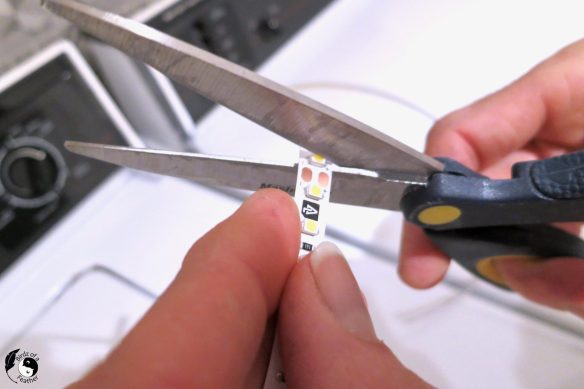
If using a connector, ensure that you cut half way through the copper (refer to directions to make sure this is correct for your own brand). The piece probably fine for soldering but likely too small for the connector and will get re-cut.
The LED strip easily cuts with scissors.
Peel the backing then slip the copper into the connector. Close the connector, ensuring it snaps shut. This can be tricky. So, if necessary, you can carefully apply pressure with pliers.

Test LED Lighting
Before moving on, test the lighting once again to ensure the connection is properly done.
After sticking down the rest of the LED strip, snap on the diffuser.

Diffusers also come in different options. We chose this frosted one over opal.

Installation complete and the aluminum channel is barely noticeable below our custom IKEA cabinets.

Last, but not least, to turn the lights on and off, we use this remote control.

Here’s a quick video from Lee Valley showing how to work with LED light channels and diffusers.
Funny story: before our first basement flood (and subsequent water leak repair), we’d come down to the basement and find our under cabinet lights on. Hubs thought I was leaving them on and vice versa.
We’ll never know for sure, but we think one of our nearby neighbours had a similar remote that accidentally kept turning our lights on. We ended up exchanging our unit and haven’t had a problem since.

Well the lights might be done, but the work is never ending. After this project, Hubs had to fix the orientation of our sink during our new laminate counter installation.

Other DIYs from Birdz of a Feather
Within the same month that Hubs did the LED lighting, he also DIY’d a mountain of other projects:
Building my VW desk with these upcyled kitchen cabinets;

Applying laminate edging on a shelf for this jewelry storage diy.

As well finishing this DIY storage shelf.

With Spring in the air, he opens our diy ponds for the season. Click here for how to create a small water feature for your front yard!

And his final DIY for the month is to replace a bathroom fan. Of course, by that time the weather is much warmer and the heat unbearable up in the rafters! Talk about sweat equity! Is it any wonder he’s so skinny?!

Get your DIY mojo on at Birdz of a Feather and subscribe! You can also follow us on Pinterest, Facebook, YouTube and Instagram.
Fall Into Fabulous
One of the things I love most about blogging is connecting with other makers, and this Fall we’ve created something truly inspiring together.
Grab 16 digital goodies from top creators — planners, recipes, colouring books & more — including our Beginner Crochet e-Book!
Every dollar of our commission goes straight to Alzheimer’s research — a cause close to our hearts. Your purchase through this link means you’re not just treating yourself; you’re making a real difference.
Grab it now — the bundle is only available for a limited time! Let’s make this Fall fabulous and full of hope. 💜

Pin How to Install LED Lighting
Pinning is always welcome and appreciated :).

This is a great reference for my husband he wants to have lighting in garage cabinet when we build.
Hope it will be helpful when he gets to it!
Oh my, it must have been quite confusing with the lights going on and off like that. I wonder if your neighbor also someone was playing tricks 😀 And if I knew it was so simple to put them up, I would have talked my hubby into doing it us a long time ago. They make such a difference
I’m so glad we investment the $s and time! We literally can’t see a thing in the laundry area unless those under cabinet lights are on. The basement is so dark otherwise!
Lighting makes such a huge difference installed under the counters. Pinning to give hubs ideas as he wants to replace ours.
We’re thrilled with it. Good luck with your replacement Leanna!
That is hysterical that the lights would come on and your hubby thinking you left them on 😂 This is a very thorough DIY post. Great job!
Thanks Karin! The more hysterical thing is the length of time it went on for but we finally figured it out 🙂
Great tutorial Sara, I am really jealous of your laundry room it is so posh.
Ha thanks Anita! I didn’t think it was so posh when Hubs dragged home the lower cabinets just for the sink, but we made it work. Upcycling at its best!
I need some under counter lighting and wish I could install but in an apartment will have to settle for stick on.