

Clean out those junk drawers to make a whimsical scrap robot! We all have junk, right?
This summer a sudden life threatening illness kicked me to the sidelines and I had to put creating on hold for what seems like an eternity. I was able to get out of my funk and get creative again when Hubs’ challenged me to contribute to a new maker space in conjunction with a new exhibit at the Ontario Science Centre. It was all about inspiring children so how could I not? :). You can read more about that at the end.
Although this DIY robot decor has been a welcome and fun diversion, I couldn’t have done it without Hubs. He helped me put this little guy together and has been amazingly patient while I continue to recover. Did I ever mention how much I love that husband of mine?

Admittedly, it was hard to find that creative spark again after being away from DIY and crafts for so long. After finishing this bot, I not only feel a sense of accomplishment, but he puts a smile on my face every time I glance over at him. I can definitely attest to the healing power of creativity. If you need a pick-me-up, maybe working on something creative will do the same for you!
Creative Craft Hop
Speaking of creative, welcome to another Creative Craft blog hop! I want to give a huge shout-out and thank you to Donna from Modern on Monticello for keeping this hop going in my absence!
If you’ve come from Niki at Life as a LEO Wife, we’re glad to have you here! Wasn’t her Dollar Tree Halloween Candleholder amazing? At the end of this post, we’ll guide you to the next stop on this journey. Make sure to explore all the other stops for a wealth of creative inspiration. Don’t forget to revisit us throughout the week to visit them all!

Before we get into the tutorial, don’t forget to get your craft mojo on at Birdz of a Feather and subscribe to our newsletter:
Recycle Robot Craft
Now, let’s get crafting! First, raid your closet for worn jeans you can cut the hems or seams from. then raid your junk drawers for metal findings and screws. This is what we’re using to make our scrap robot:

Materials for Scrap Robot:
[If you’re looking for some of the things we used, we’ve got you covered (disclosure): Clicking on the affiliate links below means we may receive a commission. We earn from qualifying purchases which we proudly donate to Alzheimer’s research. But don’t worry, you don’t pay a cent more! Thanks for helping to support our fundraiser!]
- Awl
- Drill
- Denim cutoffs (hems, side seams)
- Wood blocks (body: 2 1/4″ x 3″ x 1′; head: 1 1/4 square). Cut them from scrap lumber or thrift them in the toy section
- 4 round head screws (to attach hex nuts)
- Chain pull / ball chain with connectors
- 4 grommets
- Mini travel padlock (ours is vintage)
- Cap and washer for hat
- 2 mm aluminum wire – green (for glasses and denim inserts)
- 2 wing nuts
- 3 hex nuts (2 for eyes, 1 for neck)
- 2 tiny brass nails (to attach optional name tag)
- Brass thumb tacks / upholstery tacks
- Piece of thick leather scrap (try a secondhand belt)
- Hammer
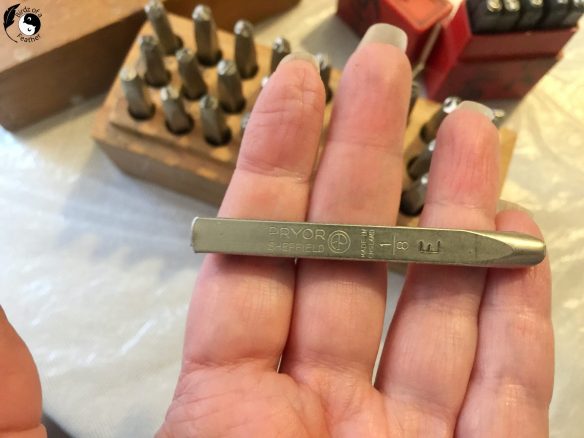
- Letter and number punches (optional; if you want to name your bot)
- Door stop (to help form the wire for glasses)
Making a Scrap Robot
If you are vertically challenged like me, chances are you’ve shortened a pair of jeans or two. Save those hem cutoffs as the jumping off point for this cute home decor piece.

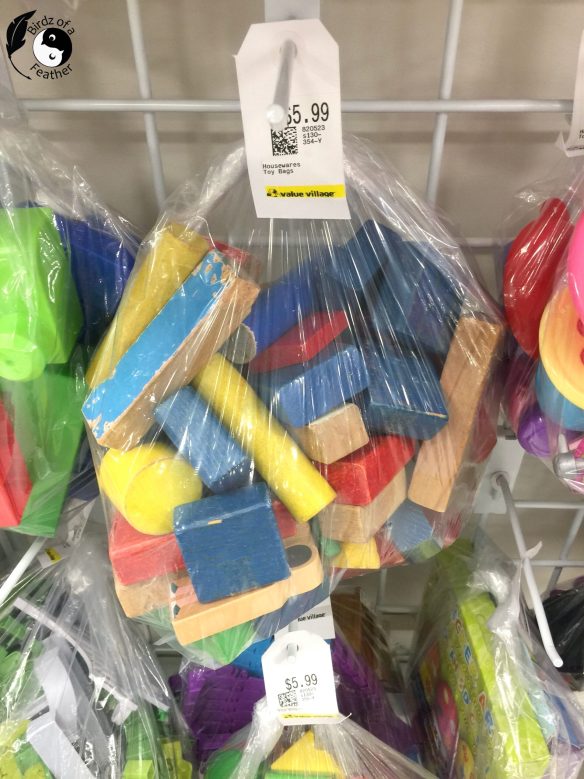
We always see bags of kids’ blocks at the thrift store. Or you can cut your own out of scrap wood.
DIY Robot
Grab a larger block for the body and use an awl to mark where the arms and legs will go.

This wood is fairly soft, so pushing in a thumbtack holds on the lengths of denim for the arms and legs. But before attaching, insert a piece of aluminum wire if you want to be able to pose and manipulate your scrap robot.

Finish off the arms and legs of the robot by threading on grommets to define the wrists and ankles.

Scrap Robot Head
This wood block is harder, so Hubs pre-drills before adding the nuts and screws for the eyes and wing nut ears. Then you can play to your heart’s content to create a face if you wish. Here are a few ideas:

Ultimately, the pull chain becomes a bracelet instead of a mouth.

Although an acorn nut and piece of plastic make a cute nose and mouth, I opt for simplicity in the end.

I find a little cap with a blue snakeskin pattern that matches the denim perfectly. Like it was meant to be!

Once we pair it with a grommet from an old light fixture, it’s a jaunty hat. Finally, I make glasses out of aluminum wire and the face is complete!

My tip for bending the wire glasses is to use something circular as a form – like the widest end of a door stop. Then, after bending the circles, it easily slips it off the narrow end without ruining the shape!

Drilling the Scrap Robot
Half the fun of this creative process is trial and error. I really want to be able to move the head into different positions, so Hubs practices on a scrap piece of wood to get the tightest fit for the end of a round head screw.
Unfortunately we drilled the block upside down …. oops! Good thing we have that hat to cover up the inadvertent hole!

Eventually we realize our mistake and flip it over to get it just right!

Now he can look around and see his surroundings!

By the way, his wing nuts ears can face in or out – the choice is yours!
 Name that Bot!
Before finishing our scrap robot, let’s give him a name using letter and number punches. This is a vintage set, but they are readily available on amazon and at Michaels.
I think ‘Padlock’ suits him just fine! First, I tried punching metal and different types of leather.
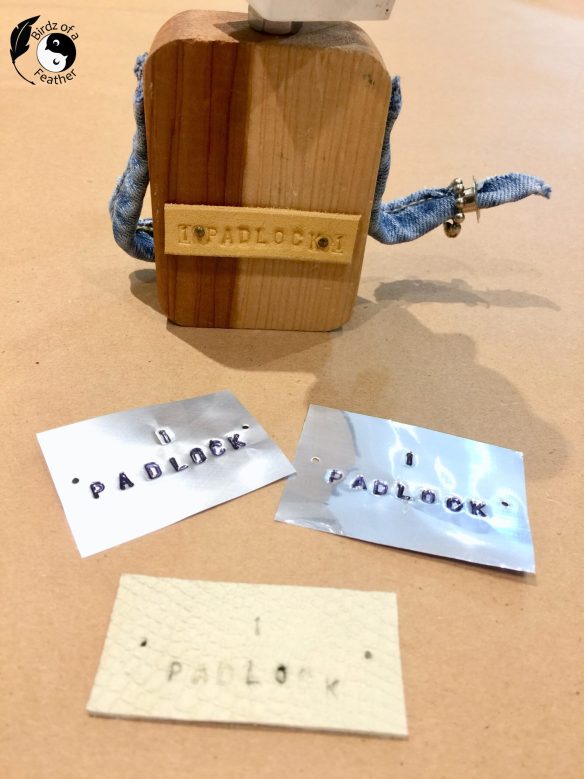
This thicker leather looks great! Some tiny brass nails hold it on. I add the number ‘1’ because who knows? He could be the start of a series of recycled robots.

Robot Reveal
Now comes the fun part. I really like how the succulents pick up on the green of Padlock’s glasses and necklace (his namesake)!

But with the bendable wire, you can prop Padlock on anything.

Or anywhere, like these DIY bookends, made from an upcycled sewing machine and vintage books.

Padlock would also look great relaxing on this upcycled book ‘shelf’, or beside this metal pulley don’t you think?
Inspiration to Get Creative Again
The Ontario Science Centre recently announced that Dinos in Motion will be on display until January. The creator of these incredible recycled metal sculptures (John Payne and Studio Properties) has engineered them to move with a series of pulleys that anyone can maneuver. How fun is that?!
It’s not only fun for the whole family, but a learning opportunity for kids to discover the science behind making these prehistoric creations. Here’s a peak of the exhibit at the Ontario Science Centre on Youtube and a more extensive reel on Instagram, but if you’re in the Toronto area, here’s more info so you can arrange to see the exhibit in person until January 7th, 2024.

Just as exciting as the exhibit, is the Maker Space where kids can get creative and make their own moveable creations! Spoiler alert: you’ll see Padlock on display there if you go! Or watch this fun segment of the Property Brothers giving us a sneak peak at the Builder Brothers Dream Factory on The Good Stuff with Mary Berg! You’ll see our makes on display 35 seconds in!

Although we simply used wood and metal bits and bobs for our DIY robot, I was also inspired to make a dinosaur out of metal findings too! After all, the show is Dinos in Motion! You can see that project is also displayed right beside Padlock in the same case. Unfortunately, Padlock’s top-hat got lost before he made it into the case but hopefully it will turn up somewhere :).

We named our dinosaur ‘Stomp’. And he’s made out of office supplies, sewing machine parts and metal closures from Bulletproof coffee bags.

UPDATE: Padlock’s hat DID show up and he was put on permanent display (or so I thought).

Premier Ford decided to shut down our beloved Ontario Science Centre so he could move it downtown to Ontario Place – all to build an underground parking lot for There, a foreign company that’s building a spa. He’ll likely confiscate the land and tear down this amazing heritage building to give to his developer friends.
I’m deeply saddened that the kids will no longer have a space to learn and create. If you live in Ontario, please sign the letter to save the OSC.

What the Kids are (Were) Creating!
Here’s a few of the awesome projects that the kids completed in the Maker Space using materials that were provided (I can see pool noodles, paper clips, test tubes, cardboard, electronic capacitors and pipe cleaners).

This guy looks like he’s ready for Halloween!

They all have so much personality! Half the fun is just figuring out what some of the pieces were in their former life! It really is upcycling at its best :).

Hope this post has inspired you to get creative with upcycling whatever stuff you have lying around!
Fall Into Fabulous
One of the things I love most about blogging is connecting with other makers. And this Fall we’ve created something truly inspiring together: 16 digital goodies from top creators — planners, recipes, colouring books & more — including our Beginner Crochet e-Book!
Grab it now — the bundle is only available for a limited time at this price: use the coupon code FALLFUN to get it for $9.99!
As always, every dollar of our commission goes straight to Alzheimer’s research, so treat yourself knowing that you’re making a real difference! Let’s make this Fall fabulous and full of hope. 💜

Pin Scrap Robot
Pinning is always welcome and appreciated!

Creative Craft Hop
Now it’s time to check out these winter wine glasses from Jenna at The Painted Apron. When you’re done, please remember to visit these other amazing talents below:
- Winter Wine Glasses
- Candy Corn With Pom Poms
- Fall Wreath Using Fabric and Burlap
- 5 Easy Steps to Make a Thanksgiving Wreath
- Wickedly Whimsical Salvaged Chandelier Centerpiece
- Upcycled Plastic Cup Vase
- DIY Dollar Tree Halloween Candleholder
Padlock is absolutely adorable, Sara. I’ve been saving different bits and bobs (junk) to make an upcycled creature for a while now. You’ve inspired me to get them out and see what I can create! Also, let me say, “Welcome back” . I’m so glad you’re feeling better and have found your creative spark again!
Thanks my friend! You should definitely drag that stuff out and see what comes of it; I guarantee you’ll be amazed at what you come up with.
Your scrap robot is adorable Sara! I would smile every time I saw him too! I am so sorry you’ve been so sick and am so glad you’re on the mend and back to crafting! The Dino exhibit sounds fabulous {I love the dino you made!} and what a great way to teach children the importance of upcycling. You’re creativity {and your husbands!} really soars with this robot creation, wow! Thanks so much for hosting our group and I’m so glad you’re back!
Jenna
Thank you Jenna! Its so great to be back and creating with the group again :). Really missed you guys.
Oh my! How cool is Padlock, Sara! What a fun way to recycle! Especially for kids! And the Science Centre you’re involved with gives the kids a rewarding and memorable crafting experience while also learning about recycling and upcycling! I’d like to also mention that I’m so glad you’re on the mend and back crafting and hosting! I had no idea you had a life threatening ailment. Virtual hugs and kisses to you!
Thanks so much Gail for your lovely comment! I am so happy to be back :). And it’s so rewarding to be able to pass my love of upcycling onto the next generation!
WOW, Padlock looks amazing and your dinosaur is looking extra awesome, too. You certainly have recovered with a creative bang!
Yes, I guess I’ve been saving it up for far too long lol
Sara, I adore your scrap robot and I love that you are creating as you recover! Thanks again for hosting! Blessings, Cecilia @ My Thrift Store Addiction
Always a pleasure you host the group!
Sara, what creative and cute project. Great way to use up odds and bits we find in our drawers. Happy to know that you are feeling better and back to creating.
Thanks Carol! I’m so happy to be back to creating; it really does help with the healing process.
Yay!!!! You’re back. How I missed seeing your creativity online, Sara. Padlock the 1st is adorable, BTW. If ever you decide to start an online challenge to make upcycled robots, count me in. My mind was all over the place reading how you made him. And seeing what the kids came up with is beyond amazing. Such a great way to teach our new generation about upcycling and being creative.
Welcome Back my friend.
Thanks my friend; I’ve missed everyone and am beyond happy to be creating again! I do want to create more robots; we may have to add it to our IBC challenges next year. And I agree that the kids stuff is so amazing; their creations blow me away.
Programs like this are so important to the next generation. Our government wants to move the science centre to a sub-par location downtown; it would be even sadder if programs like this cease altogether! I really hope for a miracle and it stays where it is.