

Looking for a unique Valentine’s idea? Today we have an easy felt appliqué DIY. I love exploring different ways to use stencils with felt and this proves that you don’t have to just use paint as your stencil medium. This is such a cute idea for Valentines day – but it would work any time of year because off the Mondrian theme!
The best thing? This totally transforms a stool without doing a thing to the stool itself!
Using a stencil from Old Sign Stencils, we’re creating a Mondrian heart stool cover by fusing felt. That’s right, we’re breaking out the hot knife and melting it in place! I often use stencils in a way that’s outside the box, like this wooden sled decor or this hot cocoa bar sign, so why should this be any different?😉

Inspiration Behind Felt Appliqué
As a former fashion designer, I’ve always loved Yves Saint Laurent’s Mondrian dress. It’s based on the abstract paintings Piet Mondrian is most famously known for with it’s signature primary-coloured red, blue and yellow squares and rectangles. The influence of Mondrian’s work extends well beyond art and fashion and has influenced furniture too. So now we’re reinterpreting it in felt as a seat cover for this antique glass ball claw foot piano stool.
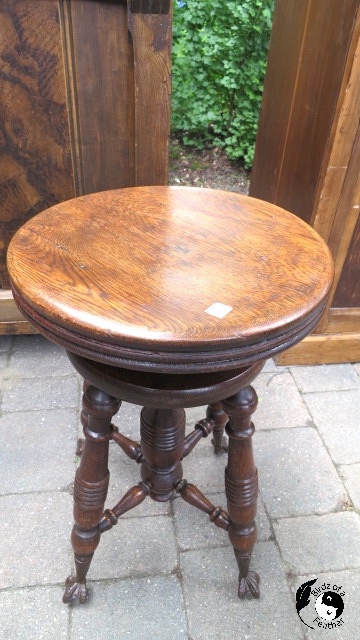
We found the piano stool at a yard sale and ending up paying very little because one of the spindles was broken. We’ve been using it as a plant stand ever since but it’s time for an little update!
Felt Applique Mondrian Heart
Learn how to use a stencil burner to fuse felt together into a Mondrian heart stool cover. Or continue below for the written tutorial.
Materials for Felt Appliqué
* [If you’re looking for some of the things we used, we’ve got you covered (disclosure): Clicking on the affiliate links below means we may receive a commission. But don’t worry, you don’t pay a cent more and it helps us make more unique crafts to share with you! Thanks for helping to support our blog!]
- Old Sign Stencils – Heart Stencil
- Stiff industrial 1/8″ inch synthetic felt (.5 metre black and 1.25 metres grey)
- 6″ x 6″ felt squares or craft felt sheets (blue, red, yellow, white)
- Staedtler Protractor with extension bar
- Grid Ruler
- Wood metal edge ruler
- Plaid Stencil Cutter/burner
- Piece of clear glass
- Fons & Porter mechanical fabric pencil or Fons & Porter chalk pencils – I used blue and white
- Fiskars Titanium Easy Action Scissors
- Paper scissors
- Fiskars Softgrip Fabric Shears
- 45 mm Olfa Rotary Cutter
- Fiskars Gingher Curved Embroidery Scissors
- Pencil
- Brown craft paper for pattern tracing
- Printer/scanner
- WilFiks leather hole punch tool
- Yarn or cording (I used a lime green mercerized cotton yarn)
Mondrian Pattern for Felt Applique
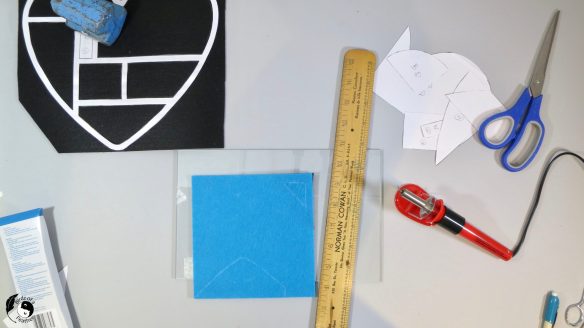
Start by measuring the top of the stool to determine the diameter.
Measure half the distance on a protractor. In our case, that’s 7″.

Draw a circle onto the brown paper.
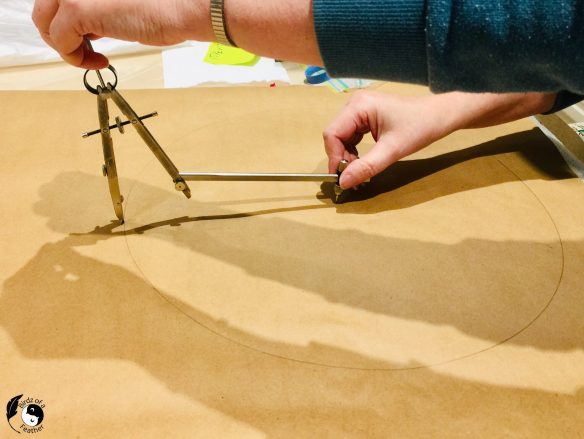
Use the grid ruler to add on 1/4″ seam allowance and cut the circle out.

Fold circle in half to centre the stencil. Then trace around the heart stencil.
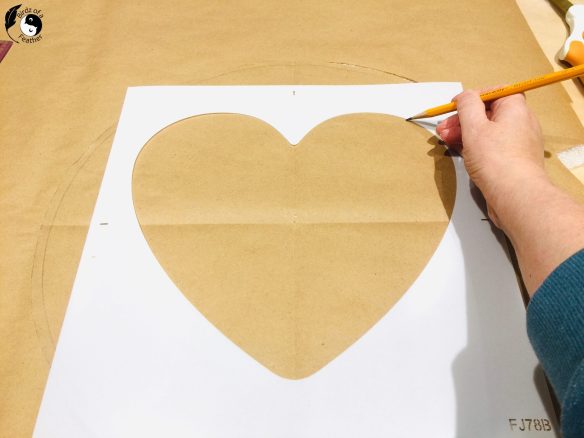
Add 1/4″ around the interior of the circle. Then fold the circle keeping parallel and perpendicular to the centre fold. This will help with the grid pattern. Create 1/4″ grid around each shape.

After the grid is done, scan it into a computer to create the pattern (if you only have 8 1/2″ x 11″ paper, you will need to piece it together.
Decide what colour you want to make each piece and label the pattern pieces accordingly.

Trace Felt Appliqué Pieces
Use a pair of curved scissors to cut out the interior of the heart.
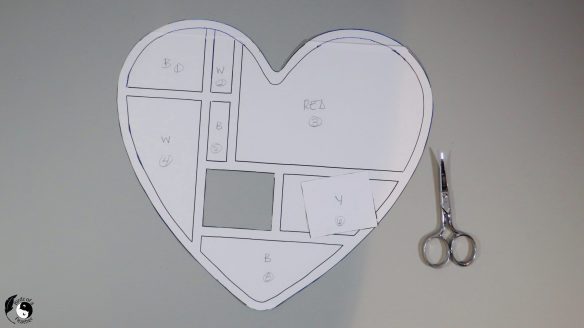
Cut all but one piece, which will be cut later. Leaving one piece intact makes it less fragile; that’s where I put the weight to hold it while tracing.
 Using the chalk pencil, trace around interior and exterior lines of the heart onto the black felt.

Cut Dollar Store Felt Squares
This pack of 6″ felt square is what we use to fill in the felt appliqué. Pull out the red, blue, white and yellow squares.

Again, use a mechanical fabric pencil or chalk pencil to trace around the pattern pieces cut from the interior of the heart. I love this mechanical chalk pencil because it gives me a thin, sharp line.

Tools to Cut the Felt Appliqué
I’m using a stencil burner to cut the felt which does double duty to fuse each oolour to the black heart! I don’t know what felt is actually made of, but many synthetic felts are made from recycled plastic water bottles. For that reason, please do this is a well ventilated area.
If you’d rather not use a stencil burner, there are other options. You can trace and cut the felt with scissors. Alteratively, print your pattern on the paper side of freezer paper, then cut around each piece leaving some allowance beyond the lines. Iron the respective pieces onto each colour felt and cut it with scissors. Take care not to iron onto the bare felt which can potentially melt onto the iron!
Also note that freezer paper has a plastic coating, so iron plastic side down or it will melt onto the iron. For that reason, it’s a good idea protect the ironing board with some scrap fabric.
How to Cut Felt with Stencil Burner
This technique is best explained on the video, so watch it for a better understanding of how this works.
Plug in the stencil burner and allow to heat up according to directions. Place a piece of glass on your work surface. You can use a piece of glass from a picture frame for this.
Be sure to use a wooden ruler with a metal edge. The metal edge will guide the burner and the wood will not heat up as you hold the ruler.
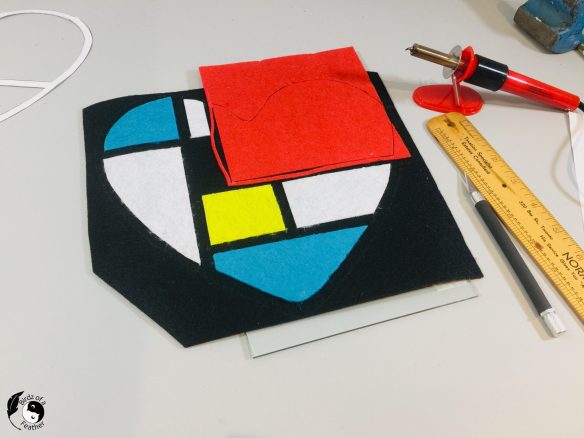
After tracing the piece, cut around it on at least 3 sides, leaving some allowance. Position it onto the black felt so it lines up with the chalk lines underneath. As shown on the video, you can use a pin to help position each corner and check for accurate placement.

Position the ruler with the metal edge out. Bring the tip of the stencil burner to the beginning of the line and touch it against the metal edge. Lower it onto the felt and drag it along the line until you are at the other end. Don’t press too hard – you’re not trying to cut away the black – just the top colour layer.
Leave the ruler in position, hold it down and give a tug on the felt to see if it easily separates. If not, go back in with the burner ensuring you are up against the metal.
Troubleshooting
You can also use the curved scissor or a craft knife to coax apart some of the stubborn threads that don’t want to separate.

Rotate your work. When you position the ruler, it should always be placed on the inside of the piece you’re cutting. This will give a flawlessly straight line.
I find that free handing the curves can sometimes result in a wobbly line. As shown on the video, you can also use the straight edge to guide the curved lines. This may take some practice.
After lifting the piece, ensure your corners are right to the edge. I missed the lower left corner below, so put the rule back on and completed the line.

Reveal the Felt
Now pull away the edges of the felt leaving your fused piece of felt on the black.

While you work, ensure that you are cutting on top of the glass.
After finishing the second last piece, don’t forget to cut the one piece you left at the beginning, to stabilize the heart grid, to fill in that last space.

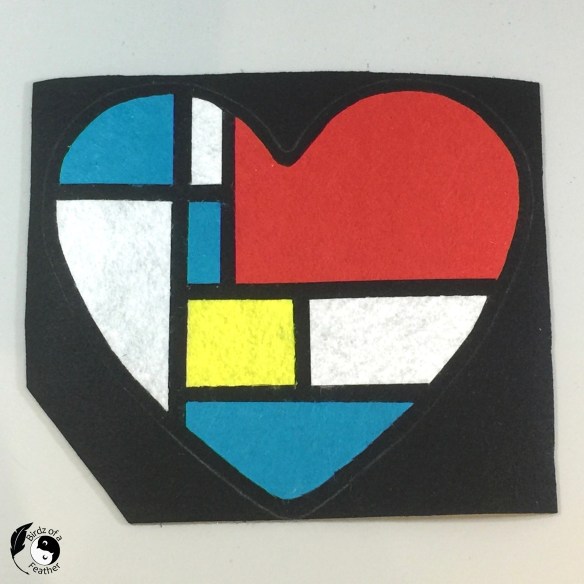
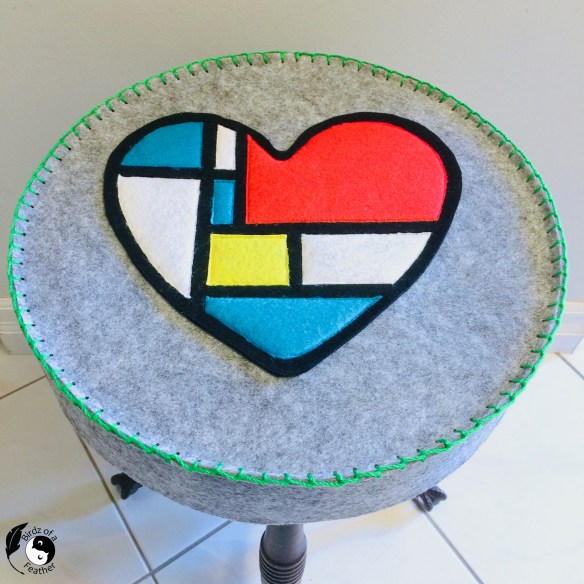
Mondrian Heart
The beauty of this technique is that the pieces are now fused in place to the background. No need for pins for the next step.
If the chalk has faded on the perimeter, use the stencil to re-trace the heart and cut it out. However, if you find the pattern has ‘grown’, use the grid ruler instead allowing 1/4″ seam allowance.
Felt Appliqué Seat Cover
Now use the original template to cut the circle out of the grey industrial felt.

Isn’t the Mondrian heart looking fabulous so far? To attach it to the grey felt, I’m going to topstitch it on. 
However, I don’t want to use any ‘ol regular thread and detract from the colours. Instead, I’m using this invisible tread. It’s so invisible, you can’t even see it in the package (I’ve already removed to wind the bobbin) 😉.

Using a long stitch length, stitch close to the edge around the perimeter of all the coloured pieces to attach.

Stitching done! If desired, you can stitch around the outside of the black heart also (I didn’t do that).

Felted Stool Cover Gusset
In addition to sewing on the felt appliqué, the last step is to create a gusset to go around the edge which we’ll blanket stitch together with the top. To do that, you’ll need a little math to figure out the circumference of your circle. Just multiply the diameter of your circle by 3.14 to determine the length.
My measurement turns out to be 44″ long, but add a few inches onto your particular length for overlap at the back. Also determine the width you want (ours is cut 3″, but could have been narrower).
Chalk it out before cutting. The best way to get a perfectly straight edge is to use a rotary cutter with a metal ruler on top of a cutting mat.

If you have small kids, hide the rotary cutter well when you’re done. But not so well, you can’t find it again!

After that, it’s back to the original seat cover pattern. You can mark directly onto the back of the felt with the chalk every half inch along the seam line. But instead, I mark the paper pattern first (to save time next time I use it). Then I use a pattern notcher to notch around the pattern.
I put the paper pattern onto the back of the felt and use the blue chalk pencil to place a dot at the tip of each notch.
Punch Holes
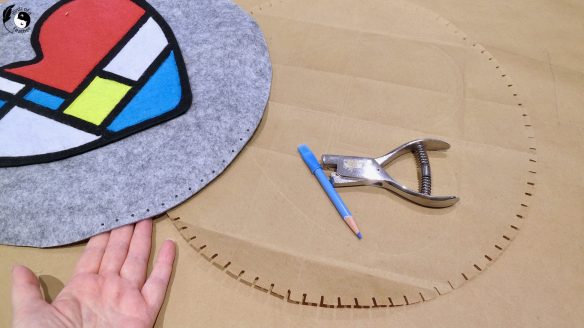
First, chalk a 1/4″ line along one long edge of the gusset first to represent the seam allowance to guide you as you punch.
Using a punch tool, such as the one shown below, create holes at 1/2″ intervals around both the circle and one long edge of the gusset. 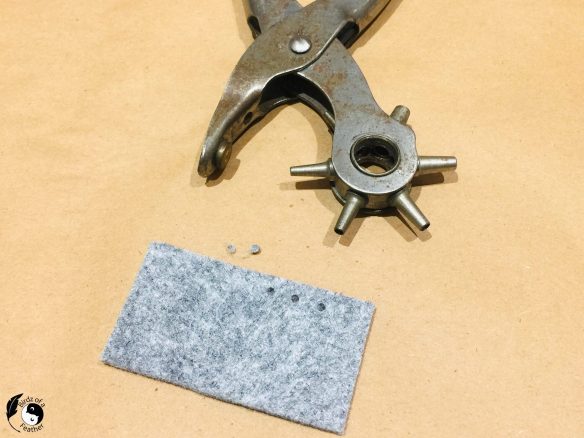
I used Hubs’ old leather punch and found that it can be hard on the hands when you go to town punching a hole at every dot, so break it up in intervals. After some research, I now have this WilFiks puncher on order and can’t wait to give it a try next next time I need holes for a project!

Once all the punching is complete, I chose to blanket stitch around the edge to bring the two pieces together. Start by placing the gusset behind the circle and clipping to hold. Skipping the first two holes on the gusset, blanket stitch from left to right around the circle until back to the beginning. Overlap at the back and stitch through all layers. See the video for how to do the blanket stitch.
I love how the lime green looks against the grey felt.
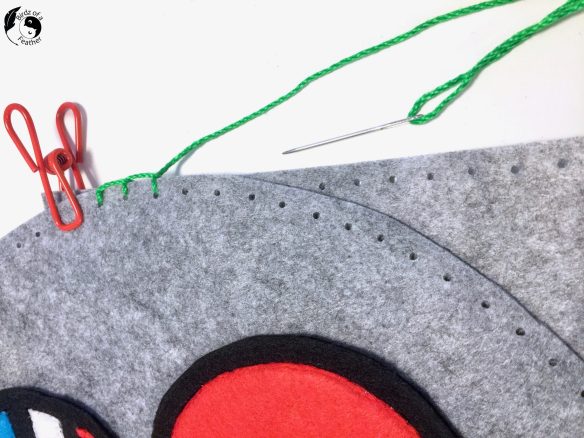
Since the holes are pre-punched, this is something you easily can do while watching TV. Finally, a chance to relax :).

Wooden Stool Makeover
Before our felt applique transformation, the top of the vintage wood piano stool is looking a little worse for wear.

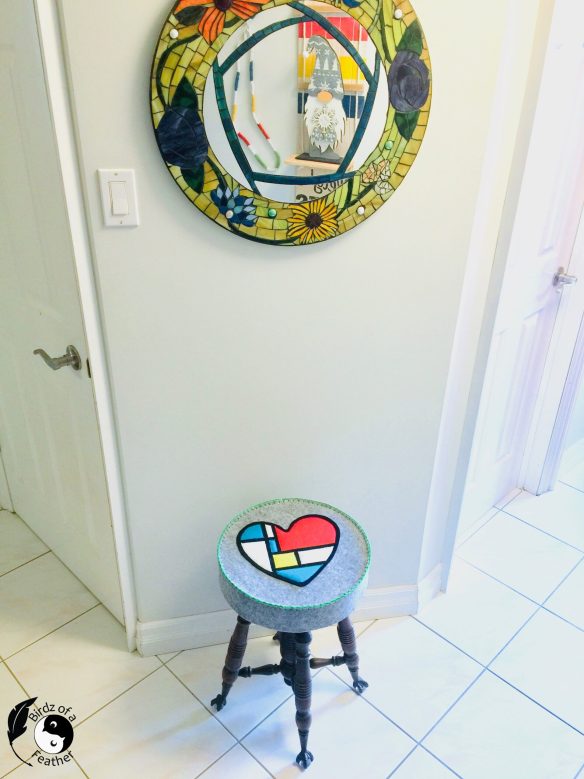
So pop the new felt stool cover onto the stool and enjoy the updated look!

Easy Felt Applique
One day I may transform the stool with paint. But for now I love it just as it is.
Although this isn’t a Christmas project per se, it would make a great Christmas gift! And if you look closely at the reflection in the mosaic mirror, you can see last year’s colourful Christmas projects: our Christmas stocking DIY, Christmas Sleigh Decor and Gnome DIY (using the grey same felt)!
I don’t often gush over our upcycles, but I have to admit, I heart the Mondrian heart! The combination of colours brighten my day.
If you have bar stools, imagine how cool a whole row of them would be covered in felt! You could even add padding if you wish.
Looking for a unique Valentine’s gift that can actually be worn? You’ll want to make our DIY Charm Necklace!
Pin Felt Applique Stool Cover
Pinning is always welcome and appreciated:

For another unique way to cut felt, you have to check out this felt craft post!
Fall Into Fabulous
One of the things I love most about blogging is connecting with other makers. And this Fall we’ve created something truly inspiring together: 16 digital goodies from top creators — planners, recipes, colouring books & more — including our Beginner Crochet e-Book!
Grab it now — the bundle is only available for a limited time at this price: use the coupon code FALLFUN to get it for $9.99!
As always, every dollar of our commission goes straight to Alzheimer’s research, so treat yourself knowing that you’re making a real difference! Let’s make this Fall fabulous and full of hope. 💜

IBC Felted Fixations
International Bloggers Club
It’s time for this month’s International Bloggers Club (IBC). The IBC is a group of bloggers from all over the world who challenge each other every month to make something using a common theme. Our previous challenge was ‘Beads Galore‘ and I took a trip down memory lane to create a diy dream catcher.
When the International Bloggers Club challenged us this month to Felted Fixations, I thought for sure I would needle felt something like my needle felted elf. But I couldn’t resist the mondrian felt heart!
Visit these awesome ‘Felted Fixation‘ projects from our creative friends below.

- Unique Creations by Anita
- A Crafty Mix
- Interior Frugalista
- Birdz of a Feather (that’s us)
Felt Applique FAQs
What types of felt are there?
Felt is a great choice for crafting, home decor and fashion. Here’s are some of the choices to consider for your next felt project.
- Craft felt. This is a synthetic material made from polyester, acrylic or rayon. Unless you’re getting it at a fabric store on the roll, craft felt tends to be on the thin side and most come pre-cut into specific sized sheets. You can also find it with an adhesive backing, but I find that it tends to gum up my scissors when cutting. The craft felt used in this project came from the dollar store and was pre-cut into 6″ x 6″ sheets, but 9″ x 12″ is also a common size online and in craft stores such as Michaels. Craft felt is great for applique because it’s pliable and not too thick so sew through by hand.
- Eco-friendly felt. Made from post consumer waste, such as plastic water bottles, this type is stiffer than craft felt.
- Blended wool felt. 20 – 35% real wool fibres combined with rayon. The wool content give this fabric a softer feel than the previous two.
- 100% wool felt. Real wool felt is expensive and comes in a variety of thicknesses. Used by professionals, architects and designers in apparel (like hats) and home decor (trivets, wall art etc). I wouldn’t attempt to do trivets with anything other than real wool because it can handle the heat.
- 100% wool roving. Wool roving can be felted with the use of a felting needle to matte together the fibres and create two or three dimensional felted sculptures (like our needle felted duck and needle felted VW Beetle.
Is felt good for applique?
Felt is the ideal fabrication for appliqué because the edges don’t fray. And with our hot knife technique, you can just fuse it right in place before stitching around the edges. It holds everything in place while you permanently sew it on!
Is Felt Applique Difficult?
With the right tools, felt applique is easy! Just transfer your patterns with chalk pencil and it brushes right off. For special patterns with clean lines, like this Mondrian inspired stool seat cover, applique the pieces with invisible thread right on the sewing machine instead of by hand.
How to you sew two pieces of felt together?
Punch holes 1/4″ in from the edge in half inch increments. Thread a blunt needle with your chosen yarn. Then line up the two edges and either whip stitch or blanket stitch the pieces together.
What can I use felt for?
Felt can be used for anything from clothing, shoes, crafts to home decor. Although it has a wide variety of uses, felt applique in particular works especially well for wall decor, seat covers and Christmas projects such as stockings!
What can I make with thick felt?
Felt comes in a variety of thicknesses. 1/8″ thick industrial felt is ideal to cover wooden stools, such as this one, to protect the top and add decor flare.
I heart your Mondrian heart too, Sara. It looks so cool. I must admit I’ve never even considered doing applique, it sounded like too much work, but after watching the video, I think I’ll give it a go.
I’m always happy to hear when I’ve potentially converted someone to try a new craft 🙂
I love this and it would make a great gift. Laura
Thanks Laura!
Wow, your video was mesmerizing to watch, Sara. Your felt Mondrian stool cover is absolutely fabulous! I remember wanting a Mondrian dress with white gogo boots so bad in the 70s. I got the gogo boots but never the dress.
So glad you liked the video; I literally had no idea this would work so well when i tried it!
Your story is so funny because I got white boots too and never the dress lol! But I had NO excuse since I’m a fashion designer by trade and could’ve easily designed one lol!
I had a Mondrian dress that my mom bought me back in the day and have always enjoyed the patterns!
That’s so awesome Janet! I’ll be you looked great in it!
Wow, you always come up with such unique projects that i have never heard of. I had no idea you could even fuse felt together. I have always used glue which makes the felt go all hard. And the design is very cool.
I had no idea either until I did it – lol. I don’t know how I come up with these crazy ideas!
what a groovy design reminds me of the 60’s
Thanks so much Maria! I love that era for design.
INTERESTING PROJECT! REMINDS ME OF SOME OF THE MONGOLIAN CRAFTS WE WAS THERE. THOSE TOOLS ARE FASINATING
Thanks Linda!
I have done typical applique by machine my whole life, but this is really a modern take on it. Love it.
Thanks Rosemary! After doing this, I’d love to explore more appliqué projects.
Wow! This looks fabulous. I am impressed with the professionalism and clean lines of the final product. I love that Piet Mondrian was your inspiration.
Thanks Anna! Mondrian has always been a favourite; so glad I finally got to create a project inspired by him!
Not only does this look nicer I bet the felt gives it needed cushioning. Great new technique
Thanks so much Leanna! It definitely needs some cushioning 🙂
This is just beautiful, what a completely gorgeous idea. I love how it turned out. I’m now looking round the house for things I can decorate with a Mondrian style heart 🙂
Thanks Julie; although it won’t be a heart, I’m hoping to have another Mondrian project idea in time for our hop at the end of the month!
Wow truly fabulous! thanks for sharing on craft schooling sunday!
So glad you like it Sara! Thank you for hosting!
I’m featuring you this week when the next To Grandma’s house we go link party starts – thanks for sharing with us!
Thanks SO much Tarah for the feature!