

This DIY jewelry display will organize the clutter if you have a lot of costume jewelry. But the best part about making this particular jewelry display (other than upcycling a scrap of pegboard)? It will keep all your necklaces and earrings together in one spot! Making this free standing display ensures no more searching for the matching earrings stored separately!

jewelry pegboard display stand
If you’re looking for jewelry storage ideas to keep your jewelry tarnish free, then check out this jewelry storage DIY.
DIY Jewelry Display
Want to know the secret to making the jewelry display DIY work? Raid your sewing stash to find some bobbins like these and some chicago screws to attach them (more about that later).

Watch the video to see how easy it is to attach them onto your jewelry display stand!
Pegboard Stand
The pegboard stand itself is a thrifted wrought iron base that is normally used to display stained glass artwork.
However, when you cut a scrap square piece of pegboard 12″ to fit inside the holder, it becomes a jewelry display. Stay tuned because we’ll have more jewelry display ideas using pegboard for finer jewelry prone to tarnishing. Subscribe so you don’t miss that in a future post!

soon-to-be pegboard display stand
How to Make a Pegboard Display Stand
Step 1. Paint Pegboard
In our last post, we showed you how to paint using a spray gun, so refer to that post to paint a 12″ x 12″ scrap of pegboard.
Because it will look symmetrical, cut the pegboard in such a way that the holes are even on the sides, as well as the top and bottom. The piece below is not evenly cut, but you’ll see that the final pegboard display stand was re-cut.

The paint we’re using is PPG BreakThrough in a colour called Van Courtland Blue. It’s been sitting for quite a while so we stir the paint well.
Add a bit of water to thin the paint. 
Then strain the paint through a paint strainer.

Use a paint jig, like the one shown below to apply paint with a paint sprayer.

The dowels help prevent overspray from bouncing back on the underside of the pegboard. Although, I’m spraying this pegboard with only one colour, it’s a great tool if you want to spray the front and back two different colours!

Step 2. Attach Bobbins to DIY jewelry display
Gather your bobbins and Chigaco screws.

Chicago screws, also known as binding screws, are a two part fastener system consisting of a treaded barrel, or post, and a mating screw. While working on another project, I discovered that a 1/2″ Chicago screw works perfectly to secure a bobbin to pegboard!

Use the chicago screws to attach the bobbins to the diy jewelry display as shown below. To start, the post should come through the peg hole from underneath.

Then pop on the bobbin.
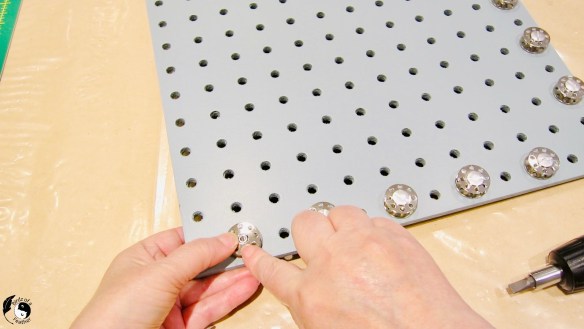
And screw the other half of the Chicago screw to the post. The bobbin is now sandwiched right in the middle. Use a screw driver to tighten to the pegboard.

Do this along two edges of the pegboard jewelry display, skipping every other hole.

Once done, the pegboard will sit diagonally in the display stand as shown.

Step 3. Hang Jewelry
Hang the necklaces over the middle of the bobbin.

Once the necklaces are on, you’re ready to add the earrings. Take the matching earrings and place the hooks through the holes in the bobbin.
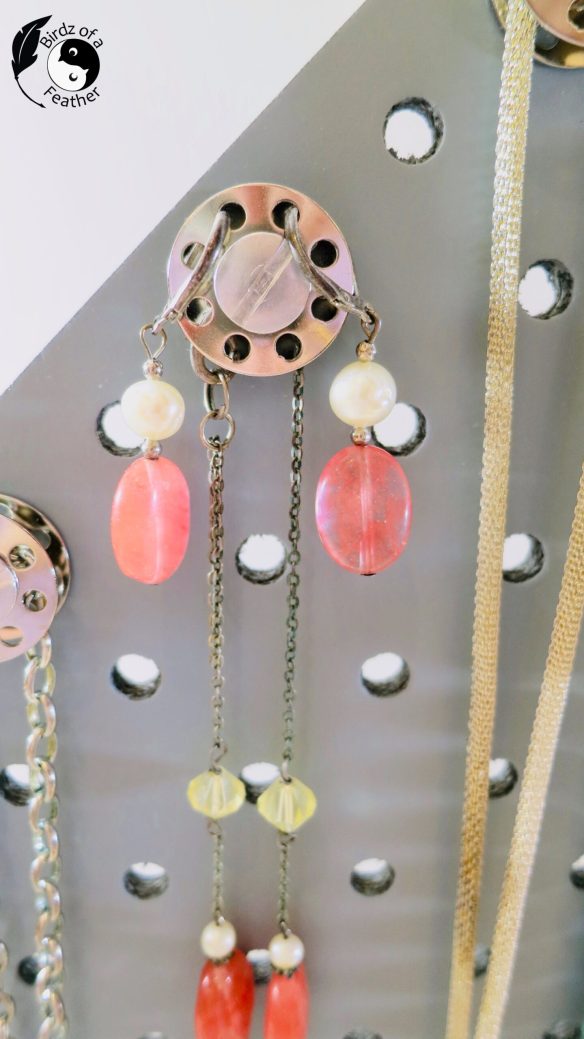
Instead of adding earrings individually to the jewelry display stand, connect one to the other as shown:

Then you only need to connect one earring through a hole in the bobbin.

For open earring hooks, just slip them in at an angle.

There! Now you have the entire set hanging together on one jewelry holder!

It’s a great convenience to have everything paired together. A pegboard jewelry organizer allows you to just grab ‘n go to match your outfit.

Fall Into Fabulous
One of the things I love most about blogging is connecting with other makers, and this Fall we’ve created something truly inspiring together.
Grab 16 digital goodies from top creators — planners, recipes, colouring books & more — including our Beginner Crochet e-Book!
Every dollar of our commission goes straight to Alzheimer’s research — a cause close to our hearts. Your purchase through this link means you’re not just treating yourself; you’re making a real difference.
Grab it now — the bundle is only available for a limited time! Let’s make this Fall fabulous and full of hope. 💜

Pin Pegboard Jewelry Organizer

DIY Jewelry Display
Questions and FAQs
Where do you keep your jewelry?
If your jewelry is silver and can tarnish, it’s best to keep it in closed storage away from air. For costume jewelry, the jewelry display DIY tutorial above is perfect because it keeps your necklaces and earring together for easy storage and retrieval.
How do you make a pegboard jewelry holder?
Use Chicago screws to attach sewing machine bobbins onto the pegboard. Arrange them in such a way that there’s space between your jewelry. Your necklaces and earrings can then be stored together on the same jewelry holder!
How do you organize jewelry in a small space?
Use this jewelry pegboard display stand to organize jewelry such as necklaces and earrings vertically. A pegboard jewelry organizer can be stored on a desk or shelf for easy access. You can make it double sided and/or add more bobbins to organize and store even more jewelry.
The jewelry organizer is such a good idea — such a simple make! Thank you for this post. I will be voting for you at Amara
Happy to hear you liked the post! Thanks so much for your Amara vote Karene! Much appreciated!
That’s really clever, Sara and so unique too. I tend to just hand my costume jewelry where ever I find an open spot, but it becomes messy and so difficult to find when you’re in a rush to get to work.
Thanks Michelle! I’m always so inspired by my husband’s interests and the creative things he dreams up. He’s into restoring vintage sewing machines so we have an abundance of those bobbins now. Then he used those Chicago screws on another upcoming pegboard project and it really got the wheels turning to combine them!
What a clever idea using metal bobbins for organizing jewelry. I love how the necklace and matching earrings hang on the same hook!
Thanks Marie – that has always been a pet peeve of mine in organizing jewelry; it’s so convenient to finally have necklaces and earrings together on the same hanger!
Genius idea Sara! Love how the jewelry hanger offers some extra height for longer pieces as well! Beautiful design!
Thanks so much Donna! This is a great piece for my costume jewelry. I’ll be making another jewelry hanger for my finer pieces featuring one of your stencils. Can’t wait to get that done!