

A level basement floor rose to the top of the priority list many years ago when we applied to be on one of those home reno shows. They chose to renovate our basement! – or so we thought. In the planning stages of the reno, the show’s contractor discovered that the slope of our basement floor was too steep to build on. The floor was inconsistent and out of level by over half a foot in some areas! There wouldn’t be enough time in the production schedule to fix it properly so they were going to have to take a pass on us.
At first, we were disappointed: who wouldn’t want a crew to come in and take care of a major renovation while we sit back and let them do all the work? But on the flip side, as avid DIY’ers, it was going to be hard to give up full control of the project. As I always like to say, it all works out in the end! After all, there’s really no sense in finishing a basement when there’s still things to renovate on other levels of the house (i.e. our kitchen). Open access to the plumbing and electrical in the basement before closing those things off forever is the best scenario!
Level Basement Floor
Anyway, with our stuff out of the basement for the show, what better opportunity to level the basement floor and get it over with? As a result, a prime opportunity to renovate the basement ourselves at our own pace (links to our projects at the end of this post)!
But how were we going to level a concrete floor that slopes with 700 square feet of space in our basement? It wasn’t going to be something that we could tackle ourselves. The easiest method to level a basement floor of that size is to call in an expert!

After researching our options, we settled on a product called USG Levelrock 2500 (known as CGC in Canada where we live). We brought in a licensed contractor to apply it. Levelrock 2500 is a self-leveling gypsum underlayment that provides a smooth, crack-resistant surface that accepts virtually all types of floor coverings (it’s not to be used as a finished floor). It was a great solution for us for two reasons: we used the ‘green’ version of the product and it left the door open to a choice of many floor coverings before we finally settled on the engineered hardwood we eventually installed.
Some Commonly Asked Questions About USG Levelrock
Keeping in mind that we used Levelock 2500 Green, here are the answers to some commonly asked questions:
Q. How long does it take Levelrock to dry? A. The product can take about 2 to 3 weeks to dry (depends on drying conditions).
Q. Is the use of dehumidifiers recommended while the Levelrock is drying? A. Yes, dehumidifies always help to speed up the drying process.
Q. How long after pouring Levelrock can you walk on it? A. Levelrock can handle foot traffic about 3 hours after pouring.
Q. How long after Levelrock installation until you can move furniture back into the area? A. The recommendation is to let the poured floor dry before placing any furniture on it. However, this is only a temporary measure until the product surface gets its final floor treatment.
Q. Is Levelrock suitable for above grade applications? More specifically, what about a wood subfloor? A. Yes, The Levelrock product can go over a wood subfloor, but should be a minimum thickness of 3/4 inches.
Q. Are Levelrock floor underlayments under warranty? Yes, there is a two-year warranty. Refer to the levelrock website for a current listing of products and what is covered.
Q. Can Levelrock bond to epoxy that’s currently covering concrete floor? A, Bonding on the epoxy coat will not be an issue as long as the epoxy is not peeling off.
Go Green
Q. Is Levelrock 2500 a green product? A. There is a version of Levelrock 2500 that is specially ‘green’ that uses gypsum from the flue gas desulfurization process that cleans combustion gases from fossil-fuel-burning power plants. This process greatly reduces emissions of sulfur dioxide which helps the environment by reduction of harmful acid rain. The use of this recaptured gypsum also eliminates the need to dispose of the material in landfills as a solid waste.
Q. How is Levelrock 2500 Green applied? The floor surface first gets a primer. Levelrock underlayments combine with sand and water at the job site in a pump truck. A rubber hose leads to wherever the concrete needs to go. In our case, the hose was fed through the basement window. Then a 3⁄4-in. thick underlayment is poured over the existing concrete sub-floor. More about prep and installation here and below.
Q. What is the price to install Levelrock 2500 Green? A. For a 700 sq. ft installation, including labour, equipment and materials, the cost was $4200 at the time of install (2011) without taxes (Canadian dollars). Price will vary according to market and costs of labour.
While the cost to level a basement floor may seem excessive, to us, it was worth it.
Preparing for Levelling
Before the actual levelling takes place, there are several things to consider. In our case, the first order of business was moving our water heater. This isn’t necessary with respect to the floor levelling per se, but the builder stuck it in an area encroaching on our laundry room. Shifting it a few feet to tuck it in beside the furnace did the trick. Since we were renting it, we paid to have it moved.

Once the water heater was moved and the two appliances were side by side, It wasn’t really practical cost-wise to have them both raised to the level of the new floor so we did the next best thing by creating a ‘step down’. Hubs built a frame around what was going to be the furnace room to provide a barrier against the levelling compound.

Here it is from two more angles:

See that jog in the wood bracing by the water heater?

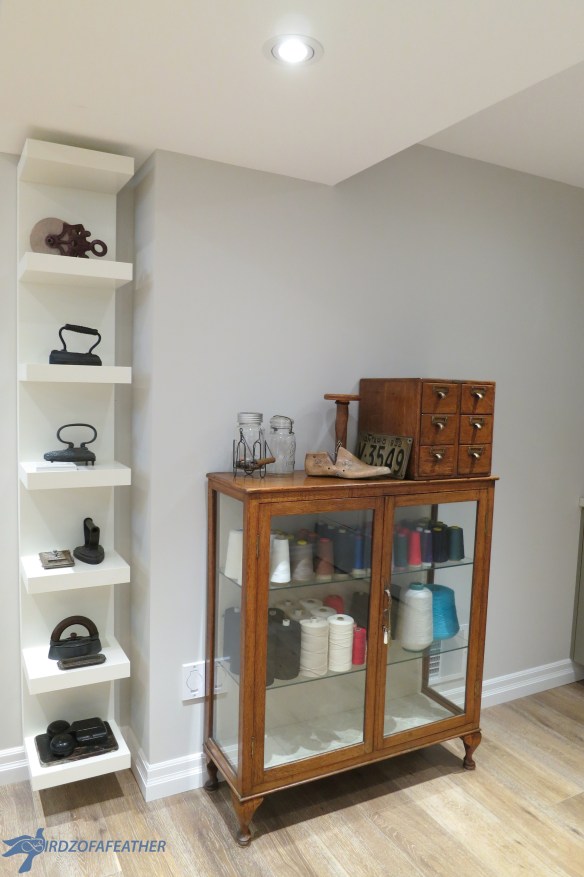
We eeked out every inch of space and turned that into a niche to showcase my collection of antique irons (show below), but I digress.
How to Level a Basement Floor with a Drain
Back in the unfinished basement here’s another dilemma: the water drain was in the furnace room and it was going to be closed off to the rest of the basement. What if we had a flood: how would the water drain?
We brought a plummer in to consult and he suggested trenching a new drain from the laundry room to the furnace room. But after we got a quote and he went away, we realized that we didn’t need to trench at all! Our solution? Since the pour was going to be deep, hubs installed some ABS pipe directly onto the concrete, through the wood bracing and lined up over the floor drain in the furnace room. Since it would be buried in the new underlayment anyway we didn’t see any reason to trench it.

Although it’s hard to tell, the pipe angles on a downward slope toward the existing drain. Just ensure that there’s extra pipe above the level of the new floor so it can be cut even with the flooring later. In addition, before the new floor is poured, stuff a rag into the opening. If you’re following our series on installing a floating hardwood floor, we’ll be showing you how we complete the ‘new’ drain in the laundry area.

Here’s an overview shot of the pipe leading up to the drain in the furnace room.

How to Level A Concrete Floor that Slopes – More Prep
Hubs installed another wooden barrier in our cold storage room so he could move our upright freezer in there.

He then plugged the freezer into an outlet and temporarily sealed off around it with plastic. On the downside, the cold room floor didn’t get levelled, but at a least we didn’t have to lug the freezer up the basement stairs!

Speaking of the stairs, the part that rests on the floor got lifted onto blocks (on blue moisture proof wood). We couldn’t remove the stairs because we still needed a way to get up and down afterwards. Raising them on blocks made them functional and also allowed them to be removed at a future date for eventual replacement.

Unfortunately for us we had already done insulation and drywall around the perimeter of the basement. If you’re going to level a basement, I suggest you do it BEFORE completing any other work. All we could do was remove the bottom layer of drywall and seal the plastic moisture barrier well around the perimeter with tape and construction adhesive.

My only contribution before the levelling took place was adding graffiti on the floor below one of the posts. Even though it got buried, I still know it’s there 🙂

On the day of the pour, the crew came in and marked all the high and low spots with blue spray paint.

How to find High and Low Spots on Concrete Floor
If you want to know how to find high and low spots on your own concrete floor, watch this video. It will show you the easiest way to do that:
Outside the house, their equipment monopolized our street for the better part of the day. It’s always a good idea to get a street permit so the neighbours can’t complain.

Countless bags of Levelrock went into the hopper to be mixed with water and pumped into our house through a hose positioned in our basement window.

On the inside, the level rock was pumped in starting in the far corner of the basement (in the laundry room).

A long float was used to spread the material out. You can see how our new drain pipe is sticking out above the new floor level.

Here you can see the Levelrock flowing around the barrier hubs put up around the furnace room.

They gradually moved toward the stairs, levelling with the float as they went….

… and adding more as needed.

Levelrock can take about 2 to 3 weeks to dry depending on drying conditions and also the depth of the pour. A dehumidifier can help speed up the drying process, so 3 hours after the crew was done pouring (when it could handle foot traffic), we plugged in our dehumidifier and left it running while the floor dried. Levelrock should be completely dry before placing any furniture on it; we let ours dry for about 2 months before our ‘stuff’ started to trickle back into our basement.
Levelling Concrete Thickness
Levelrock can be used for more than just basement applications. For anyone wanting to use it on an upper level, the product can be used over a wood subfloor, but should be poured at a minimum thickness of 3/4 inch. It can be a saving grace when you run into noticeable variances in level and want a cohesive subfloor before applying a new flooring finish.
Once the floor was dry, Hubs removed all the wood bracing around the water heater/furnace area. Below, you can see the step down and also the new drain.

Moving the two appliances side-by-side allowed us to extend the wall to separate the laundry area from the furnace room.

Here’s the view looking back from our staircase. The floor is perfectly smooth and the basement is ready to put up walls.

We could finally start planning our reno!

Before we started building, Hubs added caution tape around the perimeter of the step down.

Then he was off to the races with the walls and rough-ins.

Unseen Costs
Thanks to a lazy builder, the opportunity to have a basement reno on HGTV got away and the unseen costs that went into our basement reno added up to quite a chunk of change! Looking back however, we’re happy with the outcome. Planning the layout ourselves is actually fun. And there’s so much to learn during a DIY build, like how to tile a backsplash, do our own electrical (with a permit of course) and use ready-made Ikea Pax units to add storage in the craft studio.

Basement Plan (mancave not shown)
Our basement reno is an accomplishment we’re proud of and it all started with a level floor 🙂 In the end, we built a laundry room, a mancave and a craft room from the (level!) ground up – all custom designed by us to suit our needs.
If you’re following our flooring series, we have three more posts coming up soon: how to shop for engineered hardwood floating floor, how to prep for installing floating engineered hardwood and finally, how-to install engineered hardwood floor.
You can follow Birdz of a Feather right here. You can also follow us on Pinterest, Facebook, YouTube and Instagram.
We’re Going to ‘Level’ With You
We love it when you pin our posts! If you think this will be useful, pin it for later.

SaveSave
Wow so much work and yet the end result is so worth it. I had to hire out to do the flooring because this is above my skill level. Your basement looks great.
Thanks Mary; the prep work is always harder than the finishing. Even though we brought in an expert for the actual pour we didn’t really get much of a break! It sounded like you also had quite of bit of work to do to get a level subfloor. Is your floor done now? If so, how did it turn out and what kind of flooring did they install?
It’s done, they did extensive work on the subfloor. And then we added laminate for the top. It went really fast but I am so glad I used a professional, he was able to level the floor which we realized was very off balance before.
I’m glad it went smoothly for you Mary; enjoy your new floor!