

Hubs had a thing for vintage metal pieces even before he met me, so when he came across a vintage display holder for a retro bathroom scale he stepped right up and bought it. I’m a Star Trek fan, so I instantly loved the ‘Borg’ reference! Once we wed and started frequenting antique markets together, we kept coming across scales. It wasn’t long before he found a Borg scale to accessorize it at our favourite antique market in Aberfoyle!

A Perplexing Facination
On subsequent trips, Hubs then bought another scale, and another – all different brands and looks! Kind of perplexing for someone who has never been – and never will be – overweight, isn’t it?!

I’ve been thinking a lot about bathroom scales lately because seven years ago, I lost over 30 pounds and one of the scales that Hubs restored was integral to monitoring my weight loss progress. Unfortunately, since then, I’ve regained every…single…pound! That’s probably because it’s been so long since I actually stepped on one! Guess it’s time to remedy that, but before I do, we’re going to have to ‘weigh our options’ and work a bit of DIY magic first!

A Tale of Two Scales
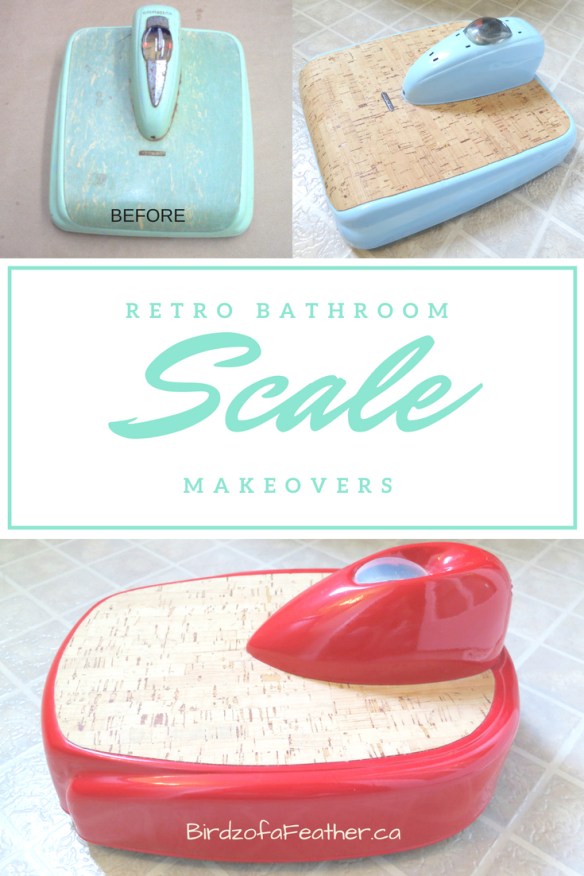
Today I’m showing you how we upcycled two of the scales in Hubs’ collection. The first one is this ‘Health-O-Meter’ scale:

Hubs started by peeling off the black rubber part that protects the platform when you step on the scale. He scraped off as much as he could and didn’t worry too much about scratching the platform; it’s going to get a new surprising fabric choice that you’ll see further ahead.
Hubs used a screwdriver to carefully pop off the cap (and the glass window) covering the numbers so he could access the inner workings and give it a clean too.

Remove Paint
Note that some vintage scales are porcelain enamel which hardens at a firing of extreme temperatures. A porcelain finish will require a very acidic chemical treatment to strip which can be dangerous for a do-it-yourself project. I don’t often say this, because we are after all DIY’ers, but if you really want to change the colour and your scale is porcelain you might want to look into professional stripping. The other option would be sandblasting; if you have access to one, I say go for it! One last option to keep in mind is that some porcelain items can be brought back to life, instead of stripping, like we did with our vintage light fixtures.
Safety Precautions
If you do decide to go the stripping route, take all safety precautions. Work in a well ventilated area, wear a charcoal mask and protect your eyes from splatters. The goggles shown below are our favourite; they are anti-fog and sealed around all edges!

Hubs stripped the metal with a gel stripping solution and removed all the old paint. Fine steel wool will help you get off any stubborn residue.

Reassemble
Now you can pop the cap back on and the glass window. Tape over the glass before you spray paint so you don’t get any paint bleed through to the inside. You can see below that the glass window has yellowed with age. You can choose to love it that way, because that’s part of the charm, or pick a paint colour that will make it less noticeable.
There’s a third option, which Hubs chose on another scale that was missing the glass: he cut a new piece of plastic and replaced it!

Paint
The raw metal looks pretty interesting as-is; you could even finish it with a clear topcoat instead of painting it. Whatever you decide, use a product that will inhibit rust; after all, bathrooms are damp environments!
Hubs chose to paint this particular scale fire engine red, like the colour we used on our fire pit makeover. Seal with Rust-oleum clear top coat if you want to further protect the finish.

Protect the Floor
Don’t forget to put some felt on the bottom of the scale to prevent scratching the floor. If you’re worried about slippage, you can use rubber floor protectors instead like the ones we used on the makeover of my late Uncle’s drafting chair.

Update the Platform
After spray painting, the black rubber is replaced with cork fabric! It’s very different from the cork you’d typically use for a cork board. As you see below, the backing on this product is soft and fuzzy like a woven product, and the cork itself is extremely thin (but durable!).

We personally love the choice of cork because it is a 100 percent natural material that uses environmentally friendly harvesting processes. Cork trees are not cut down to obtain the cork: the bark harvest is every nine years by hand. It’s a fascinating process!
To cut the cork fabric, we find it’s better to cut the cork slightly larger, stick it down on the platform and then cut the excess away with a utility knife to get a perfect fit. Use a spray glue on the back that’s suitable for fabric to adhere the cork.

If you have access to graphic materials, you can use a double-sided adhesive backing film to cover the back of the cork stick it down that way instead.

Isn’t That ‘Weigh’ Better?!
Here’s a reminder of the before. Looking at this picture in close proximity to the ‘after’, Hubs must’ve pulled his inspiration for the colour from his toolbox!
Here’s a view from the side.

Cork is extremely durable and can take a lot of friction, so will survive repeated use on the platform. It’s perfectly suited for a moist bathroom environment because its naturally antimicrobial and water-resistant attributes also help combat mold and mildew.

Here’s a another scale that we purchased on one of our antiquing ventures. This one is a ‘Counselor’.

The original mint-green reminded me of the colour they used to paint walls in hospitals and medical facilities. I couldn’t get him to change the colour fast enough! Funnily enough, Counselor actually made a blue version of this style that was very similar to the colour we chose to paint it (the one shown below was originally on Etsy):
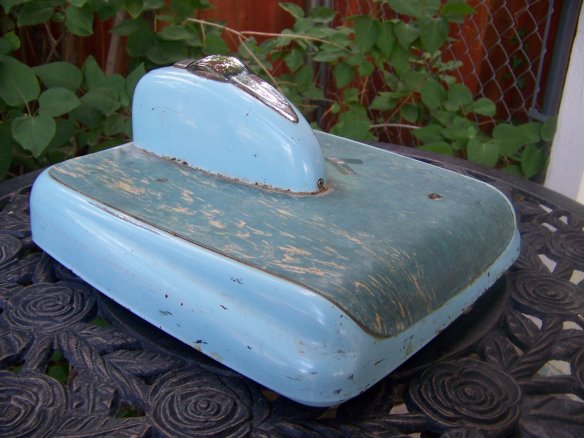
Aren’t the sleek curvy lines beautiful? They just don’t make them like that anymore!

This one had some chrome details which Hubs removed. It was pretty rusty.

We were going to re-chrome it, but I thought I would try to see if I could polish it up with Quick-Glo chrome cleaner:

I worked mostly on the piece on the left. As you can see, some of the rust is gone but it’s still pitted and black. We’ll go ahead and get it re-chromed once we have a few more pieces to make it worth our while.

Occasionally we’ll loose a small pieces like this if we’re not careful. When you are disassembling, always store the hardware in a Ziploc so they don’t get lost – and mark the bag so you remember what it is!
Here is our mint-green scale with it’s colourful new update:

Cork Fabric
Once again Hubs used cork fabric to top off the platform. Isn’t it fabulous?!

He cut around the original ‘not for legal trade’ tag. I’m guessing this tag indicates there was no testing to ensure its meets government standards. Maybe that’s why this particular scale was no longer working accurately!

It’s not complete without the chrome metal shield, but it still looks just as beautiful as the red one.

Since this particular scale never worked (as you’ll see below where I actually step on it), Hubs found another practical use for it.

He uses it in the bedroom to store his slippers on so he remembers exactly where they are.
As you can see, we got a little spray happy with the blue paint. It’s a colour we originally used for all the metal items we upcycled for our wedding – and they all eventually made their way into the bedroom. I guess I took the ‘something blue’ aspect of the wedding adage to heart!

The colour also found its way onto my toes. Hubs often cajoles that my feet are like ‘stumps’ and marvels about how I’m able to balance without falling over. I have to admit that sometimes that can be a challenge 🙂

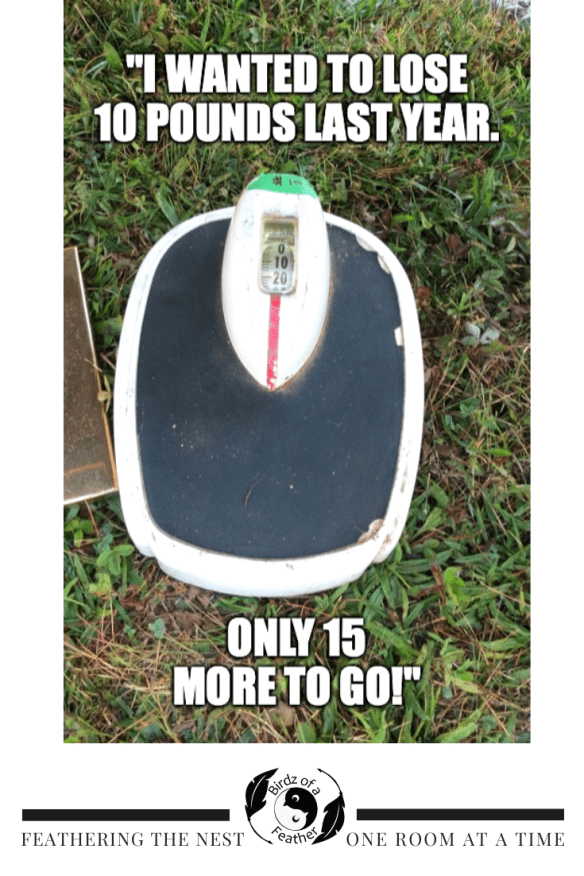
Like I mentioned earlier, it’s been a long, long time since I weighed myself on an accurate scale. I had meant to lose weight last year but without ever setting any goals, this is what actually happened:
Fall Into Fabulous
One of the things I love most about blogging is connecting with other makers , and this Fall we’ve created something truly inspiring together.
Grab 16 digital goodies from top creators — planners, recipes, coloring books & more — including our Beginner Crochet e-Book!
Every dollar of our commission goes straight to Alzheimer’s research — a cause close to our hearts. Your purchase through this link means you’re not just treating yourself; you’re making a real difference.
Grab it now — the bundle is only available for a limited time! Let’s make this Fall fabulous and full of hope. 💜
 Don’t forget to pin for later!
To see what we found on our recent Spring trip to Aberfoyle, you might be interested in this post.
Follow our blog here to get tutorials on other DIY projects, in and around the home. You can also follow us on Pinterest, Facebook, YouTube and Instagram.
I love all your vintages items, especially the scales.
Wow what a big difference, looks awesome!
wow, you did a fantastic job restoring those scales. I will be keeping a look out for some now.
Thank Anita. I have to warn you though; once you start you can’t collect just one – lol!