

This DIY Pincushion is the start of an odyssey. Today I’m showing you a technique to create your own custom mudcloth-style fabric – using cotton fabric, gel school glue and dye! But, as usual, I have plans to take the technique much further in a future post!
You should end up with a mudcloth fabric of sorts. I say ‘should’ because projects don’t always turn out as expected. As you’ll see in the reveal, my project didn’t go exactly to plan :).
Ever notice that the top of a squash looks like a mini pumpkin stem? Save it to upcycle it for later!

International Bloggers Club
Today it’s time for another Int’l Bloggers Club challenge and this month the theme is ‘Halloween‘. If you missed last month, check out our Serving Tray DIY. The rest of the ladies in the International Bloggers club have come up with some absolutely delightful projects for Halloween! So stick around until the end and be sure to check them out!
Before we get into the tutorial, get your craft mojo on at Birdz of a Feather and subscribe! You can also follow us on Pinterest, Facebook, YouTube and Instagram.
Materials for DIY Pincushion
[If you’re looking for some of the things we used, we’ve got you covered (disclosure): Clicking on the affiliate links below, means we may receive a commission. But don’t worry, you don’t pay a cent more and it helps us make more unique crafts to share with you! Thanks for helping to support our blog!]

- 100% cotton fabric. As you’ll see later this won’t have a lot of contrast unless you’re using 100% natural fibres. However, if you like the subtle effect I got, this is the fabric I used.
- Elmer’s School Glue Gel. Look for the blue in the bottle!
- Dylon Dye. I’m using Intense Black/Velvet Black
- Fibrefill
- Patons Hempster yarn, white sand
- Salt
- Oxo Kitchen Scale
- Measuring cup
- Rubber Gloves or Vinyl Gloves
- Container for dying or stainless steel sink. Metal won’t stain but plastic is fine if you don’t mind the discolouration after.
- Plastic drop cloth to cover your work surface.
- Squash stem
DIY Pincushion
Wash and launder your cotton fabric. I also ironed it.

Lay plastic down on your work surface first.
Apply glue to Fabric
I did free form patterns by squeezing the glue onto the fabric. Google ‘mudcloth’ to use as inspiration for your patterns. (I also tried applying the glue with a stencil but I prefer the hand drawn patterns for this project).
Notice how the wet glue is applied thickly? That’s what you want. You need to be heavy handed with the glue!

Here’s my first piece ready to dye.

It’s best to lay flat overnight until the glue is dry. If you hang to dry and the glue is still wet, it can run.

How to Use Dylon Dye
Weigh your fabric. One 50 g package of Dylon will dye 250 grams of fabric. Because mine weighs 119 grams, I’m only going to use half the package of Dylon for this first trial.

Weigh 25 grams of Dylon.
For this technique only use room temperature water. Warm water could melt the glue. With that exception, prepare according to package directions (I’m using half the amount of water and salt indicated on the package because of the fabric weight).

Once the dye bath is prepared, dampen your fabric. Then place it in the dye bath and stir for 15 minutes. At first I used a stainless steel spoon, but then I donned gloves and got in there with my hands. If you do this, keep paper towels handy to catch the drips when you’re done!
After the first 15 minutes, let the fabric soak and stir occasionally for another 45 minutes.

Rinse and Dry
When time is up, rinse the fabric until the water runs clean. As you can see almost all the dye came out of my fabric. My supposedly 100% cotton fabric was actually not as advertised (I’ll show you how I know that later)! What a disappointment to go through all that work only to to discover that! I’m certain this project would have worked better if the fabric I bought wasn’t mislabeled 100% cotton!

Remove School Glue
The beauty of Elmer’s gel glue for this project is that it washes out! Toss the fabric into a warm/hot soapy wash cycle to remove the glue. Or you can do this by hand instead.

This is the contrast and effect I was expecting:

But because of the fabric not properly absorbing the dye due (probably due to mixed fibres), this is what I actually got. On closer inspection, you can see that the warp threads on the top and bottom edges of the fabric are dyed black, as they should be. But the weft threads are still perfectly white (right hand edge). That to me suggests that the fabric is not 100% cotton as indicated on the label.

DIY Pincushion Video
Check out this video if you want to see how to dye this DIY mudcloth fabric.
DIY Pincushion – Sewing
My craft studio is in transition, and I don’t have access to my sewing machine right now, so I’m hand sewing!
For this DIY pincushion, I cut a piece of fabric approximately 11″ x 20″. Fold right sides together.

Use a short running stitch to hand sew a 1/4″ seam – or use a sewing machine if you have one. Here I’m using unwaxed dental floss for the seam (because if you iron waxed dental floss, it can stain your fabric). If you have heavy thread, use that. Iron the seam flat to one side.

On the wrong side, at the top and bottom of the tube, sew a long running stitch as shown below.

On what will be the bottom of the pumpkin, gather the stitches tightly, Then stitch back and forth all around the gathers to secure. Knot and cut thread.

Turn inside out.

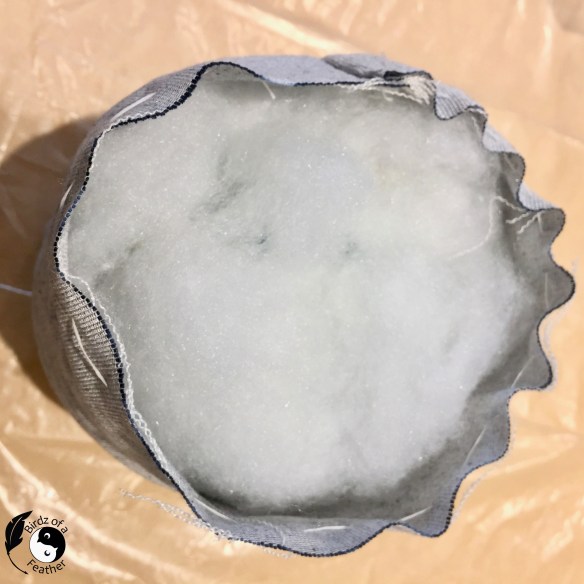
Stuff It!
Stuff the pumpkin with fibrefill.
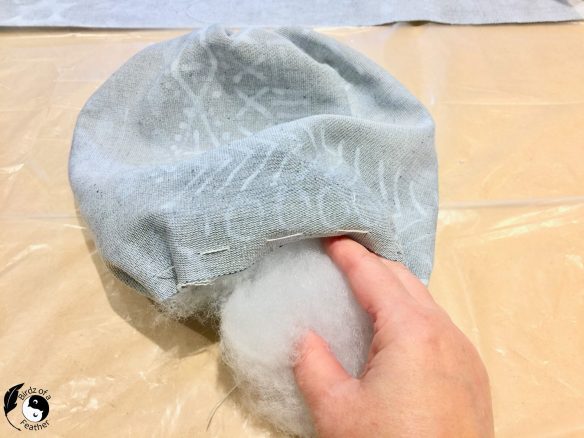
If you need additional filler, you can also upcycle a clean old dishtowel, socks or t-shirt to use as stuffing.

If you choose to use various fillers, be sure to encase it in the fibrefill to fill-in all the voids.
Gather the top. I saved the top of a delicata squash for the stem. That’ll be glued on later with hot glue.

To define the pumpkin sections, I’m using this Patons yarn. Any white yarn you have on hand will do. 
Secure at the top, then wind it around the bottom, weaving the yarn underneath the previous section and changing direction. I created 6 sections.

Here’s how the sections will look on the sides.

Tuck ends in at the top, knot and cut all threads. Then glue on the stem with a dollop of hot glue.
I would’ve loved if the pattern on the dyed fabric was more defined, but it still looks pretty. It actually looks like the reverse side of denim quite a bit.

Stick a needle in your ‘mudcloth’ pumpkin pincushion; ‘X’ marks the spot!

For more DIY fall crafts, check out our Craft Ideas for Autumn.
Pin our DIY Pincushion Mudcloth Pumpkin and Subscribe!
If you enjoyed this post, please pin and share. Ready to get your craft mojo on? Don’t forget to subscribe to us right here on Birdz of a Feather for more great crafty projects.

Int’l Bloggers Club – Halloween
And now onto the brilliant Halloween projects by the uber-talents participating in this IBC Halloween Challenge:
- Interior Frugalista – Spooktacular Upcycled Halloween Diorama Box
- Unique Creations by Anita – Halloween Flower Arrangement
- A Crafty Mix – Easy Realistic Eyeballs
- Birdz of a Feather – that’s us!

That would have made me so cross. False labelling like that is just not on and so many people are allergic to synthetic fibres too. UGH!! On the bright side though, the subtle mud cloth pattern does look really lovely and I really like the idea of having a pumpkin pin cushion too. My old one is looking a little tatty (I think it used to be a mouse or something) and most times the pins don’t even stay in either 😀
I have to believe it’s an honest mistake. Who, but me, would ever discover that – lol! I’ve contacted the company and hope they look into it. I actually do like how it turn out; I have to be more heavy handed with the glue next time so it shows up. I’m going to experiment with ‘real’ cotton too to see if there’s any difference. I’m excited to explore the technique more to see what else I can come up with!
How maddening is that! I still think the subtle color is still very pretty. This looks to be a fun craft idea that is now on my Must Try list thanks to you. Great idea turning a fabric pumpkin into a pin cushion too, Sara!
Thanks Marie – so glad you’re inspired to try this. I can’t wait to see what you come up with! Yes, it’s not what a planned, but you probably know very well that you have to go with the flow :).
Sara, this is adorable. I like the color.
I like the subtle color, even though it wasn’t what you were hoping for. I love the pattern you came up with and the end result. That is the cutest pumpkin!
Thanks Megan; it’s actually starting to grow on me 🙂
How cute it turned out even if you didn’t mean too.
Thanks so much Maria!
Love this idea Sara, and the subtle mudcloth pattern is lovely.
Thank you Kristi! I can’t wait to take it up a notch on my next project.
This reminds me of the product fails from “wish”. You are expecting a lounge carpet and get a dolls house one. It still looks great though so all was good in the end.
Oh my gosh Anita – I had never heard of ‘Wish’ but just took a look. Hysterical! Yes, that’s exactly how I feel – lol. But you’re right, it all turned out in the end :).
That will make you want to say bad words!! Love how you made the best of it!
Thanks Lori – to quote Bob Ross, it’s just a happy little accident :)!
I love this idea of making your own mudcloth. It can get pricey. So cool! Love the pumpkin too!
Thanks so much Kim; I loved your Shibori pumpkins! I think we’re on the same wavelength when it comes to pumpkin decor – lol!
Oh, fabric is my weakness!! I love this!!
It’s my weakness too; I used to be a fashion designer 🙂
Love this project. I have never attempted anything like this so I found the whole project interesting, even with the mistakes you pointed out with the fabric. I still like how it turned out. Thanks for sharing it this week. #HomeMattersParty
Thanks Donna; this is my first time dying and I agree that it still looks nice. I can’t wait to try it again! Thanks for stopping by 🙂
This is fabulous and thank you for the DIY mudcloth tutorial. Featuring this when my link party opens up tonight!
Awesome Carol! Thanks so much for the feature 🙂