

A walk in shower remodel takes centre stage. Today we’re showing you how to add a curbless shower to a two piece powder room bathroom on the main level.
An accessible shower – also known as a curbless shower – rose to the top of our priority list when my Mom began to experience falls – along with broken bones (uggh)! She lives in a two-story house so, at first, we thought about moving her. There are not many bungalows left in our ever expanding city that would give her one-level access. Thank McMansions for that! A condo was out of the question too; Mom loves her garden too much to give up her outdoor space.
We also considered a long term care facility. That is until after looking into that prospect and touring a few. That was quickly off the list of options. So the best decision was to convert a two piece powder room bathroom on the main level of Mom’s home to a full bathroom so she’d no longer have to use the stairs. No more stair climbing meant less chance of a potentially fatal fall. My sister now takes care of Mom full time.
Walk In Shower Remodel
We completed Mom’s walk in shower remodel over a year and a half ago. Can I tell you how hard it’s been to write about it? Even though this story does have a happy ending, I couldn’t bring myself to finish this post. It has had so many re-writes!
So what changed? Things really hit home when the pandemic broke out. What if we had moved Mom into a condo? Can you imagine trying to social distance in an elevator? Even worse is how the pandemic has affected those living in long-term care homes the most. I haven’t looked at the latest stats. But Mom could very well be one of those statistics had we not added a curbless shower on the main level so she could stay in her own home. I’m so thankful!
I first wrote about renovating for an aging population to ease into the subject matter. It’s painful to watch a loved one fade away. At first slowly. Then with each passing year, you start to wonder how much longer it will be before they don’t even recognize you. Alzheimers is a cruel disease; but I suspect more so for family members than the one suffering. I hope I never find that out first hand.
One can hope.
Barrier Free Living
If there’s one takeaway I’d like to emphasize, it’s to encourage you to start thinking about how a parent – or YOU – are going to manage in your golden years. Why wait?
A walk in shower remodel can keep you in your own home. Maybe not forever, but for longer. It can keep you safe in your own little social bubble. Especially, with a pandemic raging beyond your front door. It saved my Mom; I have no doubt about that!
High on Mom’s wishlist was an accessible bathroom that didn’t look utilitarian. If done right, an accessible bathroom is not just functional, but also surprisingly sleek. Wait until you see the reveal! It puts our own bathrooms to shame! Barrier free living is where it’s at, no matter what your age. With beautiful modern finishes, it’s a no brainer (excuse the pun!).
Now it’s time to share with you things to consider when designing and renovating for barrier free living!
Planning a Walk In Shower Remodel
A curbless shower is an absolute must so there are no possible trip hazards! But where to put it? We expanded the bathroom to accommodate a shower by ‘borrowing’ space from the adjacent laundry room.
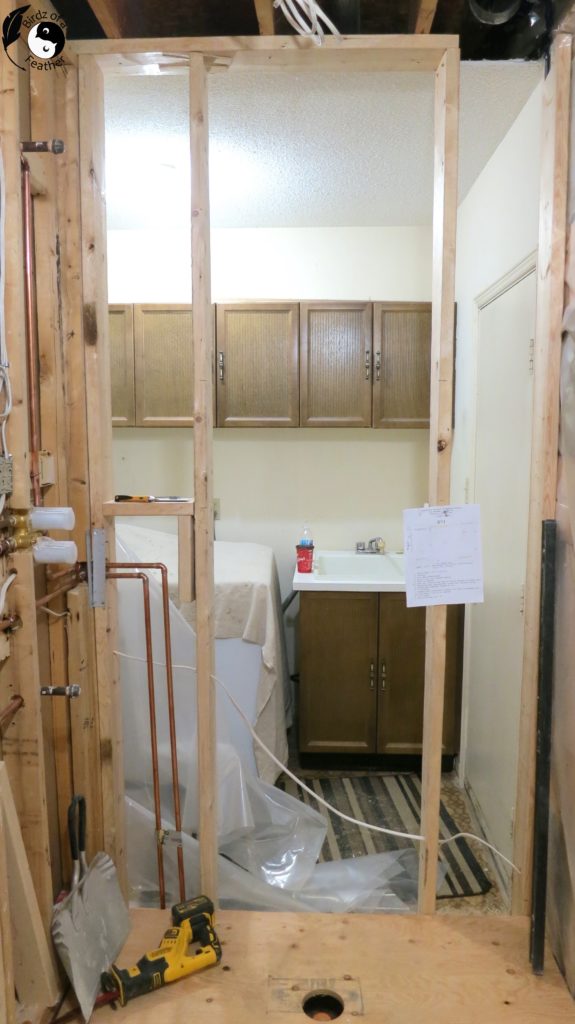
This is what we started out with; a typical two piece bathroom on the main level:

This end wall is where we knocked through to the laundry room closet.

On the other side of that wall is this closet. It gave us just enough space to add the curbless shower.

Before you Start Any Walk In Shower Remodel
Get a Permit
Before you start any bathroom renovation or remodel get a building permit. I can’t stress enough how important this is and it’s worth every penny for the peace of mind. A building inspector will look at the work several times throughout the build. Inspections will insure that you don’t make any costly mistakes that will come back to haunt you down the road. I think that’s the best insurance policy money can buy!
When I explained what we were doing at the permit office, they even fast-tracked the permit for us. They were so helpful!

get it all down on paper
The best way I find to stay organized is to re-draw the plan with a list of materials to develop a shopping list. Print two; staple it all together and pin one to a stud during the build. Of course, it’ll get moved around as work progresses but you will find yourself referring back to it during the build so you don’t forget any important details!

Having all your measurements and supplies gathered in one place is so handy. Take the second copy with you (or just leave it in your car) whenever you shop for materials.

Consult an Engineer for Structural Issues
Luckily Mom’s basement was still unfinished so we could see that there would be structural issues to be addressed in removing walls and widening the doorway of the bathroom. By the way, 36″ is the minimum door width for wheelchair access (in case Mom ever needs one).
Call in a structural engineer for guidance in these matters! They will identify what’s load bearing and what, if any, additional support is needed.
I was amazed that there were two load bearing structures within that tiny space. But it’s not the size of the space, it’s the location of where it falls relative to other structural elements!

Choosing Materials for a Barrier Free Shower
We came across this gorgeous tile for the feature wall but hesitated to purchase it right away. When we went back to get it, it was out of stock and wouldn’t be available again for 4 months!

With any time sensitive project, be prepared to buy right away. Since you already have your measurements with you, there’s no excuse not to!
Walk In Shower Tile Ideas
Here are the tile choices we ended up with. We substituted a large scale subway tile (4″ x 16″) for the feature wall. As you’ll see later it worked out for the best 🙂

Don’t forget to add 10 – 15% onto your tile order for additional waste – and have someone else double check your calculations. Somehow I misjudged the amount needed for the floor and my sister had to run out in the middle of the job. Luckily that tile was still in stock, but it was a trek!
Floor Tile for a Curbless Shower
The most important selection you will make is the floor tile. It has to be non-skid.
Did you know that a skilled tile installer can cut any size – even large scale – tiles for a curbless shower pan so not a drop of water escapes? We saw that first hand when we visited a friend’s reno. But we unfortunately couldn’t hire that installer and this isn’t really the time to learn a new skill!
A small scale tile will give you a lot of grip because of the numerous grout lines. It’s easy enough for a homeowner to install well and waterproof – if you have a Schluter curbless shower pan (you’ll see that later).
Along with the small scale, chose a floor tile with a matte finish. Even with lots of grout to give you traction, if the tile is slippery it’s no bueno! Choose something like this 1″ x 3″ tile:

How to Waterproof a Curbless Shower
Two materials that I feel are essential to the success of a curbless shower are the Schulter system and water resistant drywall (green or blue board).

Water resistant drywall is used on the ceiling and behind the rest of the walls outside of the tile area.

Schluter has a full line of water-proof membranes, shower pans and even niches. Their products will ensure that the shower is fully protected against mold and water damage. We even used it on the entire floor, underneath the tile in the shower and main area. If you want to learn more about how to use the Schluter shower system to build your curbless shower, there are great resources on their site. I didn’t really touch on drains in this post, but you’ll see some great options to consider on their site too.

Schluter Curbless Shower Pan
Insulating a Barrier Free Bathroom
When opening up walls, take advantage and beef up your insulation! There’s a garage on the other side of the wall that runs across the full length of the bathroom, right through the back of the curbless shower, so now’s the time to do it!

We used Roxul as a replacement. This insulation has a much better R-value than the previous builder installed stuff! Don’t forget the vapour barrier!

Adding a New Barrier Free Bathroom on the Main Level
Here’s a view from the new shower after taking over the closet space from the laundry room. It seems pretty expansive without any walls :). We always kept our checklist handy so we wouldn’t forget important details. Like blocking for grab bars!
Framing and Additional Blocking
Framing for the shower is almost complete. Notice that we added extra blocking below the niche; that’s for a grab bar. Don’t forget this step; it’s important that the grab bar is installed into solid wood for security! Notice that there’s also extra blocking on the right side too. That’s for a folding shower seat.

Then the plumbing goes in.

The Schluter Kerdi Board waterproof membrane can then be installed:

A special membrane is installed with thinset in the corners, on the seams, around the niche (it’s best to pre-cut it before you install) and covered with more thinset. Every screw hole also gets the same treatment (you can pre-cut the mebrane into squares).

Here’s a great video by the Home Repair Tutor that shows you exactly how to install Schluer Kerdi Board to make it completely waterproof:
Here’s the back of the shower wall from the laundry room. Remember the extra blocking we added? My suggestion is to keep this wall open until AFTER the grab bar is installed. Until the tile is up, you might not know exactly where it’s going to land and it’s great to have the option to add more blocking if necessary! As you’ll see later, we mounted the grab bar on a diagonal, which needed more blocking!

Installing Tile in a Curbless Shower
The 1″ x 3″ floor tile goes in first before the walls. The tiles easily conform to the slope of the pan. Mastic was used to secure all the tiles, like we did here for our laundry room backsplash.
We used the exact same style of tile for the rest of the floor and the walls – but a much larger scale as you’ll see further ahead.

Once the floor is complete, use something like this Ramboard to cover it up to keep dropped grout from the walls off your newly finished floor.

The feature wall goes in first before the remaining wall tiles. We used this subway tile in a herringbone pattern for the feature wall.

A wet saw in the garage makes quick work of cutting.

Then it goes onto the wall around the shower niche.

This 12″ x 24″ tile goes on the remaining walls (extended outside of the shower) and also the remaining floor.

Here you can see how the small tile in the shower transitions to the larger tile on the floor, which carries right up the wall opposite the entry door.

Lighting for a Walk In Shower Remodel
Good lighting is a must for any bathroom – accessible or not! In the original bathroom, we only had this one little wall light. That wasn’t going to cut it! Along with a new light fixture above the vanity (which you’ll see in another post), we added 4 new pot lights.

We even added one right in the shower! Don’t forget, if you’re installing a pot light and fan right in the shower, these MUST be rated for wet areas!

Walk In Shower with Seat
An accessible shower is nothing without a spot to sit. However, it’s not practical to build in a seat. You really need all the space to be as wide open as possible. We found this awesome shower bench that can fold away when it’s not in use. It’s a great space saver if there ever comes a time when Mom needs a walker or wheelchair.

Finishing Touches
When the rain shower head goes on, the excitement start to build. Just a few more finishing touches and it’s done!

Because of the herringbone pattern, I thought the grab bar would look much better set on a diagonal. This is where you’ll be glad the back wall is still open!
I marked the position with some green tape, then before attaching it permanently, we had Mom sit down to try it out for a comfortable reach as I held it in place.

It worked out perfectly. The grab bar we chose is not only stylish but blends in well with the tile. You should have a minimum of three grab bars. We added two more in the room for Mom to steady herself.

We mounted the shower curtain, liner and a few hooks for towels. I love waffle weave shower curtains!

I couldn’t wait to buy some new white fluffy towels to adorn the hooks!

Before and After Shower Renovation
Here’s a reminder of how the bathroom looked before. This is the corner of the walk in shower; you can clearly see the laundry room space on the other side.

Here’s the same view of the walk in shower with the seat!

Now when you open up the shower curtain, it reveals this….

… and this, on the opposite end!

A Walk In Shower Remodel that Brings on Smiles
While Mom’s walk in shower design gives us great satisfaction, there’s nothing better than seeing the smile on her face after revealing it to her! Just knowing that this curbless shower will drastically change her quality of life for the better put an even bigger smile on our faces too 🙂

Thank goodness my sisters and I decided to renovate when we did. What a saving grace! I hope this walk in shower remodel idea has inspired you to think about accessible renovations in your own space too.
Get your DIY mojo on at Birdz of a Feather and subscribe! You can also follow us on Pinterest, Facebook, YouTube and Instagram.
Want to see more of this accessible bathroom? We previously showed you the toilet installation in Mom’s new space and the towel hooks. Stay tuned for the vanity and pocket door.
Fall Into Fabulous
One of the things I love most about blogging is connecting with other makers, and this Fall we’ve created something truly inspiring together.
Grab 16 digital goodies from top creators — planners, recipes, colouring books & more — including our Beginner Crochet e-Book!
Every dollar of our commission goes straight to Alzheimer’s research — a cause close to our hearts. Your purchase through this link means you’re not just treating yourself; you’re making a real difference.
Grab it now — the bundle is only available for a limited time! Let’s make this Fall fabulous and full of hope. 💜

Pin this for later. Pinning is always welcome and appreciated!

There’s really not too much to do decor-wise in such a small space, but if you’re interested DIY bathroom decor ideas check this link out from DIY Idea Center.
I’m so glad you wrote this Sara. Thank you. My Mom is in much the same position as your Mom and it’s so hard. Getting old is not for sissies. I would love to convert her bathroom into a walk-in curbless shower. At the moment there’s only a bath and she’s fallen in by accident and spent the whole night trying to get out and no-one in the old age home heard her shouting for help either. It’s terrible. Unfortunately the planning permissions have been a nightmare. Her old age home is a heritage site (go figure) so things take much longer to get approved. I’ve pinned your post so once everything has been sorted out i can come back to it. It has so much detail. Thank you again.
Your Mom is in my thoughts! I hope and pray things work out for the best. It’s dreadful how elderly care in long term care homes has sunk to such lows around the world.
We are SO grateful that my sister chose to live with Mom full time. My brother-in-law also did the same thing for my mother-in-law. A reno definitely helps but realistically without their sacfrices we’d still be stuck in the dilemma!
Really nice remodel! I know your mother appreciates the changes and functionality so much better than what was there previously. I wish we had had grab bars in our new home before my inlaws came out to visit last year. There is one bar, but really it is a towel bar. Thinking of installing a long shower pole with a handle that can move up and down but the pole can double as a grab bar. Beautiful job!!! <3
Hugs for you and your family for creating this for your mom, <3
Barb 🙂
Thank you so much Barb. The finishes for accessible bathrooms have come so far; I was pleasantly surprised by the choice available. The shower pole sounds like a great idea; especially when you have people of different heights using it!
Such a fantastic idea. I work in aged care and can appreciate how important this is for an elderly person. It offers them safety and well as maintaining their independence. You did a fantastic job on this major makeover. I love it.
Thank you Anita! Safety was a big challenge; so much to think about in the planning stages. This reno helped so much but it couldn’t work without the dedication of my sister :). Thank goodness for people like you and her!
You did such a beautiful job with all the textures and colors. The various tiles look fabulous together! The seat is just the right height and trendy, as well.
Thanks for sharing each and every detail!
I hope she enjoys it for years and years to come.
Thank you Meegan! Yes, that is our hope too 🙂
What an amazing job and a gift for your mom! Thank you for sharing your thought process as well. So helpful!
Thank you Mary! I hope it encourages others that might be thinking about the same type of reno 🙂