

A pipe table is an ideal project when you need a side table but have a challenging space to fill. Such was the case with Hubs’ mancave. When I was laying out our basement design, I have to admit that I took most of the square footage for my craft studio! That left Hubs with little space on either side of his La-Z-boy! And you know all too well, he’s gonna need somewhere to put his snacks!
 Does anyone remember tinker toys? If you enjoyed those as a kid, you’ll love this more adult version in this project using cast iron pipe fittings 😉.
You will Need:
- 4 flanges
- 4 x 12″ pipe
- 4 x 7 1/2″ pipe
- 6 x 2 1/4″ T’s
- 4 caps
- 4 x 3 1/2″ pipe
- 2 x 9″ pipe
- 1 1/2″ connector
- 26″ x 16″ pine board for top
- 22 1/2″ x 9 1/2″ pine board for shelf. The shelf is optional and not shown. Hubs added it later. This measurement fits directly on top of the horizontal pipe but could be made bigger and notched around the corners.
- Stain in your choice of colour
- Top coat
Assemble
Now, back to the pipe table! Hubs built his table bases to be 24″ high x 21″ long x 12″ deep. With the top on, the dimensions are 26″ x 16″. However, you’ll need to play with the pipe length to develop the dimensions you need for your own space.
Hubs started by building one of the sides in the form of the letter ‘H’. From the bottom: a cap, 7 1/2″ pipe, t-connector, 12″ pipe, then the flange. Coming off the T is a 3 1/2″ pipe. To that, he added another T and then another 3 1/2″ pipe. To complete the other side, you’ll repeat the steps in bold. Build another ‘H’ for a total of two.
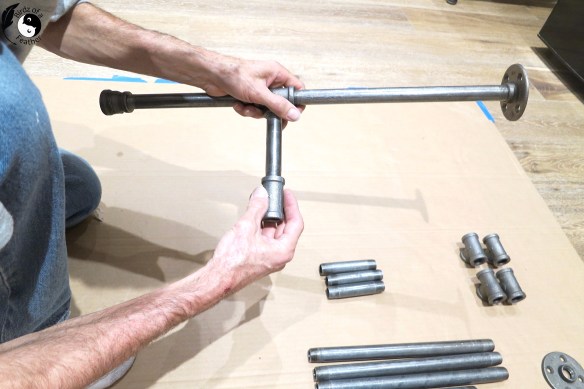
As he was building, Hubs put everything together loosely at first to ensure the base would fit the space (so he could take it apart and rebuild if necessary). Pipes can be difficult to get apart again so it was only when he was done that he tightened everything up.
Now that you have two ‘H’s’, connect them by threading into the T’s one 12 ” pipe followed by one 1 1/2″ connector in the middle, then another 12″ pipe. At this point it will look like what you see below:

Seal with a Clear Top Coat
Once the bases were together, Hubs transferred them into the garage. On top of a piece of cardboard, he elevated each one on wood blocks so he could spray right down to the bottom.

Then Hubs sprayed them with a protective top coat and let it dry.

Although you won’t really see them, Hubs also applied some bluing liquid to the screws to darken them to match the pipes.

They were mounted onto a piece of cardboard and also top coated with the clear spray.

Once dry, Hubs brought the bases back in. Turning them upside dow, he applied felt on the bottom of the caps to protect the hardwood.

Table Top
Before cutting the pine, Hubs cut a spare piece of board to test fit the top.

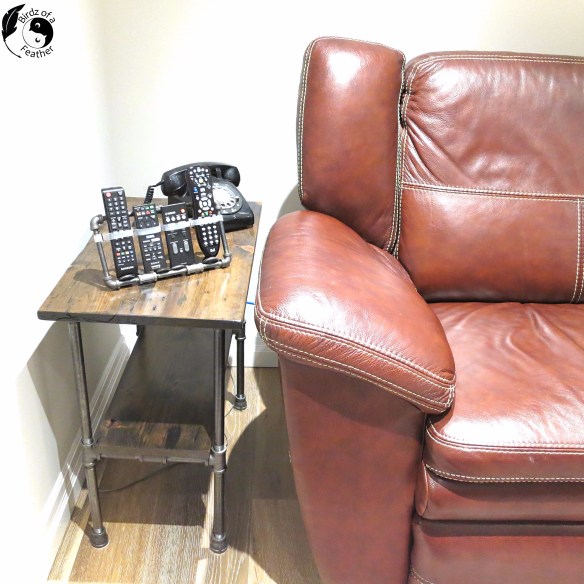
The left side of the couch is where it’s the tightest fit. The dimensions of the top gives him just enough space to display his retro phone, remote controls and headphones (the stand for those is also built from pipes!).

At this point you can see if you’ll need to adjust the size of the top. Once happy with the size, Hubs cut the pine boards then stained and sealed them. Be sure to give them a few coats of clear to protect from spills. The screws you saw earlier are used to attach the flanges to the underside of the top.

What Every Mancave Needs!
The pine top looks rustic; perfect for a mancave.

But you won’t see much of it once all the stuff goes back on!

Hubs paired back to just his phone and TV remote control caddy. I built that for him as a surprise out of much smaller pipe.
Get your DIY mojo on at Birdz of a Feather and subscribe if you don’t want to miss another unique idea! Also, you can also follow us on Pinterest, Facebook, YouTube and Instagram.
Fall Into Fabulous
One of the things I love most about blogging is connecting with other makers , and this Fall we’ve created something truly inspiring together.
Grab 16 digital goodies from top creators — planners, recipes, coloring books & more — including our Beginner Crochet e-Book!
Every dollar of our commission goes straight to Alzheimer’s research — a cause close to our hearts. Your purchase through this link means you’re not just treating yourself; you’re making a real difference.
Grab it now — the bundle is only available for a limited time! Let’s make this Fall fabulous and full of hope. 💜

Pinning is always welcome and appreciated 😉!

Very clever and it looks great with that retro phone!
Thanks Kim!
I love this table it gets my steampunk heart pumping. Great job.
Thanks Anita – gotta try an all-out steampunk project on day!