Whether sterling or silver plate, I never really gave a single thought to how to remove tarnish from silver until I inherited some pieces from my mom. In this post we try five ways to get your silver sparkling again!
This little tray shows a lot of silver tarnish. It holds a darling cream and sugar set, which you’ll see how to clean later.

Remove tarnish from silver plate
Do you have tarnished silver pieces in a cupboard or china cabinet waiting to be loved again too? Now that we’re close to Christmas, this is the ideal time to clean them. Sprinkle a few special serving pieces into your tablescapes for a touch of glamour and sparkle over the holiday season! But don’t wait until the very last minute to clean your silver. If you have silver plate items vs. sterling silver, it can be a time consuming chore. Not something to do when you have a dozen other things on the go to get done :).
Easy Ways to Clean Silver
Watch this video to see four of the five methods we tried!
Before we get into the written tutorial on how to remove tarnish from silver, you may have a few questions about why it tarnishes and what your pieces may actually be worth. Instead of keeping your silver pieces, like we are, you may even be thinking about selling them. So is it worth your time and effort to clean them? Most likely; if you want to get the best money! Here are some common FAQs about silver.
Why Does Silver Turn Black?
Silver discolours and tarnishes with air exposure. Sulphur, a naturally occurring substance in the air, is the culprit that oxidizes silver and turns it black. When silver’s on display, that shiny, sparkling look diminishes with each passing day. Kinda like me after I hit 50 🤣.
To reverse this process, use a simple chemical reaction to your advantage with little more that tin foil, Calgon and salt (more about that later). Too bad it only works on silver!
What’s my Silver Worth?
Know the value of your piece first before choosing ANY cleaning method. Some antique pieces are rare and valuable, while others are sentimental. In any case, if you read this article on cleaning and this one on caring for your silver from the Victoria and Albert museum, there may be more suitable methods than we’re showing you here. These articles have great tips on how to conserve a valuable piece, so read up before proceeding. If in doubt, contact a conservator for advice.
Sterling Silver
This article on How To Calculate The Value Of Your Sterling Silver can be helpful to determine value.
For sterling silver and silver plated items, google can a great resource. But keep in mind price ranges are all over the map, depending on the site. Someone selling an item on one site, might not have a really good handle on the real worth of an item, so look at high end and auction sites too for a better understanding. My best advice is to really do your homework!
How to Research Silver Prices
To start your research, head to a site like WorthPoint. In the dropdown menu, select ‘Metals’. Then look for markings on your piece and type that into the search bar. Below I’m searching F&JL (that’s the marking on the silver clamshells you’ll see later in this post).

Right away I have hits on the exact same item. However if you click on these, it doesn’t take you to the source (eBay) and give you a price. WorthPoint wants you to sign up for a free trial to learn how much it’s worth.

But if you don’t want to pay beyond a free trial, or just cut to the chase, copy and paste the description into google or go to eBay! The exact or similar items will pop up.
See what I mean below about price ranges? Of course, part of that is condition too! The shell on the bottom isn’t clean or polished and maybe even has condition issues.

Google Image Search for Silver
Another way to search online for the exact same piece you own is to do a reverse google image search. Click the highlighted link, then upload a picture of your item.

My advice is to upload a picture with no other items in the background – and to clean your piece first like I’ve done below. But feel free to try it uncleaned too.
The search will bring up images that you can click on to research pricing or just learn more about your item. I love learning more about how old an item is and what it’s actually for!

If nothing similar comes up (which isn’t the case here as far as images go), you can change the description in the search bar. For instance, instead of antique, try ‘silver clamshell’ and search again. A better description may work better.
How to Tell if it’s Silver or Silver Plate
Before determining the best way to clean silver, you first have to understand what you’re dealing with! Is it sterling silver or silver plated? And something else you might not even consider: is there lacquer over the silver to keep it looking shiny?
A telltale giveaway that silver is plated is if the piece looks like an oil slick (as you see with the tray at the beginning of this post). You can see a rainbow of colours in that piece. But flip the piece over to look for markings to see what they reveal too.
‘E.P. copper’ means that the piece is silver electroplated over copper as the base metal. This particular stamp, Monarch Plate Brand, actually has ‘plate’ in the name. Thanks Captain Obvious!

Flaking
Another dead giveaway is if it looks like pieces are actually flaking off, exposing the base metal underneath. The piece below is an example of that – in a way.
At first, I really didn’t know why this lid looked golden in colour instead of silver (like the rest of the set) and why only a small portion was blackened. Tarnish, if anything, is pretty consistent over all surfaces exposed to air – not isolated in an ‘island’ like this.

#1: Showing black tarnished spot
In comparison with the rest of the silver pieces in this set, the lid practically looks new – save for a few black spots.

Here’s a better shot of the golden hue on the lid (the black spot is now at the back, but you can see the tip of the handle is also tarnished):
 When Not to Clean Silver with Polish
Turns out the lid has a lacquer finish over a silver plate base which is tinted yellow to mimic gold plate. That big black mark on the right side in the first pic above is not the base metal. It’s where the lacquer flaked off, exposing the silver underneath to air and tarnishing it!
Since I’m learning as I go, I’m showing you in the video (and below) what happens when you try to use a silver cleaner over a lacquer finish. After using a silver wipe, it’s no longer shiny. You’ll end up with an ugly milky residue that does not buff off.

You might think this piece is ruined and beyond saving now. But I never give up because there’s nothing to lose at this point.
I suspect we can remove the yellow lacquer in our ultrasonic cleaner. That’s because of our experiment with how to clean brass hardware and after discussing with Hubs, he has exactly the same idea!

Ultrasonic Cleaner to the rescue
So into the ultrasonic cleaner it goes. We put the lid into a Ziploc bag filled with industrial strength Simple Green Pro HD and water (be sure the piece is fully submerged in the solution). Five minutes later, the lacquer is loose and we’re able to wash right off. Yay, it worked!
As an aside, lacquer thinner would probably also do the job. However, the best thing about the ultrasonic cleaner is that there’s no need for harsh chemicals. I personally think not having to scrub a soft metal like silver is the better way to go if you want to try to save a silver piece that has chipping lacquer.

The ultrasonic cleaner removes most of the lacquer.

What’s still clinging to the silver can simply be rinsed away.

Although the lacquer had worn away only where it was tarnished, we managed to give the lid new life again be removing it completely. Gone is the golden hue, but in its place is perfectly beautiful silver again; it was just waiting to be exposed!
Dry any water drops immediately with a soft cloth; water is not a friend to silver.

By the way, ultrasonic cleaners are not meant for tarnish removal, just cleaning (and removing lacquer!).
So now let’s take a deeper dive into how to remove tarnish from silver and the various cleaners you can try!
Materials for How to Remove Tarnish from Silver
- Ultrasonic Cleaner
- Simple Green Pro HD Heavy Duty Cleaner
- Blitz Silver Care Polishing Cloth
- Cotton swabs or small cotton balls
- Weiman Silver Wipes (there’s also Weiman polishing liquid which we didn’t try)
- Silvo Metal Polish or Goddards
- Calgon Powder Water Softener
- Salt
- Soft cotton t-shirt fabric/rags
- Aluminum Foil (I used heavy duty so it wouldn’t tear)
How to Clean Tarnished Silver
We explored several methods on how to clean silver plate using the following products:
Silver Cleaner Products
Besides the ultrasonic cleaner, we tried four other methods to clean our silver pieces:
- Weiman Silver Wipes
- Silvo Metal Polish
- Chemical reaction with Calgon
- Silver Cleaning Cloth
How to Remove Tarnish from Silver
Weiman Silver Wipes
These are convenient wet cloths that are easy to use! These are high on my list of favourite silver cleaners.
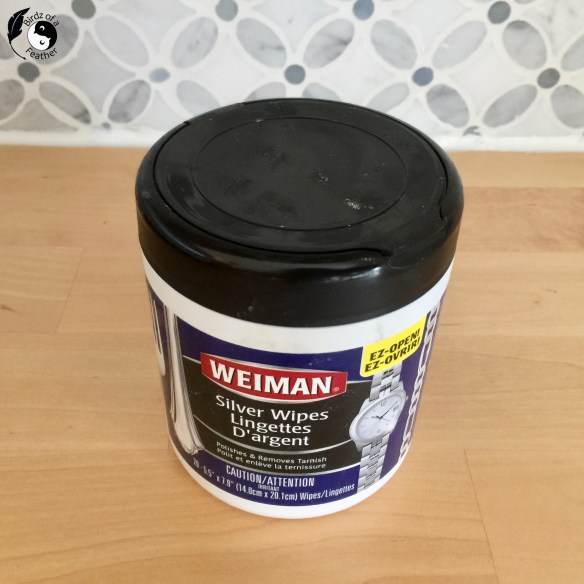
Try wipes for how to remove tarnish from silver
I love them because, there’s no harsh smell and the liquid on the wipes really gets into all the nooks and crannies. Also, since the cleaner is throughout the entire wipe, you can clean two surfaces at once – right around edges – saving time.
My best tip for using these wipes is to cut only what you need. You don’t have to pull out the whole wipe just because they pre-portion them; it will just dry and go to waste.
How to Clean Silver Plate
Clam Shells
Here’s two identical silver plate clam shells I tried the wipes on. Only one was in great condition. 
After applying the wipe all over, the directions say to rinse clean with water. Make sure to dry the water immediately with a soft cloth. Silver is a soft metal so never use anything rough to dry or buff – it scratches easily.
Look how pretty ‘the good one’ is now!
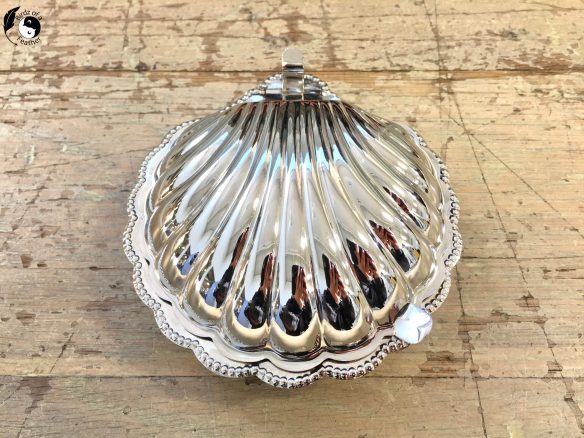
How to clean silver plate
Back in the day, this would be for used to serve butter….

…or caviar with the little silver spoon. How fancy! I feel like I’m living in Downton Abbey – except without the butler and cleaning staff. They would really come in handy to clean this stuff, wouldn’t they?!
 Since the other one wasn’t in as great a shape to start, I didn’t have high expectations. The silver plate is worn through in several areas; the ‘green’ spots on the inside of the lid are verdigris patina on the brass base metal. Brass is 2/3 copper which eventually turns green due to salt and air pollution. The green tinge looks wonderful on copper roofs, but not so much on tableware.

However, the outside wasn’t too bad. 
I think it would be lovely to upcycle this one to use on a bedside table to hold rings and other jewelry at night. It doesn’t have to be put back into service as tableware!

Serving Dish
Moving on, here’s part of the set that goes with the lid we resurrected. Where my finger is pointing is an area I cleaned with the wipe and it’s sparkling with hardly any effort!

Underneath though, looks like an oil slick. But it does the job well and surprisingly fast and easy! The wipes do an awesome job of removing tarnish so I give them two thumbs up!

Because I much prefer them over the next item on my silver cleaning list, I wish I had started with the wipes to begin with!
Here’s how this set looks now. I snapped these shots before our work on the lid.

The lid goes over the glass dish in the middle.

I’m so happy we were able to save the lid and keep the integrity of the set!
What would you serve in a silver set like this?

Onto the next silver polishing method!
Silvo Silver Polish
Silvo comes in a tiny 4 oz. bottle and is a thick, almost paste like, consistency. It was recommended to me so is the first thing we bought. Goddards silver polish is another one recommended but we couldn’t find it in our area.
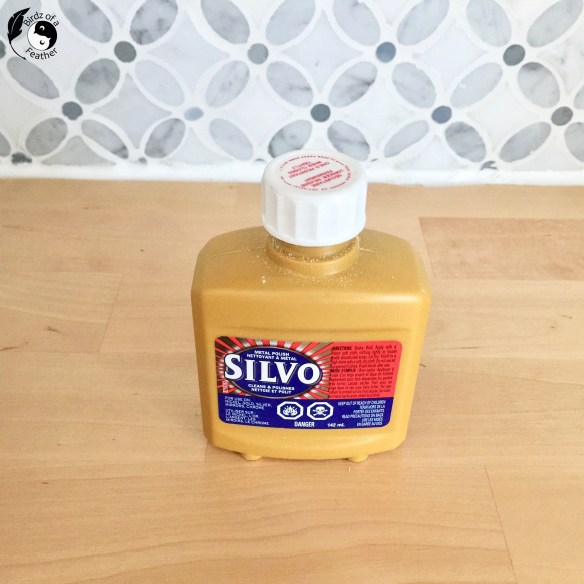
Polish is a popular option for how to remove tarnish from silver
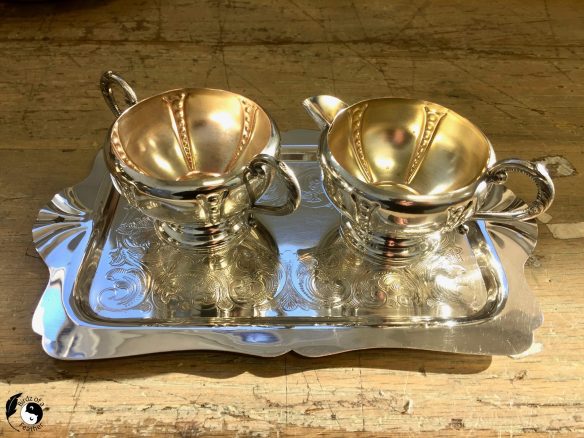
I tried it on this cream and sugar set.

Use a soft cloth – like this t-shirt fabric to apply it and rub away. And keep applying. And keep rubbing. You get the idea!

It doesn’t work as well as the wipes to get into the crevices on the inside of the bowls, no matter how hard I scrub! I have to break out the Q-tips to swirl into those circles to get them clean. Tedious work! You just have to put on music you enjoy and while away the hours.

I end up with just as much black tarnish on my hands as on the fabric and Q-tips! Silver polish is VERY messy so this is something you might want to wear gloves to do.

What seems like an eternity later, this is how it looks. Unfortunately the silver plate on the inside is sparse and the copper is showing through, but that doesn’t bother me in the least. I actually love the warm contrast of the copper and prefer it this way!

Using the tray you see with them above as one example, let’s move onto the next method.
how to clean silver with calgon
Instead of chemical/polishes + abrasion to clean your silver, a Calgon bath is a gentler method. All you need is Calgon, salt, aluminum foil and hot water to make a quick and easy silver cleaner.

These ingredients cause a chemical reaction – another option for how to remove tarnish from silver – especially good on sterling
This method is also a much faster way to clean silver than wipes or polishing liquid. However, it really works best on sterling silver. So if you have something like a sterling cutlery set, you can have it sparkling again in mere minutes!
You can see how black the silver-plate tray is to start (below right)!

How Does Calgon Work?
First, line a tray with aluminum foil – shiny side up. Then sprinkle equal parts of Calgon and salt into the tray. I hear that baking soda and salt will work too, so if you can’t find Calgon, that’s another option you can try.

Pour in very hot water to dissolve. Then add your silver, ensuring it’s totally submerged below the water and touching the foil.
The real silver knife shines up in seconds.

But the tray still needs substantial work. Flip it onto the other side so all surfaces can be in contact with the foil.

There’s a chemical reaction that attracts the tarnish from the silver items to the aluminum foil. When you see it for yourself in action, especially on sterling silver, it’s like magic!
Afterwards, here’s the foil. The dull centre section, once under water and in contact with the silver, is now sporting the tarnish. Pretty cool, eh?

Although this method does lift some of the tarnish from the silver plate tray, it doesn’t do the whole job. After drying it, there’s still plenty to clean after it’s ‘bath’. But it’s definitely much better than the ‘before’ – which practically looked like coal!

After using the Silvo polish, this is how it looks. As mentioned, I don’t find Silvo is great at getting into the crevices. So once we bought the Weiman wipes, I went over this again to get the remainder of the tarnish you can still see in the etchings.
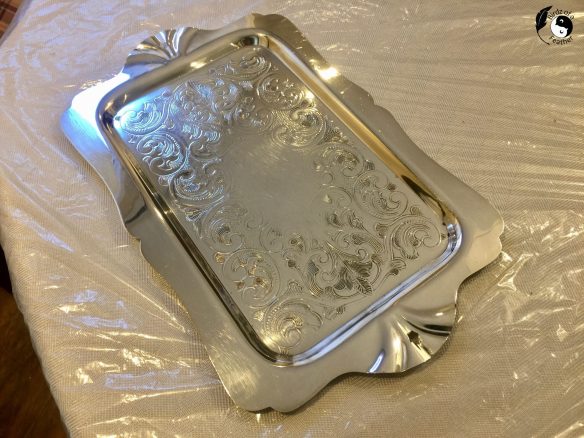
Clean silver plated tray
And this is how it looks now!
Clean silver plate
Verdict on Using Calgon
So my verdict on using Calgon in a water bath? I think it’s the only way to go if you have sterling silver pieces like the cheese knife below. It’s minutes of work vs. hours of polishing! A no brainer.

However for silver plate, like the tray, I would say use this method with caution. Although Calgon supposedly removes the tarnish from oxidized silver without removing any of the underlying metal I still worry about the thin coat of silver plate. While it did lift a lot of the tarnish, I still wonder if multiple uses of this silver cleaning method might also eventually lift the silver plate itself once it starts to wear.
Last, but not least is using a silver polishing cloth.
how to remove tarnish from silver with a Polishing Cloth
Since the little knife that goes with this set is sterling, I was confident in using the Calgon to shine it up again. However, not all silver should be polished. The cheseboard surround below is silver plated and I always remember this piece having patina. There’s no way I’d want to change it by shining everything up.

This is where a cleaning cloth works brilliantly.

A dry cloth is the 4th option for how to remove tarnish from silver
You can wrap it around a finger (like I’m doing on this brass hardware) and target a particular spot.

For this cheese platter, I just hit the high spots of the detail. I also shined up the flat surfaces of the design around the outer rim to add some sparkle.
Since the cloth is dry, there’s no accidental seepage onto areas you don’t want to remove patina from.
I love the way it looks now with a gentle cleaning!

So that wraps up the four different methods on how to clean silver and remove tarnish (5 if you include the ultrasonic cleaner). If you have treasured silver pieces too, I hope this helps you clean and enjoy them for many years to come!
If you already have experience with cleaning silver, what’s your go-to? Do you have a favourite silver cleaning method?
Keeping Tarnish at Bay
When you’re not using your silver, storing it in plastic – away from air – helps preserve its sparkle and all the hard work you spent cleaning. But then, if you do that, you can’t see or enjoy it on a daily basis. So perhaps a compromise is best: display a few pieces and bring some out on special occasions.
Wondering how to clean brass instead? Visit how to clean brass hardware or visit our household hack category.
Subscribe to Birdz of a Feather
If you enjoy learning about new things alongside Birdz of a Feather, don’t forget to subscribe – and let yourself fly! Also follow us on social media: Pinterest, Facebook, YouTube and Instagram.
Pin How to Remove Tarnish from Silver
Pinning is always welcome and appreciated so save this pin to refer back to later!

Tarnished Silver Plate FAQs
How do you remove tarnish from silver plate?
Here are some methods of removing tarnish from silver to try:
- Chemical reaction with Calgon, salt, aluminum foil
- Silver polish (i.e. Silvo)
- Silver wipes (i.e. Weiman)
- Silver care cloth


Great ideas! I usually use the aluminum foil/boiling water method but mostly I try not to have much that needs to be cleaned! LOL
lol; I hear ya!
What a great complete list! I’ve never heard of the Calgon method but I’m going to try that next time on my silver utensils. And I have a silverplate piece that seemed ruined but now I’m going to work on it some more as well. Thanks!!
Hope you’re able to restore your piece; you’ll have to let me know Kate 🙂
Thanks I have a ton of silver that needs cleaning
You’re welcome; glad we could help :).
Thank you for testing all the different options so thoroughly, Sara. We have a few silver pieces that are hiding in a cupboard because they look a little worse for wear. Maybe it’s time to give them an overhaul with some wipes. That one definitely sounds like my kind of cleaning – quick and easy 😀
My pleasure! Hope you have a Merry Christmas Michelle 🙂
My husband has quite the silver collection. Some pieces are passed down from his family but he has an impressive CPR silver collection. We’ve always used Silvo and I dread silver polishing day every December. I have never heard of the tarnishing wipes and you have no idea how excited I am to give them a try. Thank you for this very informative article!
P.S. I have the exact same cream and sugar set that my grandmother gave me.
Let me know if you like the wipes :). That’s so interesting that you have the same cream & sugar set! Do you know the age or where it was from? I’m trying to figure out if it belonged to my grandmother (she was originally from England) or great Aunt.
Some amazing tips in here Sara. I also have had success with Peak Silver Polish. I will give these a try though for sure. I’m always on the hunt at Goodwill and other thrift stores.
Loved this. It will help my granddaughter who does this for me…it’s a paid chore.
I’d happily pay to lol!