

The last thing you probably want to do is break through a freshly tiled wall to add an outlet! That can be nerve-racking! But that’s exactly what we had to do after undertaking a kitchen renovation to sell a home.
Adding an Outlet
The modern kitchen loves its conveniences. And there is nothing better than toaster ovens, spiralizers, microwaves, food processors and coffee makers (I love our Keurig!) etc. to make quick work of preparing meals and drinks. The only problem is that you need an adequate number of electrical outlets to run all those things. Since we were planning so move, we didn’t really give that a second thought at the time.
An upgrade in appliances is usually a good thing, but not when it leaves you short of an outlet! Our old electric stove had outlets built right into the backsplash area on both sides. Not so with a new gas stove!

Old kitchen with outlet in stove
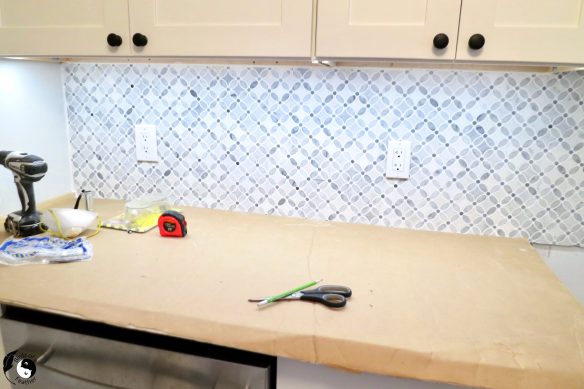
Looking at this photo before tiling, it’s obvious that the one lowly outlet on the left will not be enough for the length of counter! It’s only after finishing our reno that it dawns on us that we’re short one electrical outlet. One of those duh moments! To prevent the same mistake and having to backtrack, this video shows you how to cut tile around outlets.

The only solution for us is to add an outlet into the backslash near the stove. Since tiling and tile repairs are my forte, Hubs can sit this part out!
Before we get into the tutorial, don’t forget to get your DIY mojo on at Birdz of a Feather and subscribe to our newsletter:
You can also follow us on Pinterest, Facebook, YouTube and Instagram.
Materials
[If you’re looking for some of the things we used, we’ve got you covered (disclosure): As an Amazon Associate, we earn from qualifying purchases. Clicking on the links in this post means we will a commission (not all links are affiliate links). But don’t worry, you don’t pay a cent more. Thanks for helping to support our blog!]
You Will Need:
- Full coverage eye protection / safety goggles
- Work gloves
- Hammer
- Cold chisel
- Rotary tool with cutoff blade
- Retrofit box and receptacle outlet
How to Add an Outlet
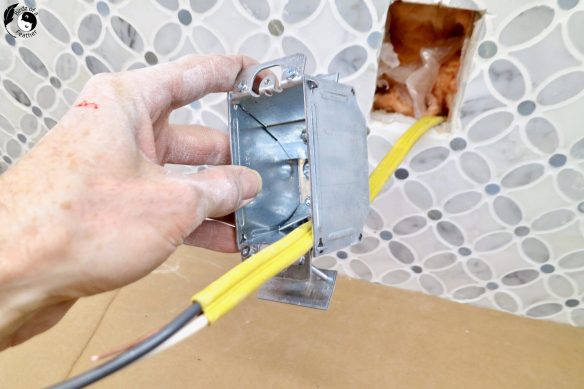
To add an outlet to a finished wall, you’ll first have to purchase a retro-fit box (see below). This type of box can accommodate the extra depth of tile vs. just wallboard. Put some cardboard on the counter to catch tile and drywall debris as you work.

Safety precaution: turn off the power to the breakers in the immediate area you are working.
Use a stud finder to locate the studs and place your new outlet anywhere in between in the vicinity you want to locate your new outlet. We’re about 32 1/2″ centre to centre from the existing outlet. Measure the placement of other outlets on the backsplash. ensuring the new one will line up vertically – or it will stick out like a sore thumb!
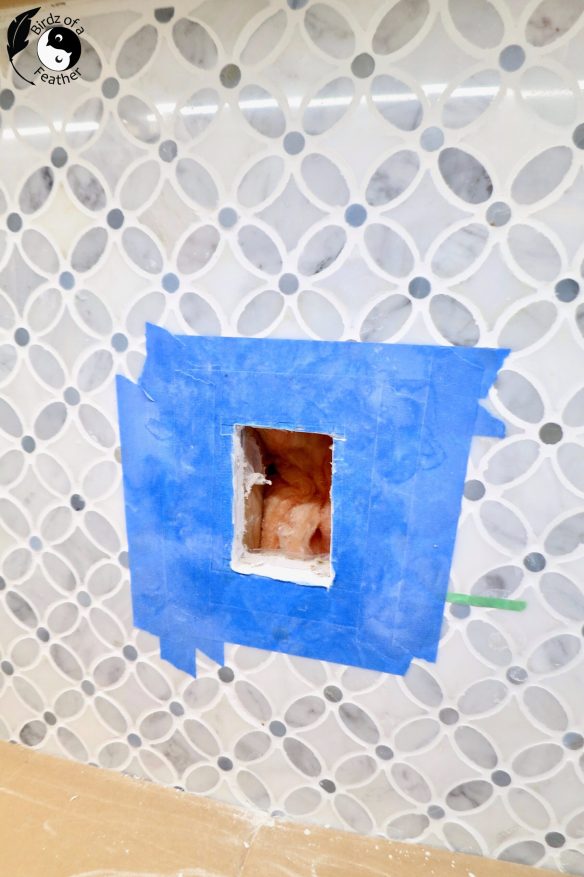
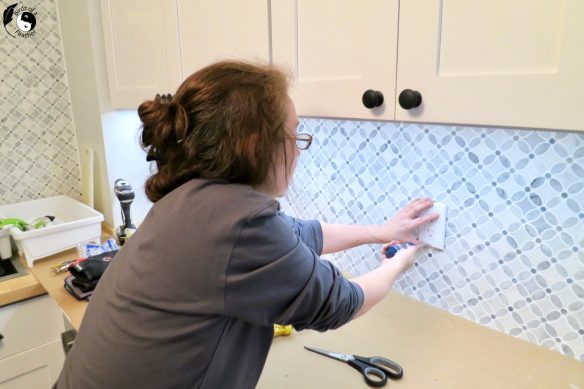
Apply tape as you see below to protect the tiles and allow you to trace the outline of the electrical box. Draw the line to cut. But it’s a good idea to also draw a line representing the face plate – that’s the line you can’t go past when you cut through the corners!
Cut the Tile
Wear full coverage eye protection / safety goggles when you cut; stuff will fly! Slow and steady wins the race when you cut through the tile; don’t rush this process.
While an angle grinder is great to cut tile when it’s off the wall, I find it too awkward to handle. So a rotary tool fitted with a diamond wheel is my tool of choice. I used a Dremel for this; it is light and nimble in comparison.
Turn the Dremel on and lower it onto the cut line in the centre. Allow it to cut through the tile, then move toward a corner. Cut slightly past the corner with the rotary blade. Now come back to the middle and cut to the opposite corner, again cutting slightly past the corner. Doing that on all the corners is important to get a complete cut. Unfortunately we totally forget to take pictures of cutting the tile!
If you’re cutting through a single large tile, cut an ‘X’ through the centre. Since we have small marble pieces, I break out the tile in the centre with a hammer and chisel and remove the tiles one by one. To do that, go for the weakest part first – the grout. The most difficult part is the first tile – it’s just like getting out that first piece of pie. Once you have the first, the rest is a breeze.
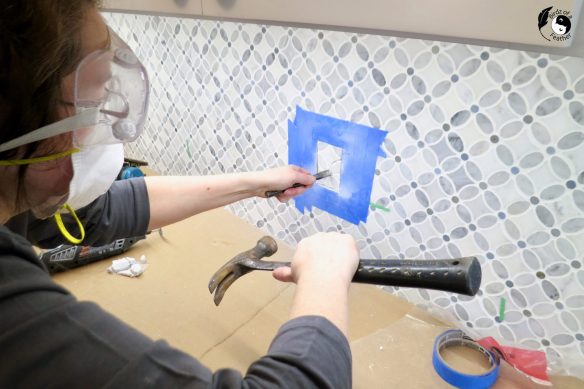
Here’s a quick video of the chiseling process:
Now you can cut through the drywall, with the Dremel or with a drywall knife, to expose a new hole.
Check the fit of the box.

Remove the tape. Now you can see how I cut just past the corners with the Dremel to get a clean cut.

Wiring
Hubs took a permit out for the electrical work; don’t take on electrical work without one! Then fish the wires and complete the electrical. Hubs hooks the wiring up to the retro-fit box (again, a deeper box to accommodate the added depth of the tile). The Family Handyman has a good article to how wire an outlet. Or refer to this one for a diagram on how to install and wire the receptacle.
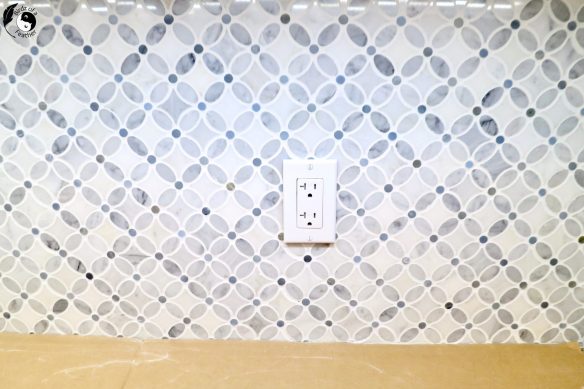
Once the box is in place, secure the electrical receptacle into it with screws. This receptacle is a modern Leviton style.
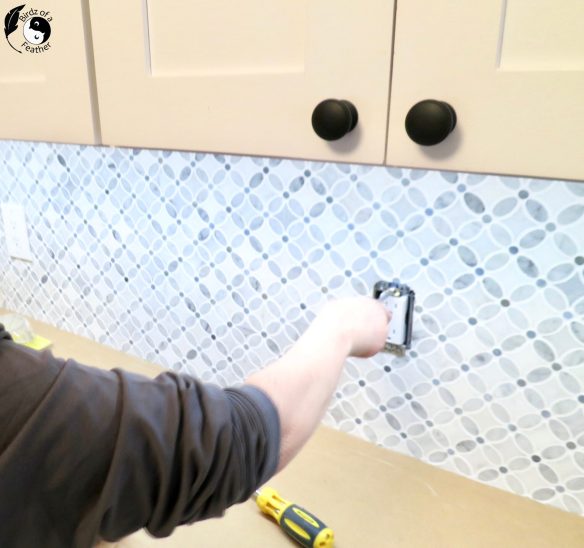
Screw on the electrical faceplate and you’re done.
You don’t know how much you miss something until you don’t have it. We’re so happy to have our missing outlet back!
The original outlet on the lefthand side is where we leave our Keurig coffee maker plugged in.
After adding an outlet
It’s the perfect corner for a coffee station (and tin can crafts!).

The new outlet is where we plug in appliances that get put away again, like our stand mixer. It would be difficult to do our recipe posts on the Unknown Chef section of our website without that extra outlet!

Counter top appliances you can use when you add an outlet!
Let There Be Light!
Although power in the immediate vicinity is off during this project, you may have noticed that our backsplash and counter area are well lit in the work-in-progress pictures. Under counter lighting was the way we achieved that.

Neither one of us had ever installed under counter lights, so Hubs and I attended a free seminar at a local woodworking store to find out how to choose and install them. The big advantage of attending a seminar is that you can ask as many questions as you like – you can’t do that by watching YouTube (our other standby)!
We not only added under counter lights in the kitchen, but we also put them in the laundry room makerover too when we renovated our basement. We’ll share a few tips on how to install under counter lighting in an upcoming post!

Add an Outlet Transformation
Now our kitchen is not only beautiful, but it’s super functional – with the addition of under counter lighting, another outlet to replace the one we had on our old stove, and practical storage in the form of pot drawers and pullouts (see our kitchen storage improvements here)!

We didn’t expect the plot twist – when we decided to stay after our kitchen was specifically renovated to put it on the market. However, the improvements we made helped solidify our decision to stay!
When you think about it, countertops are a great place to maximize storage; it’s where you leave your appliances. So don’t forget about the importance of electrical and appliance placement on your counters! But don’t fret if you do, because now you know it’s still possible to add an outlet!
Fall Into Fabulous
One of the things I love most about blogging is connecting with other makers, and this Fall we’ve created something truly inspiring together.
Grab 16 digital goodies from top creators — planners, recipes, colouring books & more — including our Beginner Crochet e-Book!
Every dollar of our commission goes straight to Alzheimer’s research — a cause close to our hearts. Your purchase through this link means you’re not just treating yourself; you’re making a real difference.
Grab it now — the bundle is only available for a limited time! Let’s make this Fall fabulous and full of hope. 💜

Pin Add an Outlet

We love it when you pin our posts!
Get your DIY mojo on at Birdz of a Feather by subscribing! Follow us here (link in the footer) or on Bloglovin’ (button below). You can also follow us on Pinterest, Facebook, YouTube and Instagram.
FAQ on How to Add an Outlet
How do you install an outlet in a tiled wall?
- Locate the studs
- Plan the placement – both between the studs and vertically
- Tape the tiles where you will cut
- Trace the outlet box. Also trace the outlet cover so you don’t cut past that line
- Cut through the tile on the inner outline with a Dremel and diamond blade. Cut slightly past the corners. If your tile is solid, also cut an ‘X’ through the middle
- Use a hammer and chisel to knock out the grout
- Remove the tiles
- Cut through the drywall
- Run the electrical wire
- Insert a retro fit box into the hole and make connections
- Secure box to wall
- Screw on electrical face plate
Wow! I’m super impressed with your skills! This is a great idea, there is never a plug where you need one!
Thanks; it’s one area where I actually know more than Hubs lol!
Such a fabulous transformation of your kitchen. I love the backsplash and such a great thing to add another outlet. Super tutorial!
Karin
Thanks Karin; it’s so useful.
I would have been so nervous to cut through that beautiful tile for the outlet, but it would be great to have an electrical outlet for appliances too.
Happy Spring,
Kippi
I was pretty confident, but my husband was pretty nervous. That’s probably why he didn’t film it lol!
Can’t believe you do electrical? Not this chicken. The backsplash is so pretty!
I wouldn’t recommend anyone take on the actual electrical without experience. My husband took care of the electrical and we had a permit so had it inspected. The inspectors are always so impressed with his work; he’s very meticulous.
You made it look so simple. I need to do this so badly in our dining room, and I have been terrified. Great tips.
Cutting is the easy part, especially if there is no tile. If you’re cutting into drywall, a Roto Zip drywall cutter works well if you have a lot of drywall work to do. Make sure to get a permit for any electrical so it’s inspected and deemed safe – whether you do it yourself or hire it out :).
great post! So informative! Thank you for sharing your expertise!
Glad you found it so helpful Kimberly 🙂
Great Job! I’m very lucky that my husband is an electrician on Broadway and is very handy with wiring lamps, outlets, and lights here in our 200 yr old farmhouse. Your kitchen looks perfect.
Thank you Brooke! Electrical skills are definitely handy for any age of house, but especially an old one!
You are awesome, you give me motivation to do this in my daughter kitchen.
Thank you Maria!
Great job. Even when I had a house, I was always afraid to mess with electrical stuff. Although I think some projects I could have done.
I learned with each house I owned so built up some experience 🙂
Great job! We have a bunch of outlets in our kitchen and you’re right, it’s super helpful to have more.
It’s frustrating when builders don’t add enough in the first place. Who wants a web of cords crisscrossing the counter? Luckily we’re handy in that way :).