

When you’re home & garden DIY’ers that repurpose and upcycle as much as we do – whether it’s a reno or craft project – it only makes sense that we would endeavour to do the same when it comes to our tools! A DIY quilling tool is an easy upcycle that’s within reach!
While I’m overseeing an walk in shower remodel at my Mom’s house, I have some time to spare. So why not play around with an idea that’s been rolling around my head for ages! Hubs bought me a package of construction paper to take with me so I could try my hand at something I’ve been wanting to learn: quilling. But after I arrived one morning and cut some strips, it struck me that I don’t have an actual quilling tool to get some practice in!
Why wait to buy a quilling tool when you can make one in under 5 minutes with a few everyday items?

Before we get into the tutorial, get your DIY mojo on and subscribe to Birdz of a Feather here! You can also follow us on Pinterest, Facebook, YouTube and Instagram.
Raid the Junk Drawers
Being somewhat of a MacGyver of DIY (I get that from Hubs), I raided a few of the junk drawers in my Mom’s house and found just what I needed to make my quilling tool.

The Keepers
On my scavenger hunt I found a few of those mechanical pencils that hold thick lead. The prongs of the lead sleeve open up pretty wide, so all I had to do was find something to replace the lead with to create my DIY quilling tool.

A trip to the bathroom garnered me a cotton swab (a.k.a. a Q-tip). I also got scissors in the kitchen drawer, a utility knife in the tool box and a seam ripper in my Mom’s sewing box to round it all out.
Materials
* [If you’re looking for some of the things we used, we’ve got you covered (disclosure): Clicking on the affiliate links below means we may receive a commission. But don’t worry, you don’t pay a cent more and it helps us make more unique crafts to share with you! Thanks for helping to support our blog!]
- Scissors
- Utility knife
- Mechanical pencil
- Cotton swab (Q-tip)
- Seam ripper
- Paint stick (I used it to protect the surface while cutting)
- Quilling paper or strips of cut construction paper to test

Let’s Make a Quilling Tool!
The Q-tip is perfect for this tool because the spindle is made of extruded plastic which is hollow through the middle.
To start, cut the ends off the Q-tip, leaving you with just the spindle.

The ends may be sharp or have some burrs, so sand them down until smooth. I only did one end to save time.

Depress the top of the mechanical pencil so the lead sleeve opens up. Insert one end of the spindle into the sleeve and release (ensuring the smooth end is exposed if you only sanded one end like me). This will stabilize the spindle and give you something to hold onto to as it’s cut in the next step.

Cut Slit into Spindle
Grab the utility knife and extend the blade as shown.

Insert the point of the blade into the middle of the plastic spindle about 3/8″ from the end.

Gently rock the blade back and forth until you cut a slit to the very end (be sure to watch the video at the end of this post to see how this is safely done).

Make sure to only cut through one side; this will create the opening that grips the quilling paper.

Widen the Gap and Test
Use the seam ripper to widen the gap so you have a slightly wider slot to accommodate the paper. You should be able to guide the sharp part of the ripper along one side of the cut to shave off a sliver of plastic.

Although I cut my opening 3/8″ long, you can customize the length of the slit to accommodate the width of any quilling paper! The beauty of this tool is that you can make a few different tips to quill. You can even make it two-sided so you can flip it around, or widen one of the slots for thicker paper 🙂
Test the slot out with a piece of quilling paper. If you are satisfied with it, move onto the next step. If not, you can always finesse it or cut the end and start over again.

Shorten Spindle
Now shorten the spindle. I cut it to just under 3/4″. An added bonus of shortening the spindle is that it gives you extra material to customize more tips with different length slots if needed!

Put the spindle back into the mechanical pencil with about 3/8″ inside the sleeve and 3/8″ below the prongs.

This exposes just enough of the spindle to insert the quilling paper. Hey, I just realized that even after the transformation, you still call it a Q-tip (short form for quilling tip)! How ironic is that?

Take Your New Tool for a Spin!
Insert a piece of quilling paper into the slot in the spindle.

♪ You spin me right ’round baby right ’round, like a record baby, right ’round ’round ’round♫.

The prongs of the lead sleeve will act as a bumper as you roll the paper. 
The bumper will help keep the paper relatively even.

How simple was that?

An Important Question
Pull the wound paper off right off the spindle and you have your first quilled circle! Or an exclamation mark 🙂

Exclamation mark!
Quill YOU try it?

Watch the Video
I sped up the video below so it’s only 1 minute in length, but it literally took under 5 minutes to complete!
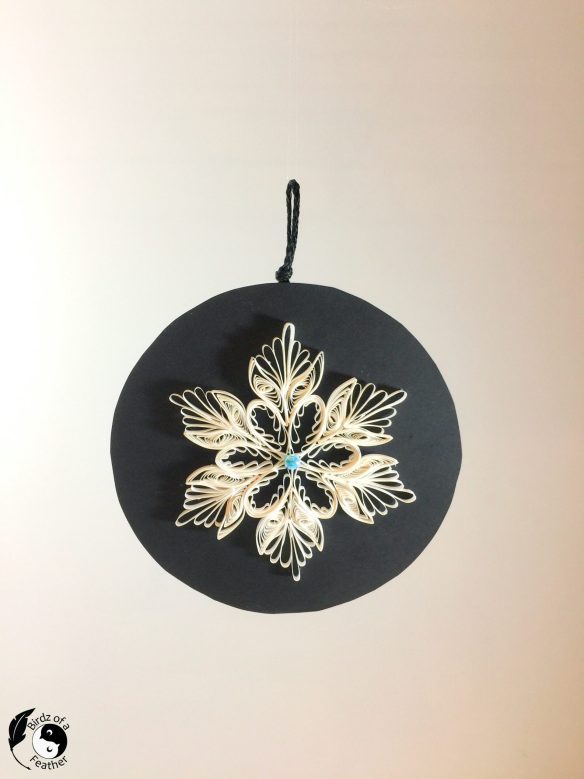
You know what else you can use to quill in a pinch? A regular ‘ol hair comb! Look at what our friend Cortney gifted to Hubs for the holiday season! Her quilled snowflake is so delicate and pretty – just like a real snowflake!

Photo Credit: Cortney Cunningham
Cortney put it onto a backing so we could hang it. So lovely!
 If you’d like to try the comb quilling method, here’s the video from Creative Paper.
Want more holiday inspiration? Check out these 31 Christmas Craft Ideas for Adults!
Have fun with your new DIY quilling tool!

The art of quilling is a skill that anyone can learn; it’s a perfect craft project for beginners!
Paper quilling projects can be used for decorative pieces around the home. Have a look at these inspirational projects by artist Yulia Brodskaya. Her work is stunning! Check out some of our own craft projects in our Craft Rehab category.

You really are the MacGyver of DIY. I am so impressed.
Thanks so much Kim! It’s amazing how being in different surroundings, yet wanting to get on with a project, really encourages one to be creative 🙂 What amazes me more though is that it comes so naturally to Hubs no matter what the situation. I think he takes the MacGyver crown in the family 🙂
You are so crafty and patient.
Thanks so much Maria!
This is a brillant repurpose, it feels so good to come up with something unique like this. Well done.
Thanks Anita – it’s amazing how creative you can be with the stuff you already have lying around!
I learned to quill back in the 70’s. Fun craft! Did you know you can buy the tool for under $3?
I didn’t know they were so reasonable – unless the last time you bought one was in 1970? Well, you know what they say about crafting? Why buy it for $3 when you can make it yourself with $92 of craft supplies 🤣🤣🤣.
How clever! You made it work with the things you had around you. Great repurpose!
Patti just let me know you can buy these for $3. But we’re in for a snow storm so I can get my craft fix now and for free 🤣.